Install drywall, trim & lamp – Edge Lighting Step User Manual
Page 4
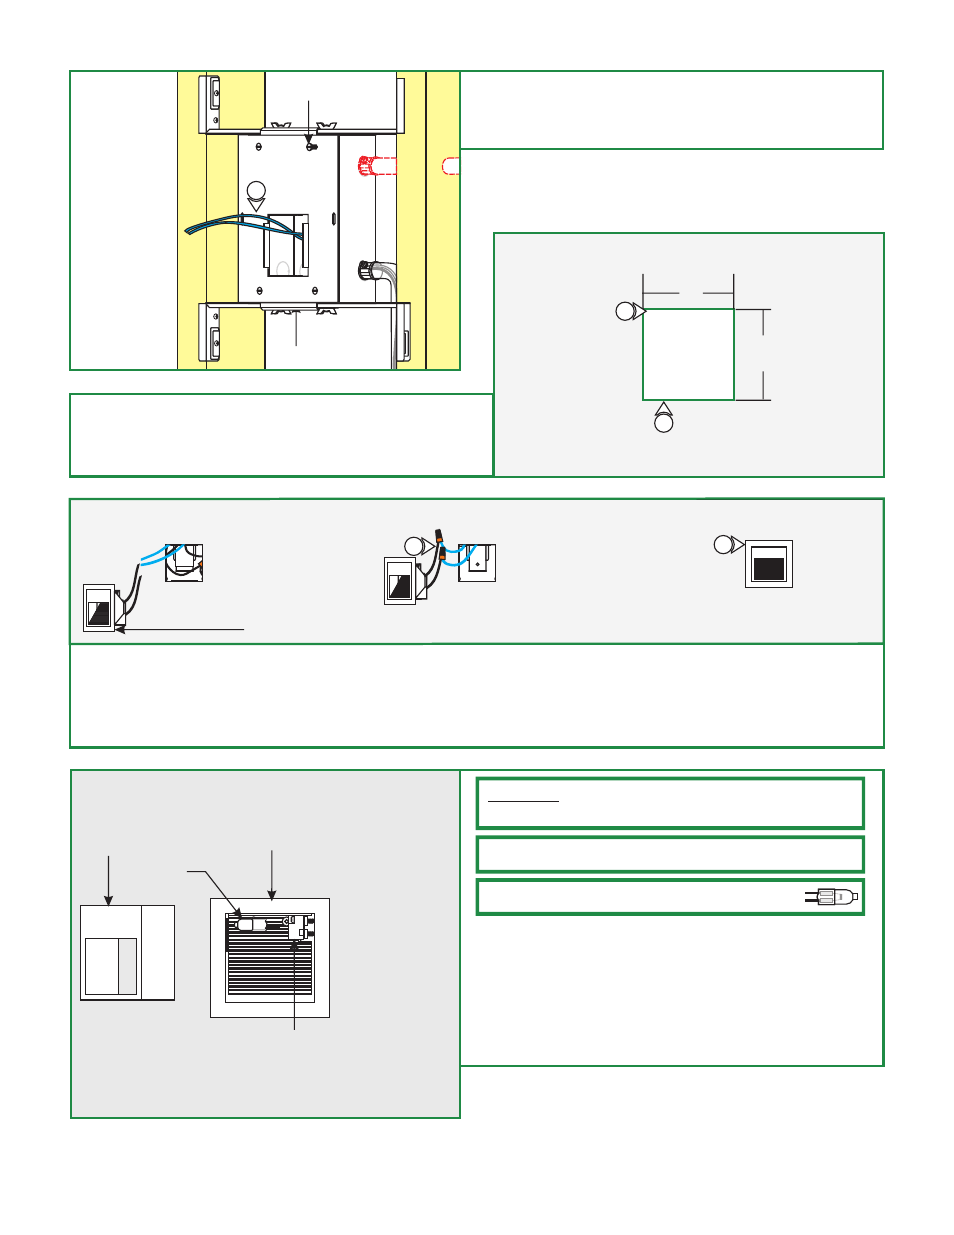
G
12: Feed the pigtail wires through the cover hole and mount to
cover to the housing with the four #8-32 screws.
13: Repeat step 12 for the remaining housings.
COVER
#8-32 SCREW
12
Install Drywall, Trim & Lamp
H
3"
2
3"
1
1: Mark 3" square(s) on drywall where the housing opening is
(are) located.
2: Cut out the marked square(s) and install the drywall.
4
I
4
3: After installing drywall and finishing it, connect each wire coming out of the housing opening to one trim wire with a wire nut.
4: Place all wires inside the housing and gently push the trim into the housing opening by squeezing the side springs.
5: (Optional) - If slave housings are used, then repeat steps 3 and 4 for all slave housings.
DRYWALL
TRIM
3
6: Pull the trim cover off to expose the socket.
7: Push the lamp pins completely into the socket holes.
8: Replace the cover to the trim.
9: (Optional) - If slave housing are used, repeat steps 6
through 8 for all the housings.
CAUTION:
To reduce risk of a burn or electrical shock during
lamping, disconnect the power to the fixture.
Use
MAX
10 Watt Bi-Pin Halogen Lamp For Each Socket.
NOTE: Use only fingers and a soft cloth to install the lamps.
Use
MAX
10 Watt Bi-Pin Halogen Lamp For Each Socket.
Use
MAX
10 Watt Bi-Pin Halogen Lamp For Each Socket.
Use
MAX
10 Watt Bi-Pin Halogen Lamp For Each Socket.
SOCKET
TRIM
COVER
LAMP
J