Qr s t u – Edge Lighting Twiggy Hinged, Direct 1" Lens User Manual
Page 5
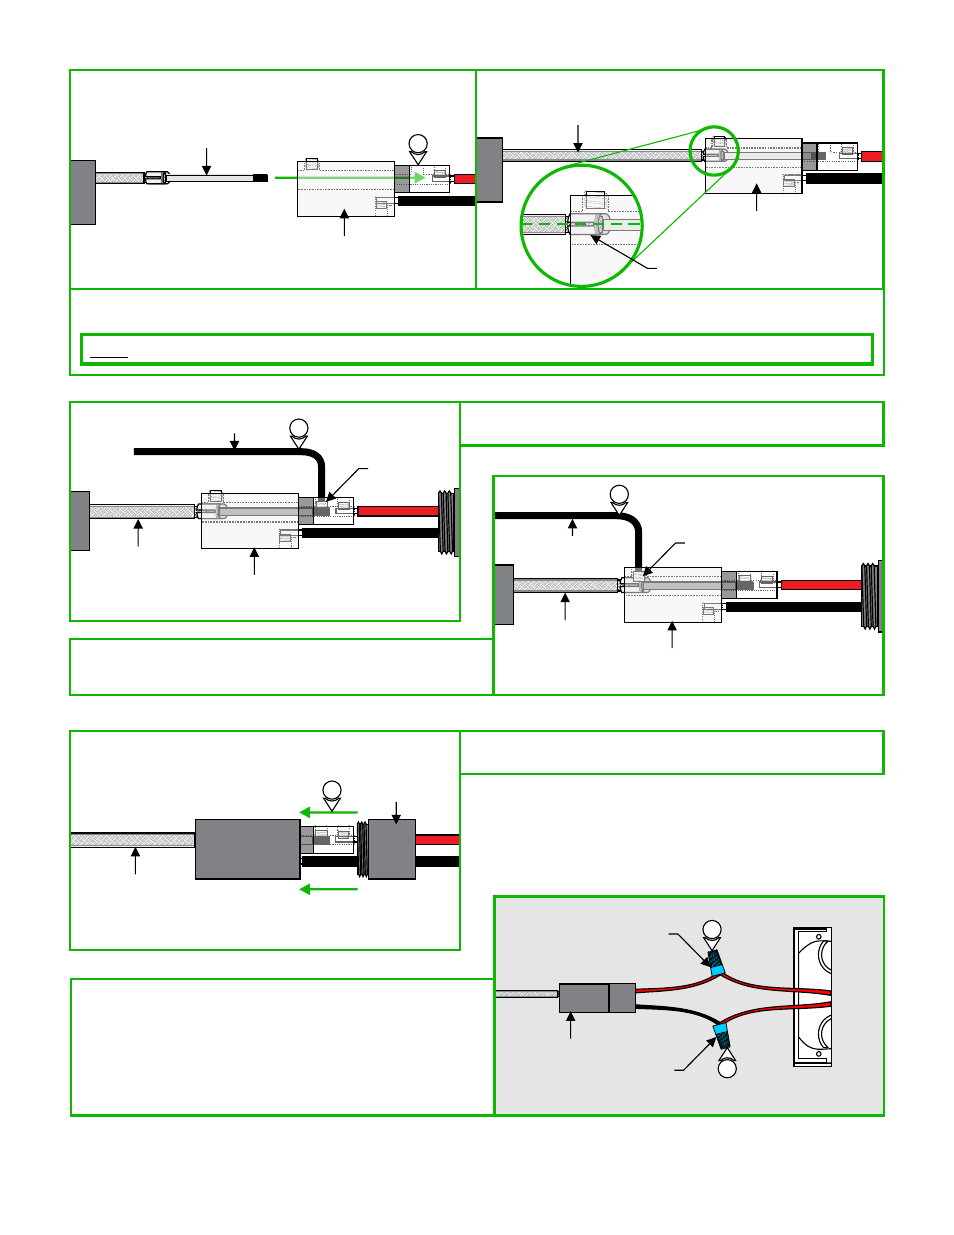
15: Insert the coaxial cable into the coaxial connector until the wires of the center conductor are visible through the M3 set
screw hole.
16: Use the provided 1.5mm Allen wrench to replace and
securely tighten the M3 set screw.
17: Use the provided 2mm Allen wrench to securely tighten the
M4 set screw until it squeezes the wire ferrule tightly to the
coaxial cable.
NOTE: Ensure that the split in the ferrule is aligned 90° from the M4 set screw (see inset).
18: Replace the coaxial connector cover and tighten into
place.
19: Connect the red wire from the coaxial connector to one of
the LED driver wires using a wire nut.
20: Connect the black wire to the remaining LED driver wire
using a wire nut.
21: Place all connections into the junction box.
COAXIAL
CABLE
15
CONNECTOR
ASSEMBLY
FERRULE
CONNECTOR
ASSEMBLY
COAXIAL
CABLE
1.5MM ALLEN
WRENCH
16
CONNECTOR
ASSEMBLY
COAXIAL
CABLE
2MM ALLEN
WRENCH
17
CONNECTOR
ASSEMBLY
COAXIAL
CABLE
M3 SET
SCREW
M4 SET
SCREW
18
COAXIAL
CONNECTOR
COVER
COAXIAL
CABLE
4
2
3
1
2
3
1
COAXIAL
CONNECTOR
19
20
WIRE
NUT
WIRE
NUT
Q
R
S
T
U