Adjusting the fixture arm (optional) – Edge Lighting Galleria Picture Light User Manual
Page 2
SHADE
LIGHT
D
8: Connect each transformer low voltage (blue wire) to one
fixture wire with a wire nut.
2
8
8
E
9: Place all wires and wire connections inside the electrical
box.
10: Align and slide the canopy assembly holes onto the
threaded studs. While holding the fixture, tighten the two
thumb nuts to secure the canopy in place. Make sure to
mount with the M4 set screws on the fixture arms facing up.
CANOPY
THREADED NUT
THREADED STUD
10
9
F
11: Pull out the two lamp housings from the fixture to expose
the two sockets.
LAMP HOUSING
SOCKET
11
11
G
SOCKET
LAMP
LAMP HOUSING
13
12
CAUTION:
To reduce risk of a burn or electrical shock during
lamping, disconnect the power to the fixture.
NOTE: Use only fingers and a soft cloth to install the lamps.
Use only
MAX
20 Watt Bi-Pin Xenon (Xelogen) lamp, or
low pressure halogen lamp specified by the lamp
manufacturer to be used with unshielded (without the
lamp shield) fixture, for each socket.
12: Push the lamp pins completely into the socket holes.
13: Replace the lamp housings and rotate the fixture arms
to a desired position.
11
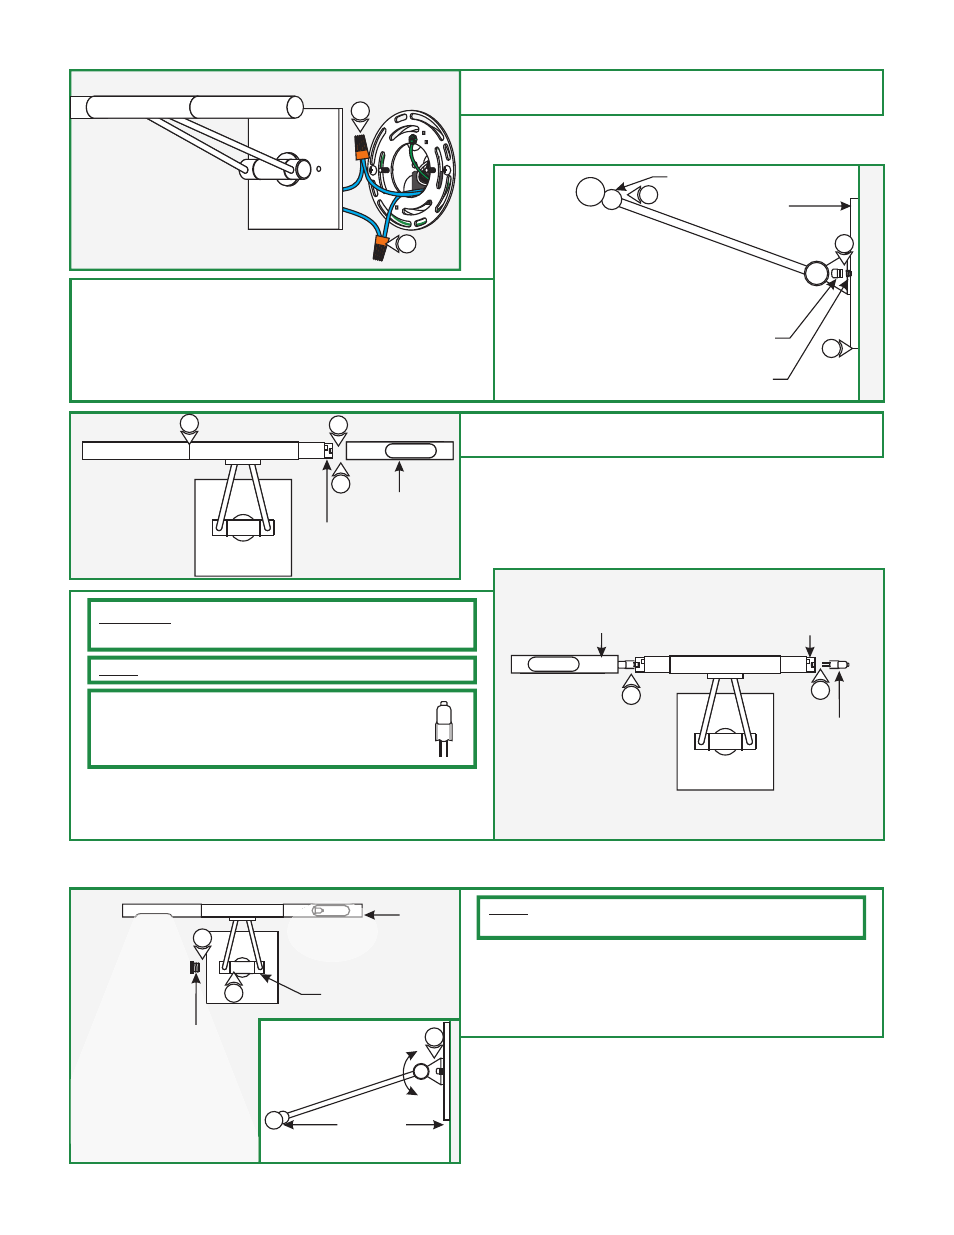
H
1: Remove the tab on the fixture body.
2: Tighten the Phillips screws inside the fixture body.
3: Replace the tab on the fixture body.
2
MINIMUM OF 6"
FROM ANY
COMBUSTIBLE
MATERIAL
TAB
M4 SET SCREW
10
FIXTURE BODY
1
Adjusting the Fixture Arm (Optional)
NOTE: Incase the fixture arms become loose proceed with the
following steps.
2