Edge Lighting 4" Fast Jack Canopies User Manual
Install 2" plaster ring adapter (new construction), Install 2" plaster ring adapter (remodel), Installation instructions for 2
SAVE THESE INSTRUCTIONS!
- This product is ETL listed for indoor dry locations.
- This product mounts to a 4" standard electrical box or
octagon electrical box using the 2" plaster ring provided.
- Minimum electrical box volume must be 6 cubic inches
(98 cubic centimeters).
- This product is for use only with halogen fixtures.
Installation Instructions for 2
Canopies w/2" Plaster Ring
" Round & Square Fast Jack Power
904-FJP-2RD-Plaster_Plate_02
IMPORTANT INFORMATION
1718 W. Fullerton Ave
Chicago, IL 60614
Tel: 773-770-1195
Fax: 773-935-5613
www.edgelighting.com
FJP-2RD-
© 2010 Edge Lighting. All Rights Reserved.
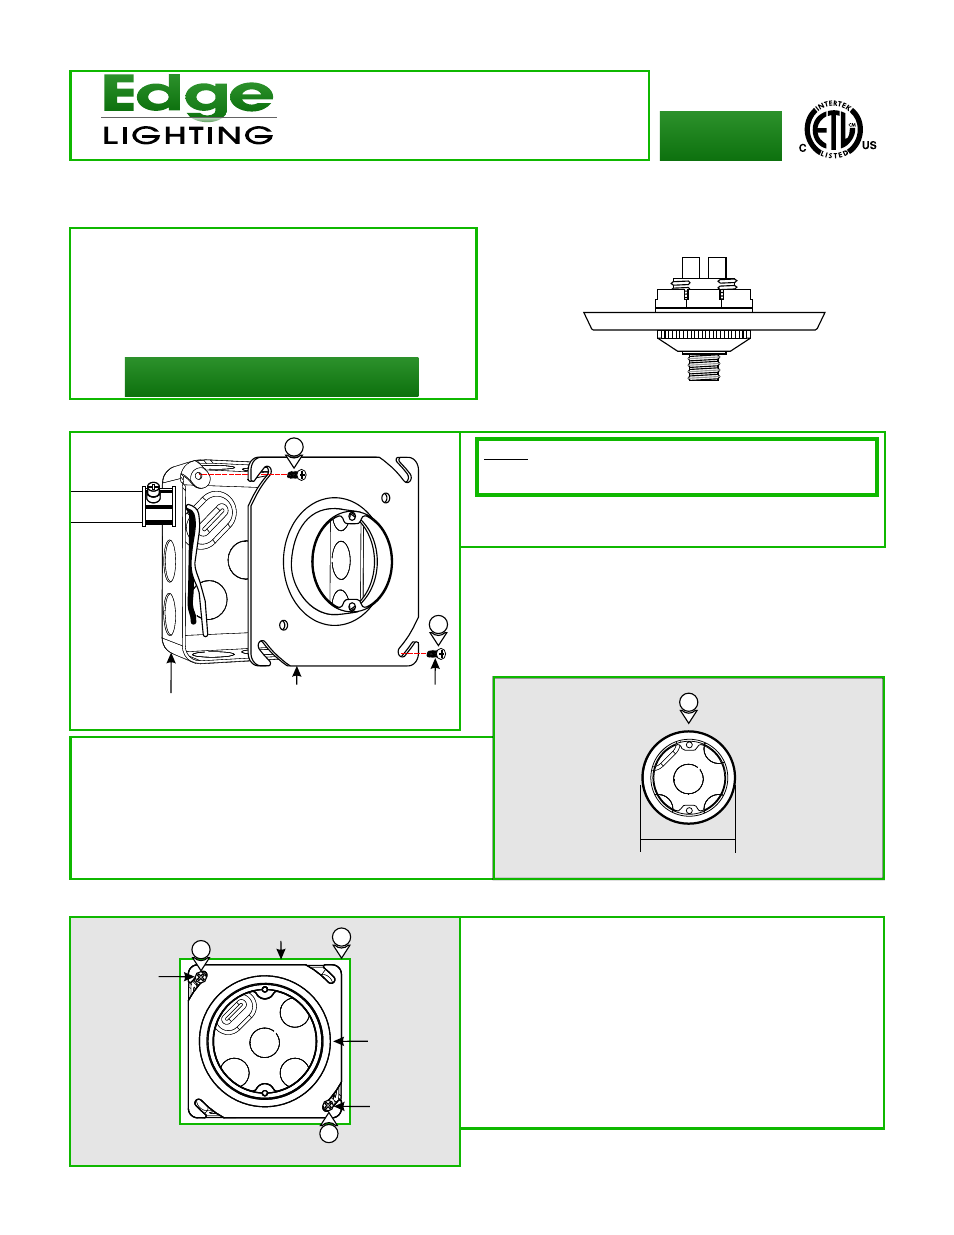
Install 2" Plaster Ring Adapter (New Construction)
1
JUNCTION BOX
1: Install the 2" Plaster Ring Adapter to the junction box using
two #8-32 screws.
2: Use a circular saw to cut out the drywall section where the
junction box opening is.
3: Install the drywall. If necessary, plaster and finish the
drywall.
4: Complete the installation as per steps in “Install Fast Jack
Port” section on Page 2.
2" PLASTER RING
ADAPTER
#8-32
SCREW
NOTE: Junction box must be mounted to allow clearance of
½" between the face of the junction box and the drywall
surface.
1
1
FJP-2SQ-
Install 2" Plaster Ring Adapter (Remodel)
CEILING
CEILING
CUT DRYWALL
STANDARD
PLASTER
PLATE
#8-32
SCREW
#8-32
SCREW
1
2
2
A
CEILING
3
2 1/4"
B
C
1: Cut away the drywall where the junction box is located.
2: Uninstall the existing plaster ring by removing the #8-32
screws.
3: Install the 2" Plaster Ring to the junction box using two
#8-32 screws.
4: Plaster and finish around the junction box opening.
5: Finish Cable Grip installation by following steps in “Prepare
Power Cable And Install Cable Grip” section.