Great Plains 3S-4010HDF Operator Manual User Manual
Page 42
38
3S-4010HD and 3S-4010HDF
Great Plains Manufacturing, Inc.
196-522M
03/28/2012
E
Crushing Hazard:
Make all down-stop adjustments with circuit in neutral and
drill raised (actuator plunger not in contact with down-stop).
Loosening the down-stop with circuit active and drill lowered
results in rapid lowering of the frame.
Field Result Inconsistency Risk:
Make sure the drill is level and the lift system bled and re-
phased before adjusting the tool bar height. If the center sec-
tion does not consistently stop at the set height, or the wings
do not run at the same height as the center, the lift system may
have air or be out of phase (above), or the wings may not be
level. See “Leveling Drill” on page 66.
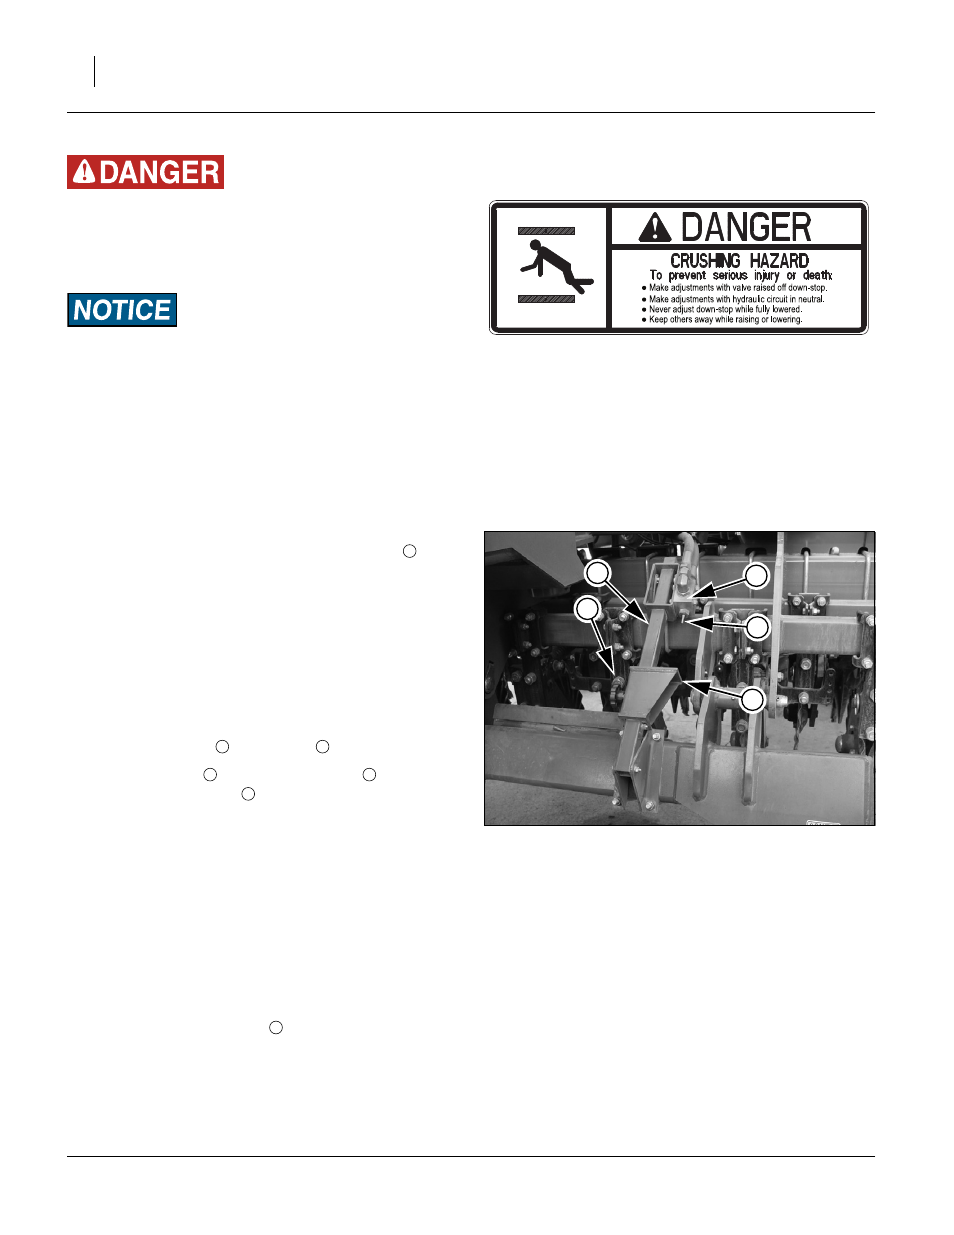
Refer to Figure 43
Note: The change in coulter height is greater than the
change in down-stop adjustment. Make adjust-
ments in small amounts.
The lift system includes an adjustable stop valve
to fix
the height of the opener frame when the drill is lowered.
To adjust the stop height
(assuming a desired 1
1
⁄
4
in / 3.2cm coulter depth):
1.
Move to smooth level ground with soil as similar as
possible to field conditions.
2.
Lower the drill until the coulter blades just touch the
ground. Hold that height by setting the lift circuit to
neutral.
3.
Loosen the knob
4.
Adjust the stop
position on the tube
touches the actuator
5.
Raise and then fully lower the drill.
6.
Pull forward 10 feet (3m) and stop.
7.
Measure the depth at which the coulters are running.
Measure only in non-tire-track rows where the
coulter springs are not in compression (arm is at full
extension). If the coulters are at the desired depth,
no further adjustment is necessary. Skip to step 11.
8.
Raise the drill and set the lift circuit to neutral.
9.
Adjust the stop up (to raise depth) or down (to lower
depth). Adjust in small increments. Secure the stop
with the knob on the bolt
10. Check the new setting starting at step 5.
11. Raise and lower several times and confirm that the
drill stops consistently at the new height.
FigureSpacer:
FigureSpacer:
FigureSpacer:
FigureSpacer:
FigureSpacer:
FigureSpacer:
FigureSpacer:
FigureSpacer:
FigureSpacer:
FigureSpacer:
FigureSpacer:
FigureSpacer:
Note: It is important that all of the tires remain in contact
with the ground to maintain levelness of machine
from front to rear. Setting the depth control too
deep combined with high opener spring force can
cause the drill to tip forward when planting, which
may cause plugging.
Running with the front tires floating or skimming on
the ground will cause uneven coulter depth and
may cause uneven seed depth.
Figure 43
FMC Opener Depth Stop
20274
2
3
1
4
5
2
3
5
2