Preparation and setup, Initial setup, Pre-setup checklist – Great Plains 3S-4010HDF Operator Manual User Manual
Page 17: Hitching to tractor
03/28/2012
196-522M
Great Plains Manufacturing, Inc.
Preparation and Setup
13
Preparation and Setup
This section helps you prepare your tractor and drill for
use. Before using the drill in the field, you must hitch the
drill to a suitable tractor and also setup the drill.
Initial Setup
Prior to first use, see “Install Clutch Switch Module in
Cab” on page 106. See that manual section for other
Options that may not have been factory- or dealer-
installed.
Pre-Setup Checklist
1.
Read and understand “Important Safety Informa-
tion” on page 1.
2.
Check that all working parts are moving freely, bolts
are tight, and cotter pins are spread.
3.
Check that all grease fittings are in place and lubri-
cated. See “Lubrication” on page 75.
4.
Check that all safety decals and reflectors are cor-
rectly located and legible. Replace if damaged. See
“Safety Reflectors and Decals” on page 6.
5.
Inflate tires to pressure recommended and tighten
wheel bolts as specified. “Appendix A - Reference
Information” on page 89.
Hitching to Tractor
Crushing Hazard:
You may be severely injured or killed by being crushed
between the tractor and drill. Do not stand or place any part of
your body between machines being hitched. Stop tractor
engine and set park brake before installing hitch pin.
Choose a drill-hitch option (page 83) that is compatible
with your tractor drawbar.
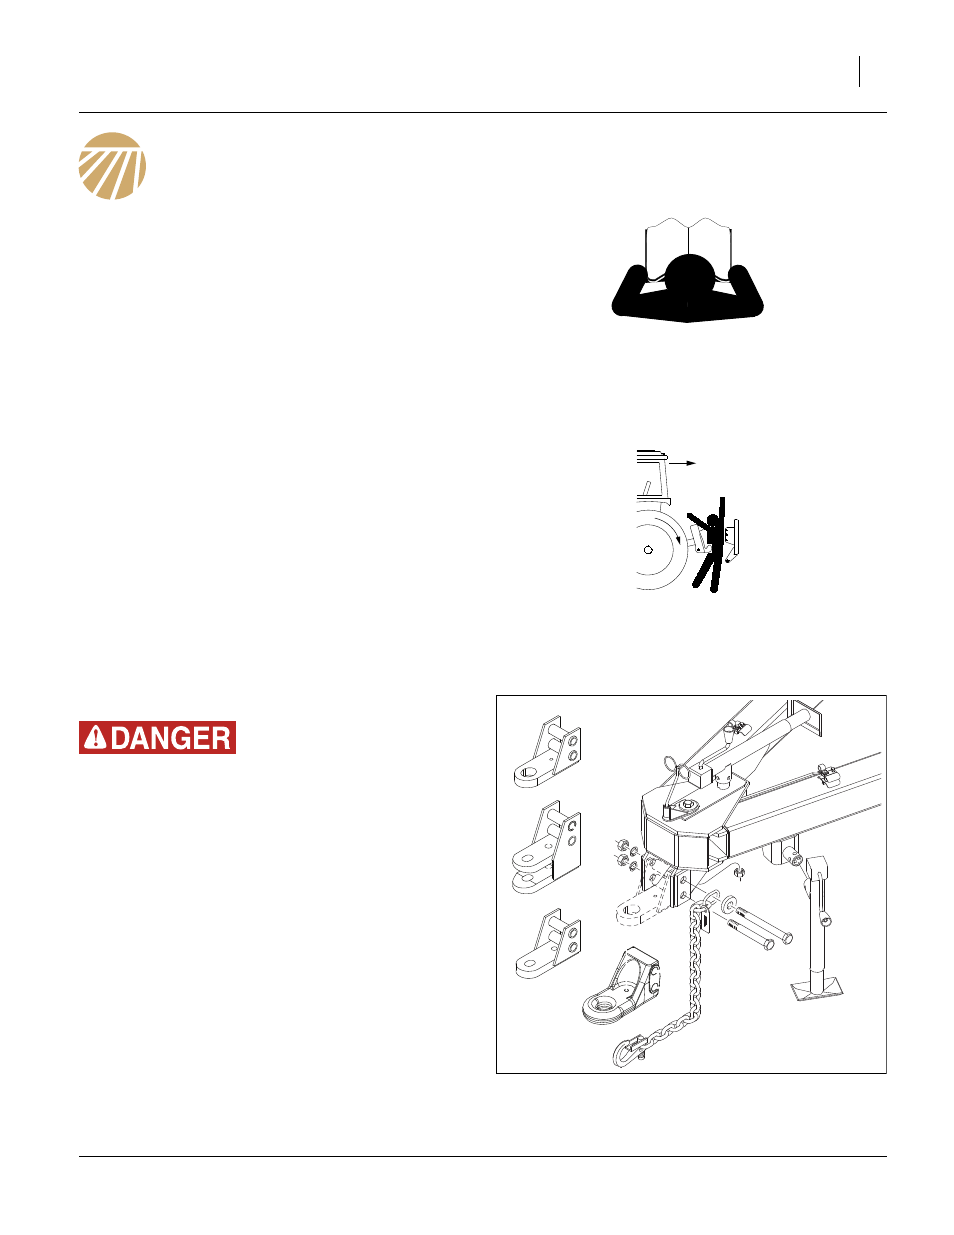
The 3S-4010HD/HDF has four hitch options:
• a clevis hitch,
• a small-hole, single-strap hitch,
• a large-hole, single-strap hitch, or;
• a large cast strap hitch.
Always use a locking-style hitch pin sized to match the
holes in the hitch and drawbar, and at least 1
1
⁄
2
in (3.8cm)
in diameter.
FigureSpacer:
Figure 4
Hitch Options
29182