Tweco Max 300 w-TD-750 User Manual
Page 40
SERVICE
34
Manual 0-2557
7. Visually inspect the quick disconnect components
to verify that there is no contact between the posi-
tive and negative sections.
If contact is evident, repair or replace as required.
If no problems are evident proceed to Step 8.
8. Remove the quick disconnect assembly from the
torch leads and check for continuity between the
positive and negative torch quick disconnect fit-
tings.
If there is no continuity, the quick disconnect as-
sembly is okay. Proceed to Step 9.
If continuity is found, replace the torch quick dis-
connect assembly.
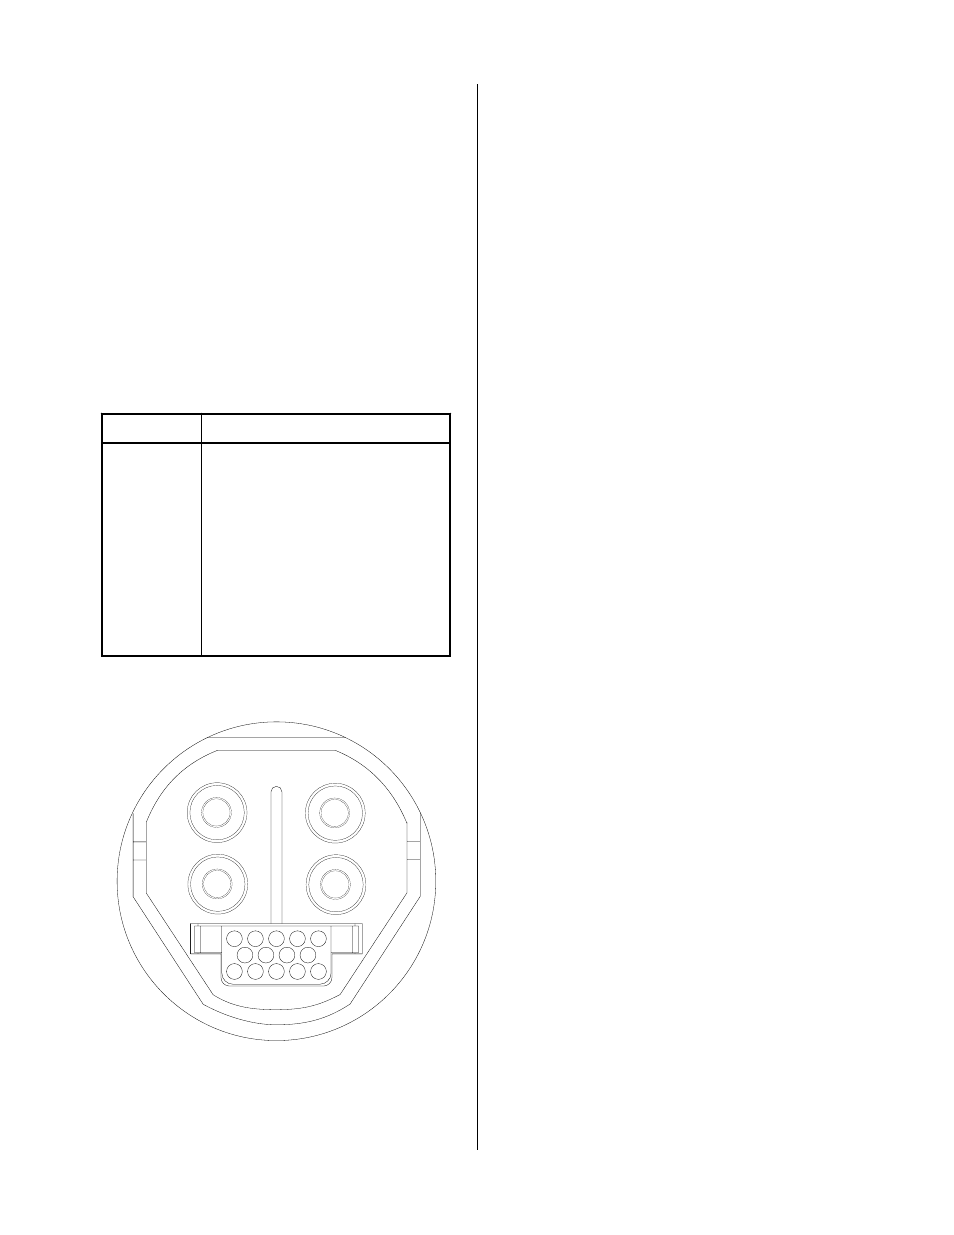
Pins
Description
1, 6
PIP Jumper
9, 10, 11, 12
Torch Identification
13, 14
Shield
A
Coolant Supply (-)
B
Coolant Return (Left-Hand Thread
C
Plasma (+) Gas (Left-Hand Thread
D
Secondary Gas
A-00283
10 11 12 13 14
1
2
3
4
5
6
7
8
9
A
D
B
C
Figure 5-13 Torch Quick Disconnect Fitting - Front
End View
9. If the torch quick disconnect assembly is okay, check
torch leads by measuring the resistance between
the plasma (+) lead connector and the coolant sup-
ply (-) lead fitting.
If continuity is found, replace the torch leads.
If no continuity is found, the torch leads are okay
and the problem was in the way the components
were assembled. Proceed to Step 10.
10. Carefully reassemble the componentsand recheck
the completed assembly per Step 3 to confirm that
the components have been properly assembled.
This completes the checks for the proper operation of the
center insulator of the torch head and leads. Proceed to
paragraph B to check the torch switch control wires..
B. Checking Torch Switch Control Wires
1. Disassemble the torch head and leads to expose
the torch head connections. Refer to Section 5.06,
Servicing Machine TorchComponents.
2. Visually check that the torch switch wires and all
lead connections are properly connected and in
good condition (no shorts or arcing).
If problems are evident, repair or replace as re-
quired.
If there are no visual problems then proceed to
Step 3.
3. Check the torch switch control wires for opens from
one end of the torch leads to the other.
If open replace torch leads.
4. Check the torch switch control wires for shorts to
other components in the torch leads.
If shorted then replace torch leads.
5. Carefully reassemble the torch and leads.