Tweco 51 with SL100SV CutMaster User Manual
Page 49
Manual 0-4640
4-7
OPERATION
4
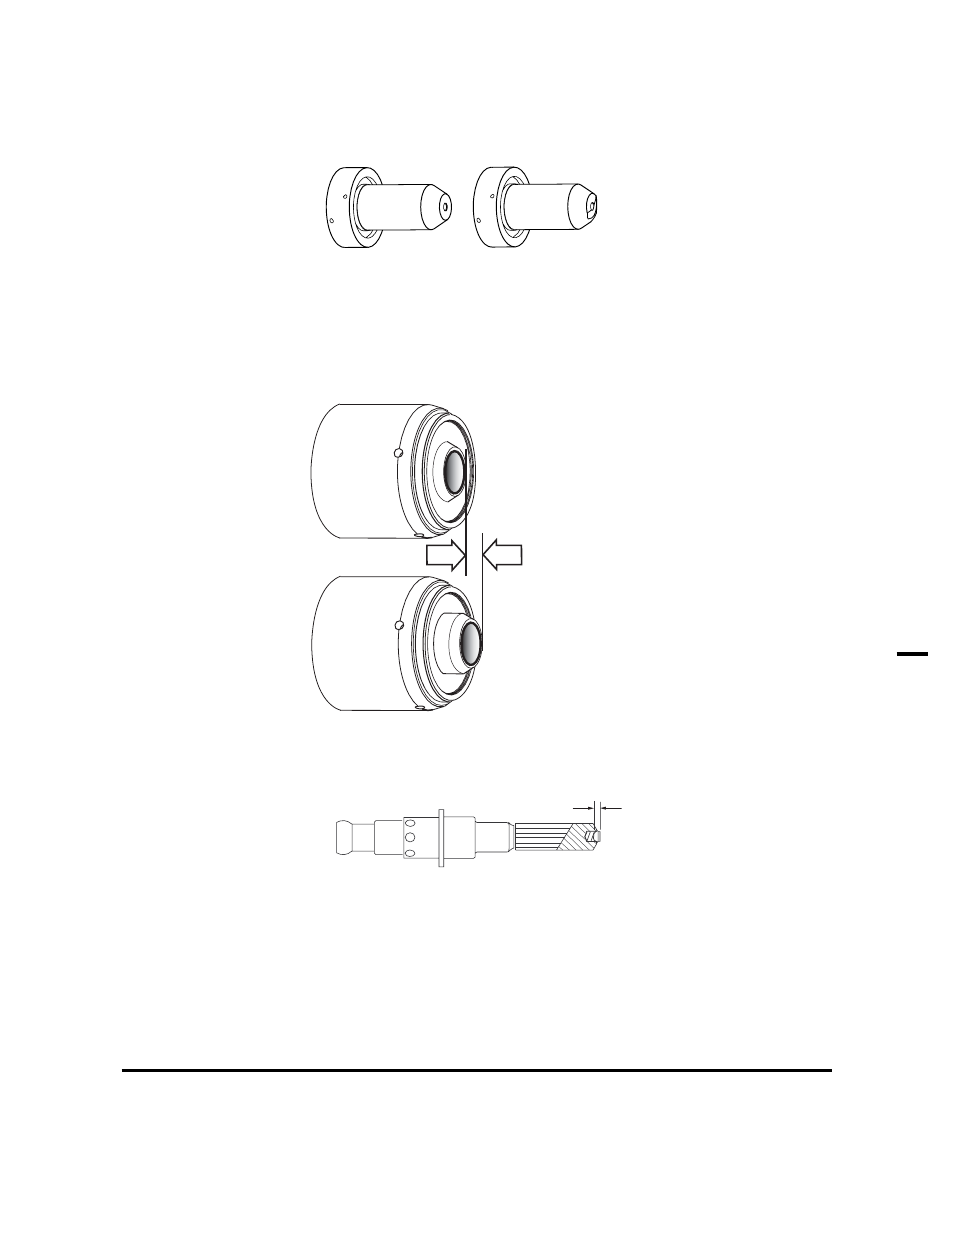
2. Remove the tip. Check for excessive wear (indicated by an elongated or oversized orifice). Clean or replace the tip
if necessary.
Good Tip
Worn Tip
A-03406
Tip Wear
3. Remove the start cartridge. Check for excessive wear, plugged gas holes, or discoloration. Check the lower end
fitting for free motion. Replace if necessary.
Art # A-07168
Spring-Loaded Cylinder
at Full Compression
Spring-Loaded Cylinder
at Full Extension
1/8” (3 mm)
4. Pull the Electrode straight out of the Torch Head. Check the end of the electrode for excessive wear. Replace the
electrode if wear is greater than 0.062" / 1.5 mm or if the wear is excessively off-center. Refer to the following figure.
Electrode Wear
Art # A-04057
0.062" (1.5 mm)
Electrode Wear
5. Reinstall the Electrode by pushing it straight into the torch head until it clicks.
6. Reinstall the start cartridge and tip into the torch head.
7. Hand tighten the shield cup until it is seated on the torch head. If resistance is felt when installing the cup, check the threads
before proceeding.
NOTE
When the shield cup is properly installed, there is a slight gap between the shield cup and the torch head. Gas vents
through this gap as part of normal operation. Do not attempt to force the shield cup to close this gap. Forcing the
shield cup against the torch head can damage components.