Dip switch settings, Quick setup – tekmar 260 Boiler Control User Manual
Page 14
Copyright © D 260 -
03/09
14 of 20
Boiler
If the boiler circuit is connected to the
Boiler terminals (11 and 12), make sure power to the boiler circuit is off and install a jumper
between the terminals. When the boiler circuit is powered up, the boiler should fire. If the boiler does not turn on, refer to any
installation or troubleshooting information supplied with the boiler. (The boiler may have a flow switch that prevents firing until the
boiler pump (P1) is running). If the boiler operates properly, disconnect the power and remove the jumper.
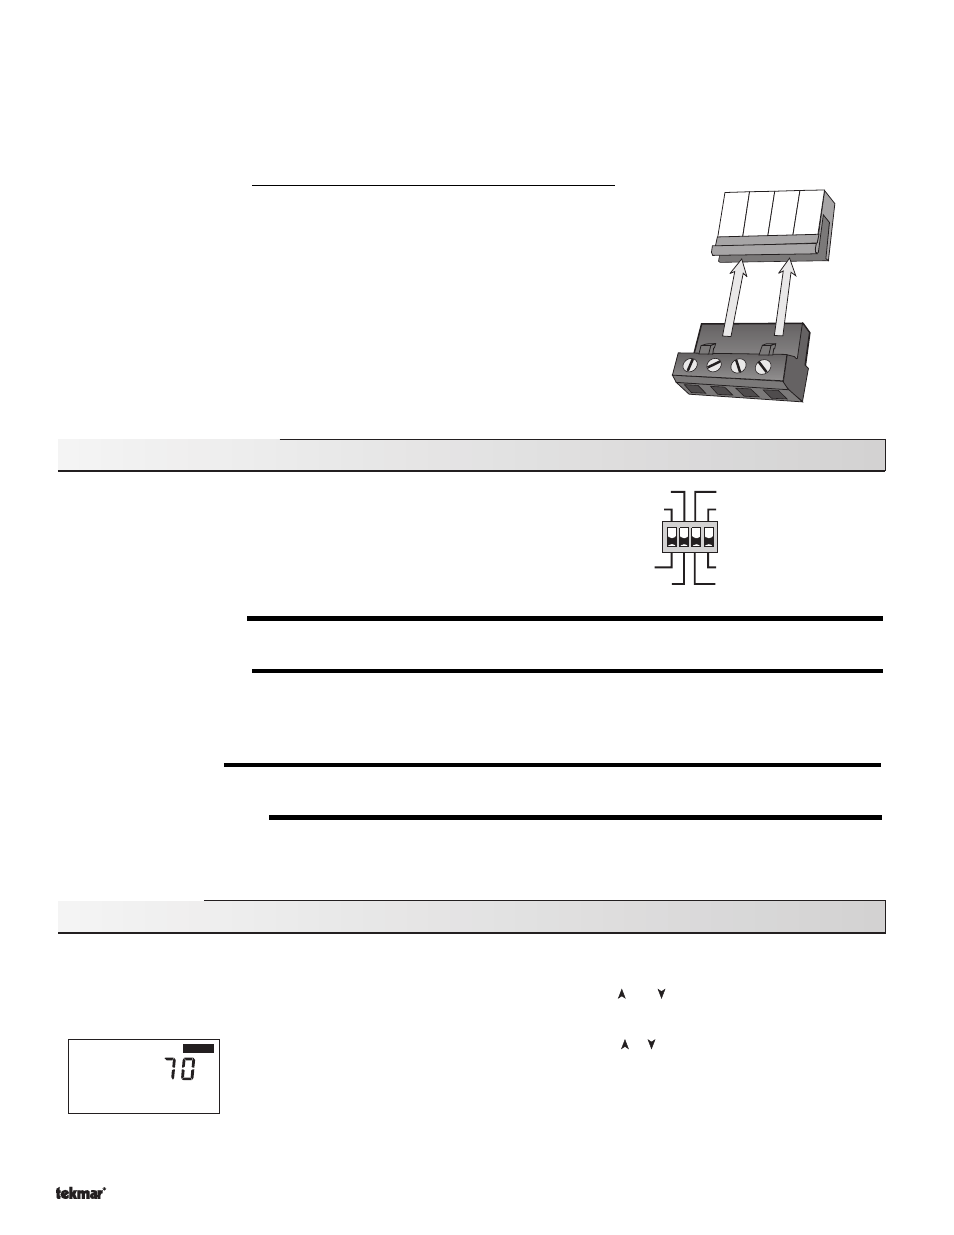
Connecting The Control
Make sure all power to the devices and terminal blocks is off, and remove any
remaining jumpers from the terminals.
Reconnect the terminal blocks to the control by carefully aligning them with their
respective headers on the control, and then pushing the terminal blocks into the headers.
The terminal blocks should snap firmly into place.
Install the supplied safety dividers between the unpowered sensor inputs, and the
powered or 24 V (ac) wiring chambers.
Apply power to the control. The operation of the control on power up is described in the
Sequence of Operation section of this brochure.
DIP Switch Settings
The DIP Switch settings on the control are very important and should be
set to the appropriate settings prior to making any adjustments to the
control through the user interface. The DIP switch settings change the
items that are available to be viewed and / or adjusted in the user
interface.
ADVANCED / INSTALLER
The
Advanced / Installer DIP switch is used to select which items are available to be viewed and / or adjusted in the user interface.
DHW VALVE / DHW PUMP
The
DHW Valve / DHW Pump DIP switch is used to select the type of device that is being used to control the flow of heat to the DHW
tank.
Note: If the DHW tank is piped in primary / secondary, DHW Valve must be selected. Refer to section C1.
DHW PRIORITY / OFF
The
DHW Priority / Off DIP switch is used to select DHW priority. If the DIP switch is set to DHW Priority, refer to section C2.
DHW DURING UNOCC / OFF
The
DHW during UnOcc / Off DIP switch is used to select whether or not DHW will be generated during the unoccupied (Night) period.
If
DHW during UnOcc is selected, DHW operates normally. If Off is selected, a call for DHW during the unoccupied (Night) period is
ignored.
Quick Setup
To enter the installer programming mode, set the
Advanced / Installer DIP switch to Installer.
Access the ADJUST menu by pressing and holding simultaneously for 1 second, the
Item, and buttons. The display will now show
the word ADJUST in the top right corner.
The ROOM OCC adjustment is the first item displayed. Use the or button to set the ROOM temperature.
The ROOM OCC setting is set to the desired room air temperature during the occupied (Day) mode.
Note: To increase or decrease space temperature during the occupied (Day) mode, only adjust the ROOM
OCC setting.
Off
Installer
Advanced
DHW during UnOcc
DHW Pump
Off
DHW Priority
DHW Valve
ROOM
°
F
OCC
ADJUST
13 14
16
15
UnO
Sw
Com Boil Out