Installation instructions – Brandmotion 1008-6502 User Manual
Page 3
INSTALLATION INSTRUCTIONS
6501 and 6502 Instructions 6-13-12.doc
3 of 20
Section 2: Camera Installation
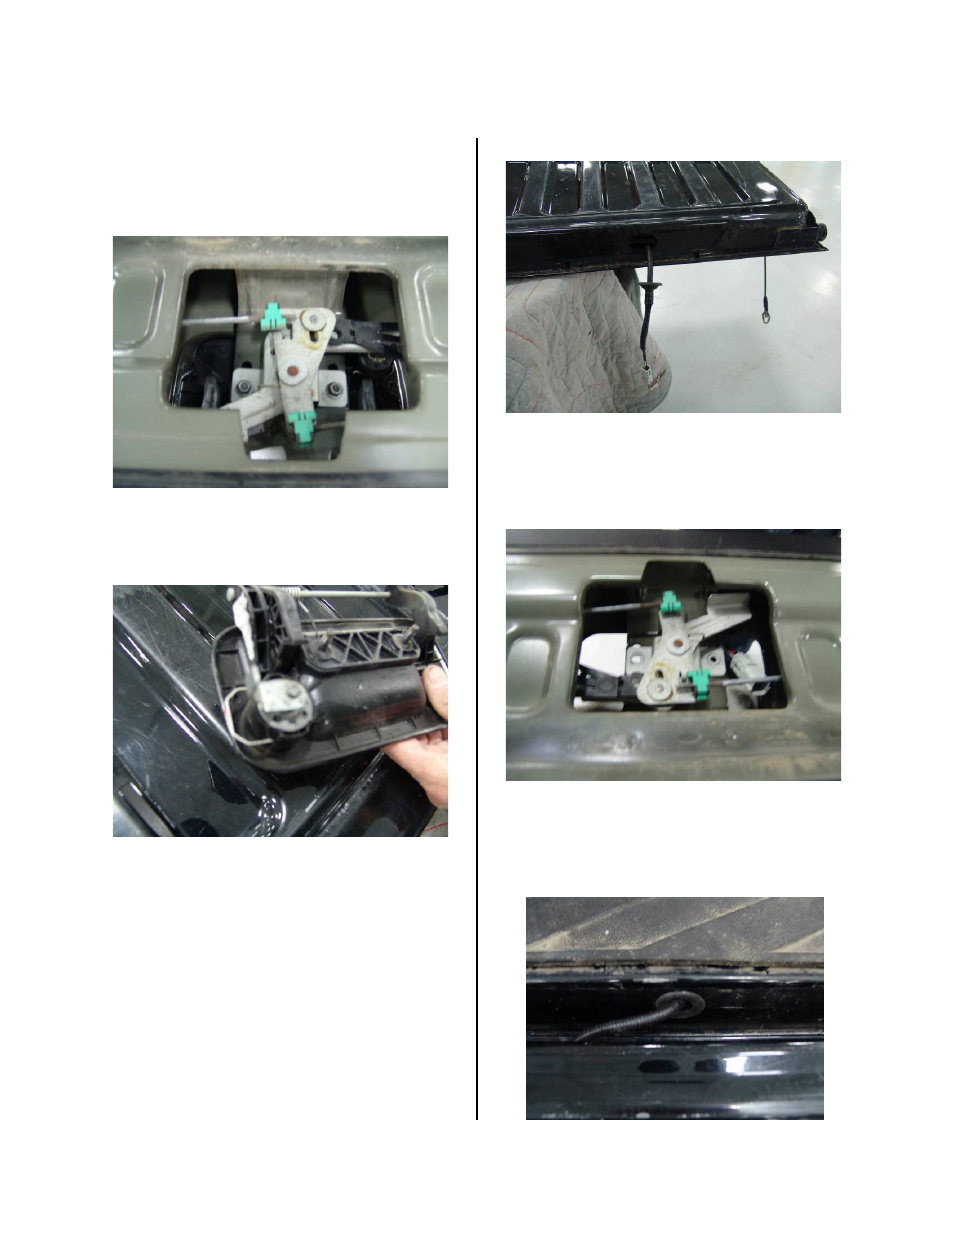
5. Remove tailgate handle by loosening two
nuts with a 10mm socket (Figure 5).
Figure 5
6. Remove lock cylinder from tailgate handle
by pulling out wire spring clip (Figure 6).
Figure 6
7. Install lock cylinder into supplied tailgate
camera handle with by pushing cylinder into
handle. Secure the cylinder with the wire
spring clip.
8. Route camera harness through handle
opening in tailgate to the hole in the
bottom of the tailgate (Figure 7).
Figure 7
9. Install supplied tailgate handle camera into
tailgate by tightening two nuts with 10mm
socket (Figure 8).
Figure 8
10. Pass the connector end of the tailgate
handle camera through the 1 inch opening
in the pickup bed and seat grommet.
(Figure 9)
Figure 9