Installation instructions – Brandmotion 9002-8521 User Manual
Page 2
INSTALLATION INSTRUCTIONS
8521 Instructions 7-26-13.doc
Page 2 of 5
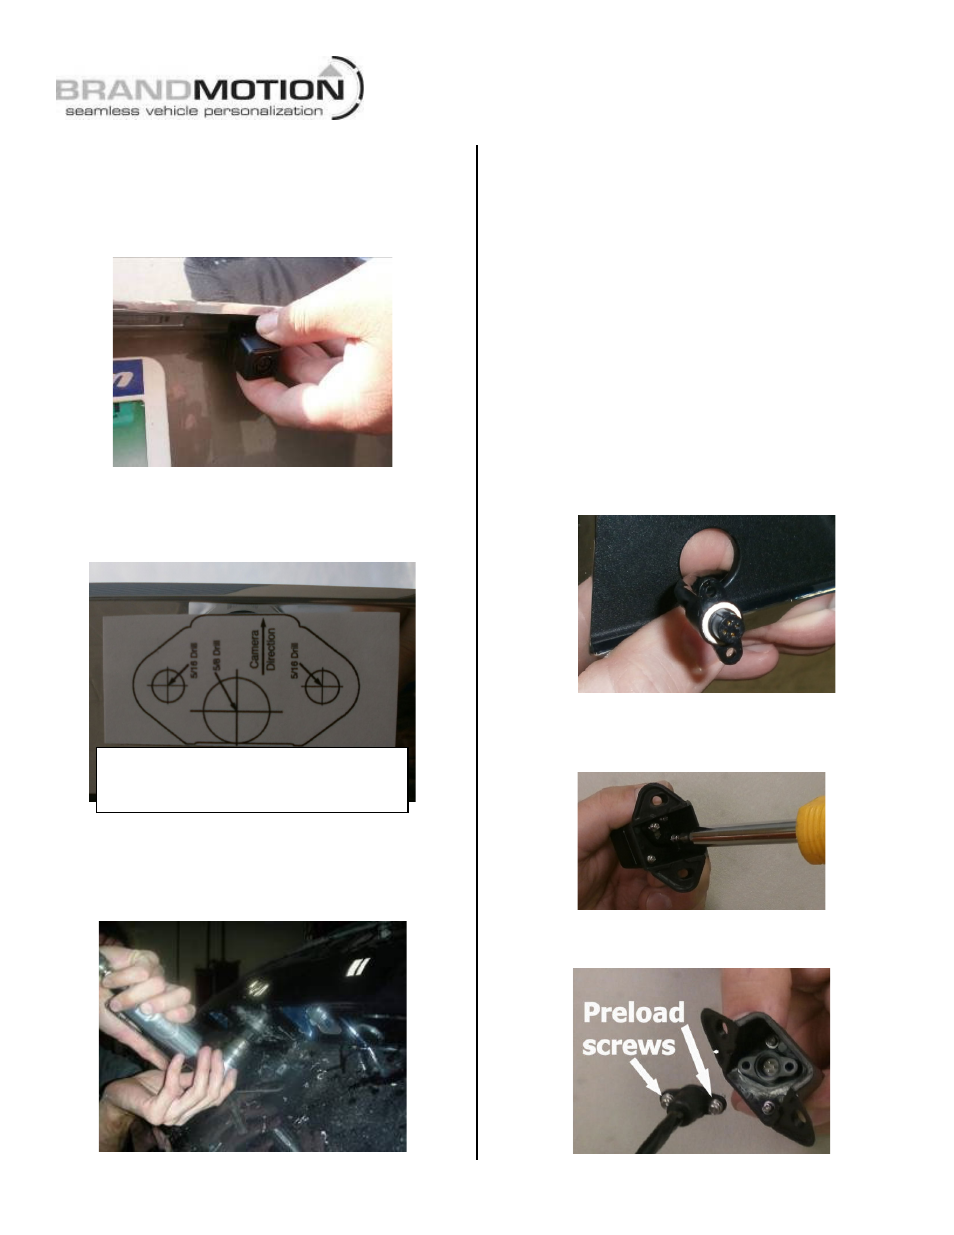
Step 1: Place Camera Mount in desired position to
confirm fitment. (IMPORTANT: Some states
prohibit items blocking the vehicle license plate;
check local authorities to confirm legal status for
your specific application).
Step 2: Peel adhesive backing from supplied
Camera Mount Template and apply to the desired
location making sure that the camera direction is
correct.
Step 3: Use a Center Punch to mark the centers of
the required three holes and drill three pilot holes
using a 1/8” drill bit. NOTE: If your vehicle has a
liftgate panel/trunk trim cover, it must be removed.
Step 4: Drill two 5/16” holes for the camera
mounting bolts and one 5/8” hole for the camera
harness. Use a Deburring Tool or Round File to
smooth edges.
Step 5 (if necessary): Using a 5/8” drill bit, drill an
opening in the trunk or liftgate for the head of the
Camera Harness to pass through. Insert Camera
Harness head through the backside of the hole so
that the gray connector end of the Camera Harness
is inside the trunk or liftgate. (RECOMMENDED:
Protect Camera Harness with a rubber grommet or
by applying a small amount of silicone caulk to the
area that comes into contact with the edges of the
hole. Additional recommendation: If drilling
through sheet metal, apply a Corrosion Inhibitor.)
Step 6: Route head of Camera Harness through the
pass-through you made with the Template.
Step 7: Use a Phillips Screwdriver to remove the
two screws provided in the Camera to secure the
head of the Camera Harness onto the Camera.
Step 8: Preload the screws into the Camera
Harness connector.
NOTE: If self-adhesive Template is missing or
damaged, cut out the image above and affix
with Masking Tape.