Mount the monitor in a panel – Rockwell Automation 6186M-xxxx Industrial Performance Monitors Installation Instructions User Manual
Page 14
14 Industrial Performance Monitors
Rockwell Automation Publication 6186M-IN002C-EN-P - December 2011
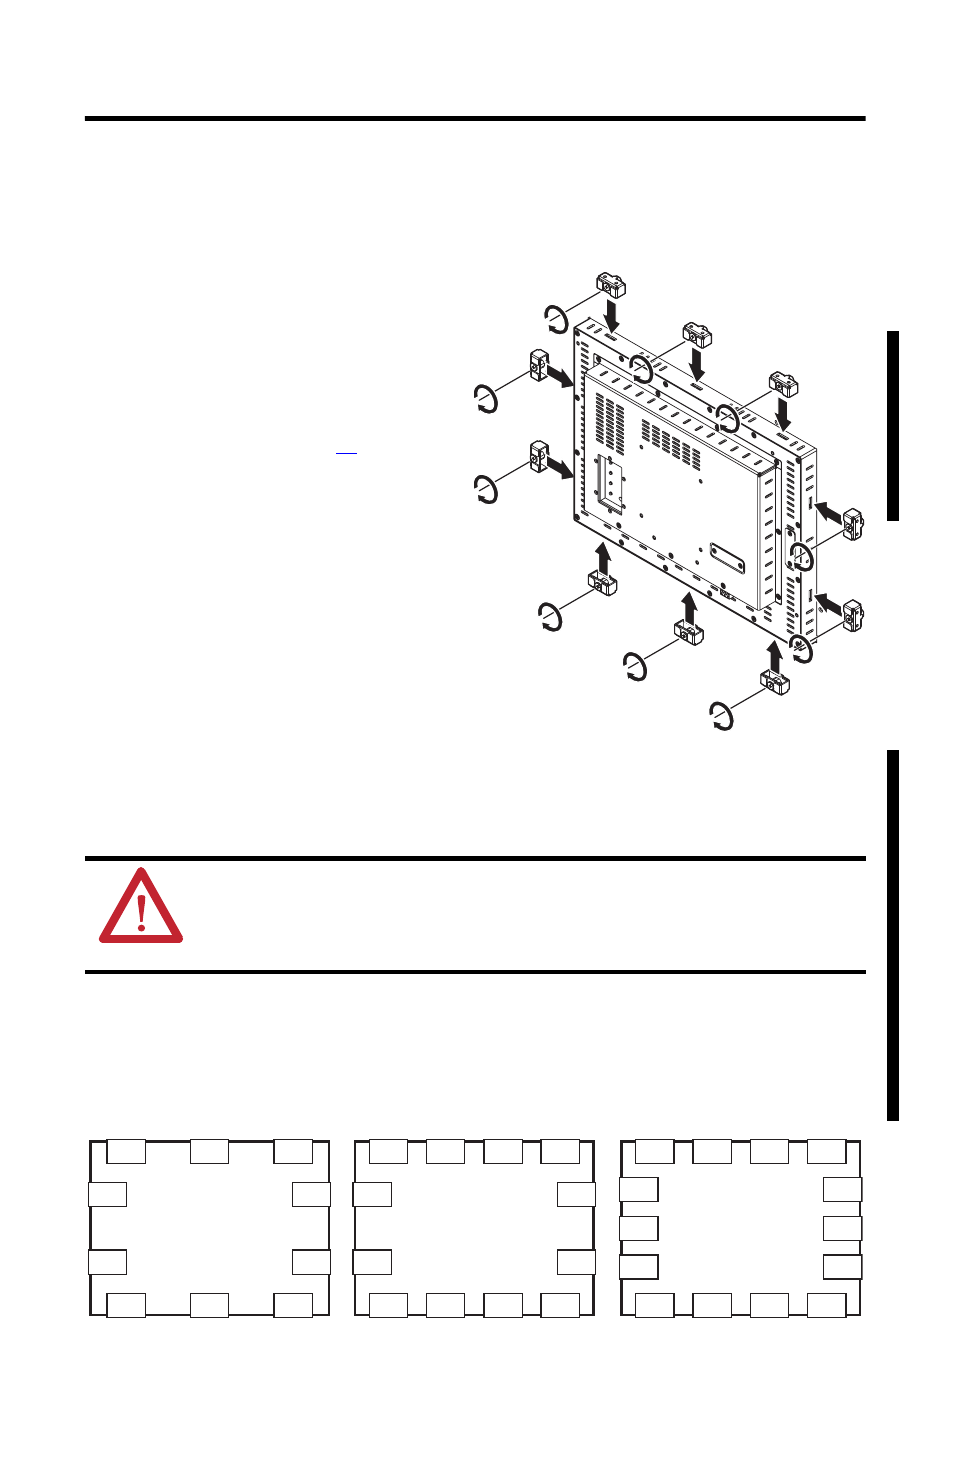
Mount the Monitor in a Panel
Follow these directions to mount the monitor in a panel.
1. Cut the panel opening by using the
appropriate cutout dimensions.
2. Attach cables to the monitor before
installing the monitor if rear access to
the monitor will be limited after
installation. See “Monitor
Connections” on page
for where
to attach cables.
3. Verify the sealing gasket is properly
positioned on the monitor.
This gasket forms a compression-type
seal. Do not use sealing compounds.
4. Place the monitor in the panel cutout.
5. Slide the mounting clips into the slots
on the top, bottom, and sides of the
monitor.
6. Hand-tighten the mounting clips around the bezel by following the tightening sequence.
7. Tighten the mounting clips to a torque of 1.35 N•m (12 lb•in) by following the torque
sequence, making sure not to overtighten.
8. Repeat the torque sequence at least three times until all mounting clips are torqued to
1.35 N•m (12 lb•in) and the sealing gasket is compressed uniformly against the panel.
Tightening and Torque Sequence
ATTENTION: Tighten the mounting clips to the specified torque to provide a proper seal
and prevent damage to the product. Rockwell Automation assumes no responsibility for
water or chemical damage to the product or other equipment within the enclosure
because of improper installation.
7
1
5
6
2
8
9
3
4
10
14
1
5
13
4
6
11
10
2
9
12
7
3
8
1200M, 1500M, and 1700M Monitors
1900M Monitors
1700M Stainless Steel Bezel Monitor
1
4
6
11
10
2
9
12
7
3
8
5