Replace the system cover, Reconnect the cables and power on the unit – Western Digital WD ShareSpace User Manual User Manual
Page 185
REPLACING A DRIVE - 180
WD SHARESPACE
USER MANUAL
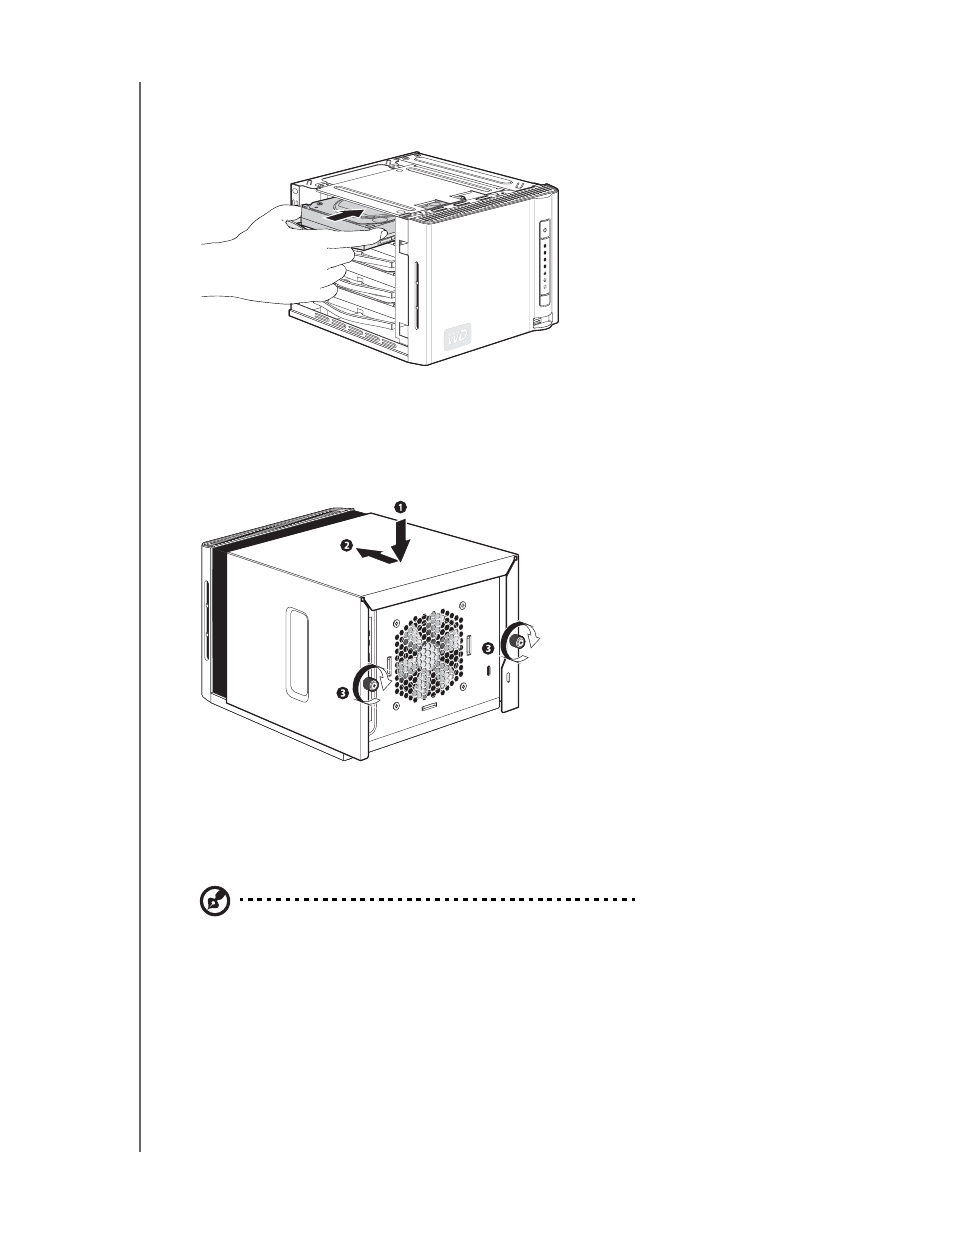
10. Slide the drive carrier all the way into the drive bay, and then push directly on
the drive (not on the mounting rails) until the assembly latches securely into
place and you hear a click.
11. Replace the system cover.
(a) Carefully place the system cover on the unit so that the tabs on the cover align with the slots
on the unit.
(b) Slide the cover toward the front of the unit until it is fully closed.
(c) Tighten the captive screws on the rear of the unit.
12. Reconnect the cables and power on the unit.
13. The drive starts the rebuild process automatically. The RAID rebuild may take up
to 34 hours depending on RAID mode and drive capacity and activity. See the
graphic in “Volumes and RAID Management” on page 133.
Note: For RAID modes other than RAID 1, RAID 5, and RAID 10, data cannot be accessed until the
rebuild is complete.
14. Once the rebuild is complete, the power LED will change from flashing green to
steady green.
15. Connect the interface cable and set up the new drive for RAID configuration (for
related instructions, refer to “Manage RAID” on page 136).