Hinge installation – Therma-Tru SHOP 3 Door Preparation - Book Size User Manual
Page 43
Door
Preparation
Shop 3
2014 (BOOK SIZE)
3.43
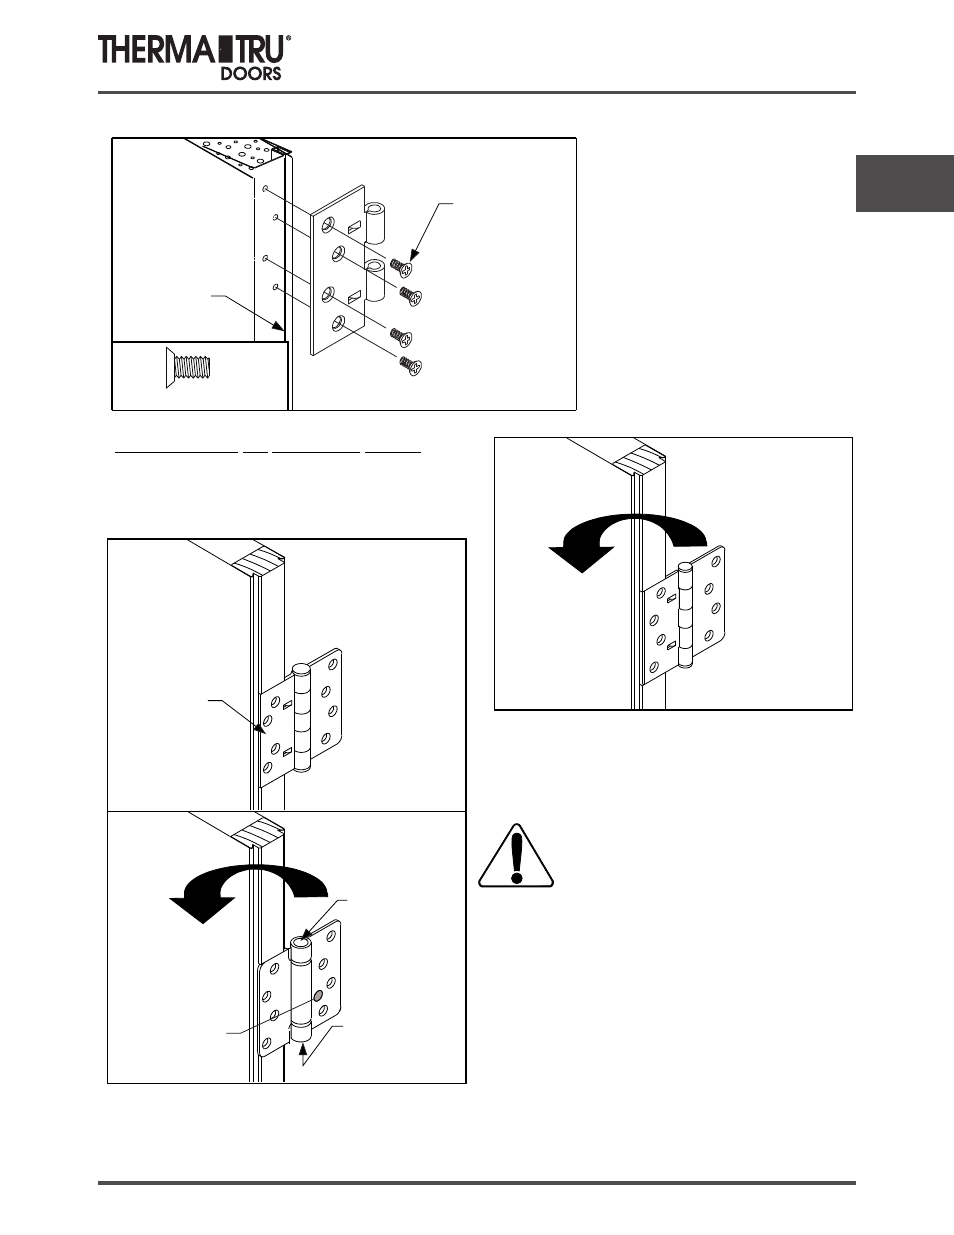
Hinge Installation
Surface-Mounted
(90-Minute Fire Door)
Align and Install Hinges
Use pilot holes to align
2-knuckle hinge leaves.
Fasten 2-knuckle hinge
leaves with proper screws.
Considerations for Assembled Hinges
Riveted-pin hinges have locating tabs. Fasten to
slabs using same method as for unassembled
hinges, placing tabs against door face to locate hinge.
If assembled hinges are used, fastening door slabs to frames will require that the slabs be first
fastened to loose hinge jambs, with the rest of the frame and sill then being built around the slab.
A standard hinge leaf with locating tabs can also
be used as a template, if a vix-bit is used to center
the pilot holes in the centers of the hinge holes.
Self- Aligning
Ball-Bearing Hinge
Spring Hinge
Right-hand
application
shown
Right-hand
application shown
Riveted Pin Hinge
with Locating Tabs
Right-hand
application
shown
Rotate to
opposite
side for
left-hand
application
Rotate to opposite
side for left-hand
application
For wood-edged doors with pass-through
hinge mortises, take care to place correct
leaf on door edge, and fasten at correct
backset, for alignment. (Backset is 1-3/8”)
To apply these hinges to wood-edged doors, use a
template and mark screws or bore 3/32” diameter
pilot holes.
Square leaf
fastens to
door
Leaf with “UL”
logo fastens
to jamb
Hex adjustment
hole - right hand
Hex adjustment
hole - left hand
Section Cut for Clarity
Seam
Part # RPSCSF-XX
Self Tapping
Screws
#10-24 x 1/2”
NOTE: Alignment tabs will
not touch door.