Therma-Tru SHOP 3 Door Preparation - Book Size User Manual
Page 25
Door
Preparation
Shop 3
2014 (BOOK SIZE)
3.25
Multipoint Lock Preparation
(Except Fire & Steel Doors)
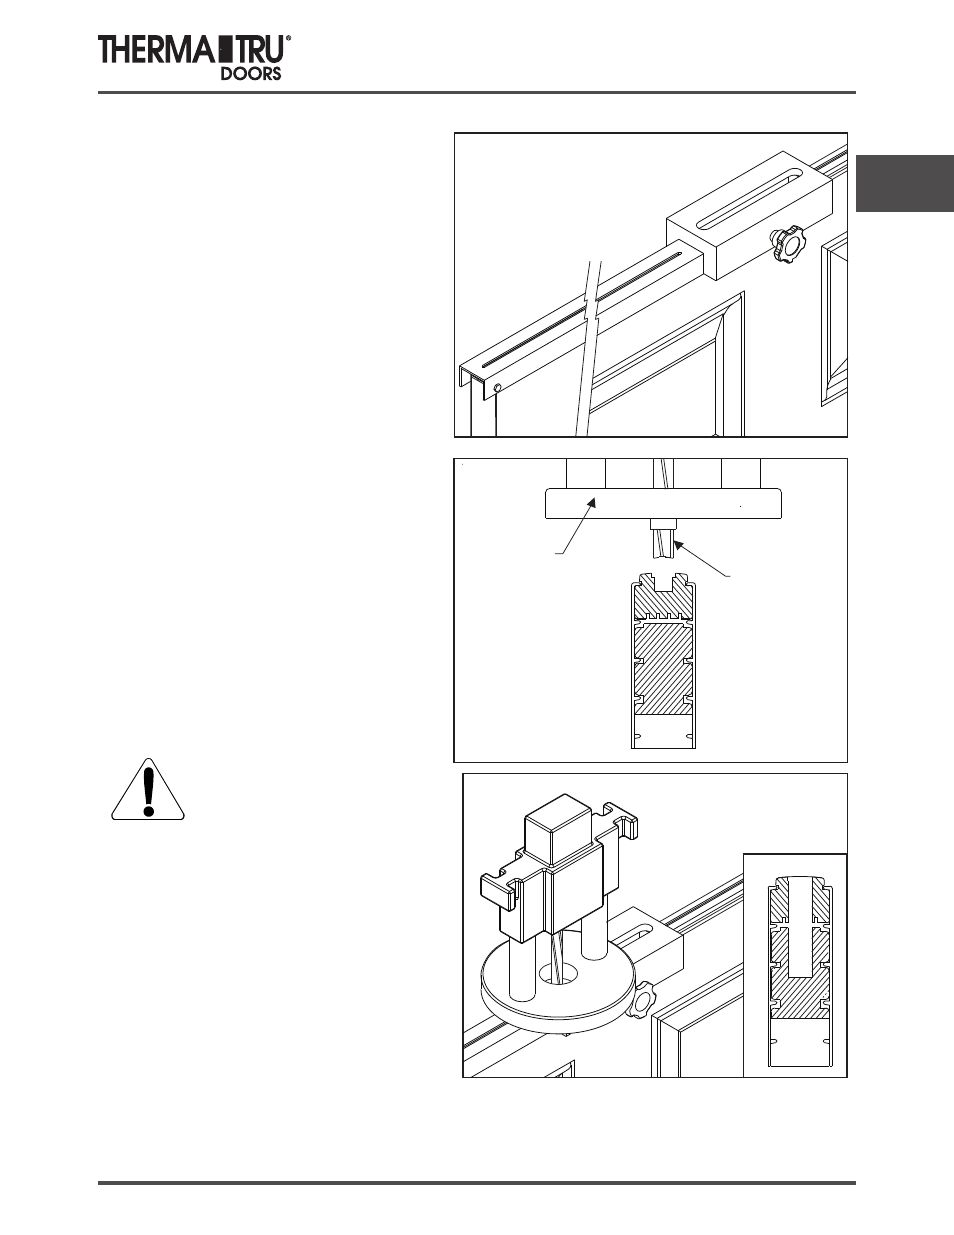
Apply Cross Mortise Fixture
Set the cross mortise jig on the edge of the door
and slide up until the lock height setting bolt
has contacted the bottom edge of the panel.
Carefully tighten the adjustment knob enough
to secure the jig to the panel.
NOTE: Over tightening can cause the width of
the mortise pocket to be cut improperly.
NOTE: Be sure the jig is flat against the edge
of the panel and tight against the bottom to
provide proper placement of the handle
mechanism.
Set Up Plunge Router
Set the depth of cut using the manufacturer’s
guide that came with the plunge router. The
depth of the route should be 64mm (approx-
imately 2-9/16” for 45mm & 3-7/32” for 60mm)
using a 1/2”cut by 5-1/2” long bit with a 3/16”
collar.
Slide the bit into the opening on the jig and
make cut using several passes along the guide
to obtain the proper depth.
Note: It is recommended to cut 1/4” - 1/2”
each pass.
Cut Gear Mortise
Gear Mortise Preparation
Plunge
Router
1/2”x5-1/2” Bit
CAUTION: The router bit will
extend past the base of the router.
Make sure the router is sitting firmly
in the jig before starting the router.
Let the router come to a complete
stop before removing from the jig.