Therma-Tru SHOP 3 Door Preparation - Book Size User Manual
Page 24
Door
Preparation
3.24
2014 (BOOK SIZE)
Shop 3
Multipoint Lock Preparation
(Except Fire & Steel Doors)
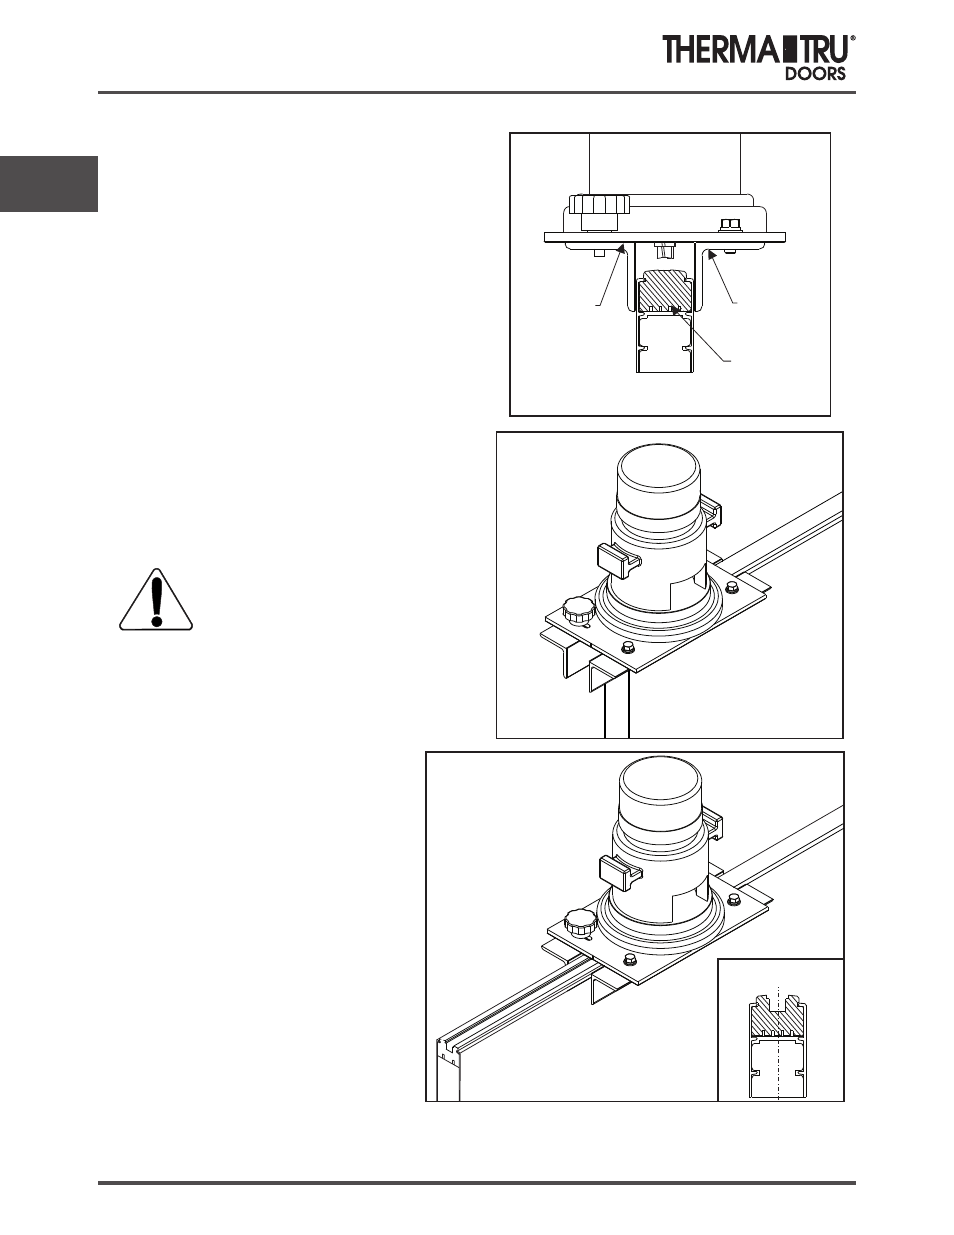
Secure Door on Edge & Apply
Router & Guide Fixture
NOTE: For best results, set the router at
maximum RPM.
Route the entire length of the door edge.
Apply constant pressure against the fixed
edge of the router fence for best results.
Remove the sawdust after the cut is
complete.
Set Router Bit Depth &
Adjust Guide Fence
Cut Eurogroove
Set assembly on the door panel and move it until the
bit reaches the door edge. Move the assembly away
from the door edge so that the bit is not in contact
when the router is started.
Set the bit depth using the manufacturer’s guide that
came with the router. The depth of the route should
be 12mm (roughly 15/32”).
Note: Test the route depth on a scrap piece of wood.
Adjust the guide fence so that the assembly can slide
down the entire length of the door.
Note: If binding occurs, readjust the fence at the
thickest section of the door.
Eurogroove Preparation
Fixed Edge
Adjustable
Edge
Door Lock
Edge
CAUTION:
The fixed edge guide for
the Eurogroove Router and the fixed edge of the
Gear & Handle Mortise Jig must be located on the
same side of the door during the preparation. Failure
to do so could result in off-center relationship of
gear mortise and eurogroove.