Spring hinge instructions – Therma-Tru Doors Installation User Manual
Page 70
Installation
1.70
2014
SITE 1
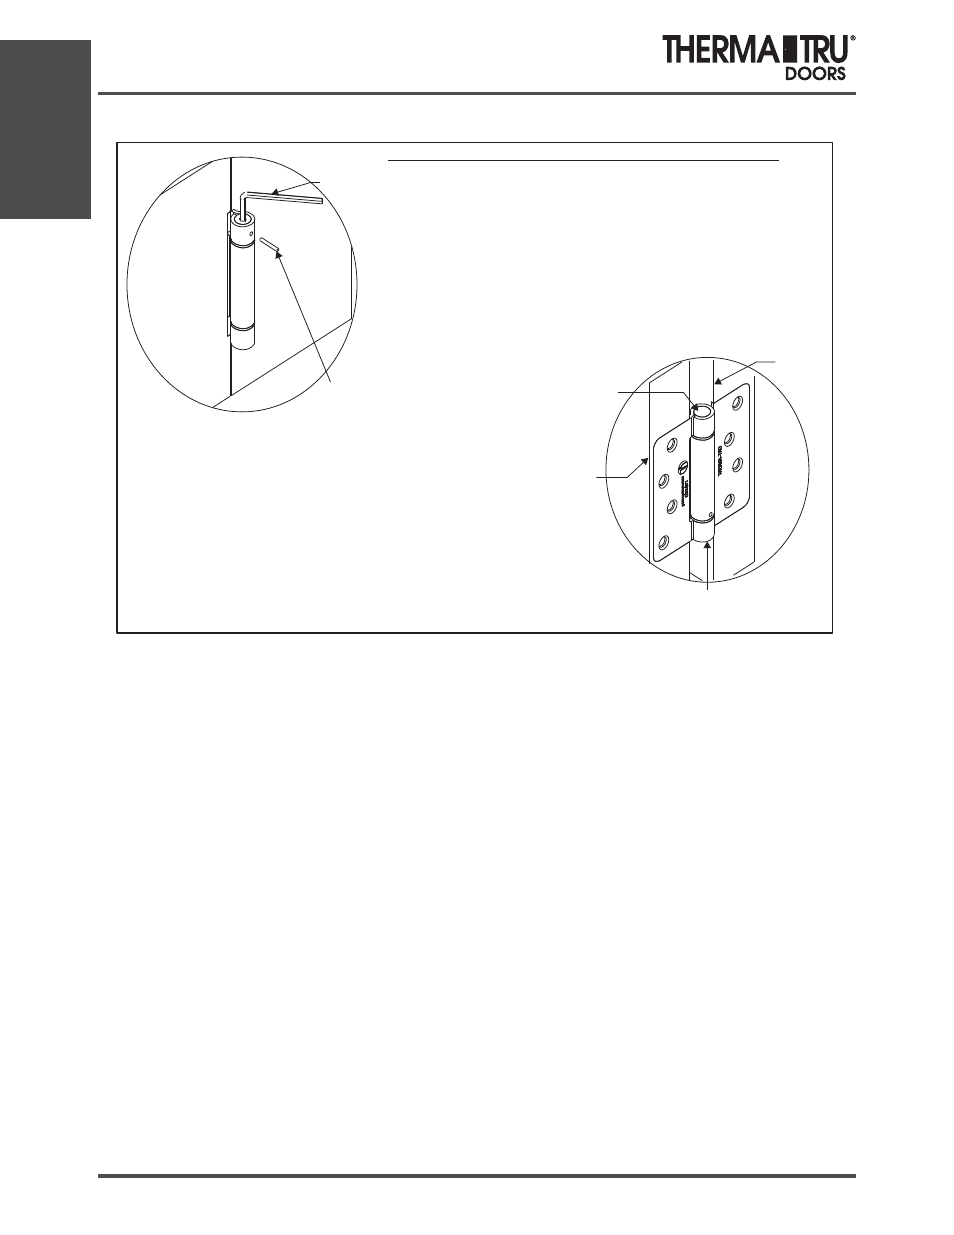
HEX ADJUSTMENT ON TOP
LEFT-HAND APPLICATION
HEX ADJUSTMENT ON BOTTOM
RIGHT-HAND APPLICATION
CROSS PIN
HEX KEY
INSTRUCTIONS FOR THERMA-TRU ADJUSTABLE TENSION SPRING HINGE
Installation:
First mount the hinges by matching the hinge leaf (with the Therma-Tru logo) to the door,
then match the other leaf (with the “UL” logo) to the jamb. Doing this may require having
adjustment end down depending on handing.
1. Place door in closed position. Insert allen wrench in hex adjustment hole as shown in
left diagram.
2. If adjustment end is up, turn hex key clockwise to desired spring tension.
If adjustment end is down, turn key counterclockwise to desired spring tension.
Observe caution notes.
3. Insert cross pin when holes in center stud and hinge knuckle line up. Slowly release pressure
on the hex key.
4. Remove hex key and test closing action of door.
5. Repeat steps 1-4, if necessary, to increase spring tension.
To make tension adjustment tamperproof, snip off cross pin at break-away head.
Do not remove head if future adjustment may be needed.
-
Use 3-1/2” spring hinge for 1-3/8” thick doors, maximum 2’8” wide X 7’ high.
- Use 4” or 4-1/2” spring hinge for 1-3/4” thick doors, maximum 3’ wide X 7’ high
- Doors over 5’ high require three hinges. At least two of the three must be spring hinges.
- The maximum door size and number of spring hinges required are based on limits set
forth in NFPA 80. For maximum versatility, use all spring hinges.
NOTE:
Adjust spring hinge to minimum tension required to close and latch the door.
Overtensioning will reduce the spring life.
Caution: Do not exceed three holes of tension for doors opening 180 degrees. Do not
exceed four holes of tension for doors opening 90 degrees.
JAMB
DOOR
Spring Hinge Instructions