Sill instructions – Therma-Tru Doors Installation User Manual
Page 60
Installation
1.60
2014
SITE 1
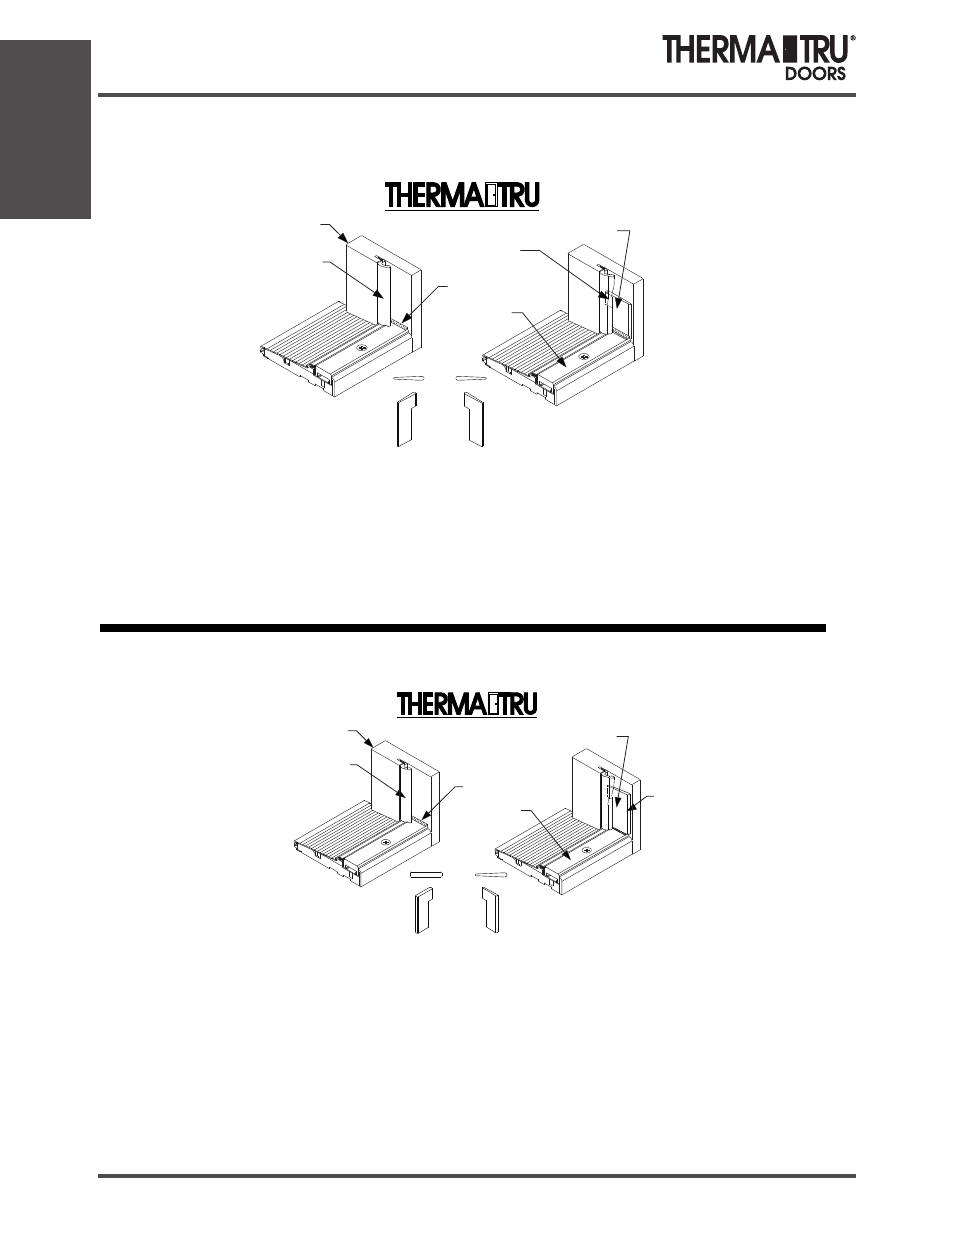
Sill Instructions
1. When saddle is adjustable,
adjust saddle to desired
height to ensure proper seal
and door function.
2. Place a 1/4” bead of sealant
at corners where saddle meets
side jambs.
The Most Preferred Brand in the Business
®
Sealant
Jamb
Weatherstrip
Saddle
Corner Seal Pad
Fiber-Classic/Smooth-Star
Corner Seal Pad Instructions
3. Remove paper backing from corner
seal pad and position pad tight to the
saddle and centered on the saddle.
Tuck top of pad to the back of
weatherstrip.
If further adjustment is required,
the following steps must be repeated on
both jamb sides to prevent air, light and
water infiltration.
Note:
Thick edge behind
weatherstrip
PART #: TDSILLINST REV. A
1. When saddle is adjustable,
adjust saddle to desired
height to ensure proper seal
and door function.
2. Place a 1/4” bead of sealant
at corners where saddle meets
side jambs.
The Most Preferred Brand in the Business
®
Sealant
Hinge Jamb
Weatherstrip
Saddle
Hinge Side
Corner Seal Pad
Classic-Classic
Corner Seal Pad Instructions
3. Remove paper backing from corner
seal pad and position pad tight to the
saddle and centered on the saddle.
Tuck top of pad to the back of
weatherstrip.
Use correct corner pad for either
lock or hinge side as shown above.
If further adjustment of the saddle is
required, the following steps must be
repeated on both jamb sides to prevent
air, light and water infiltration.
Note:
Hinge
Side
Lock
Side
Thick edge away
from weatherstrip
PART #: TDSILLINST REV. A