Pre-hung arch/radius unit installation – Therma-Tru Doors Installation User Manual
Page 19
Installation
SITE 1
2014
1.19
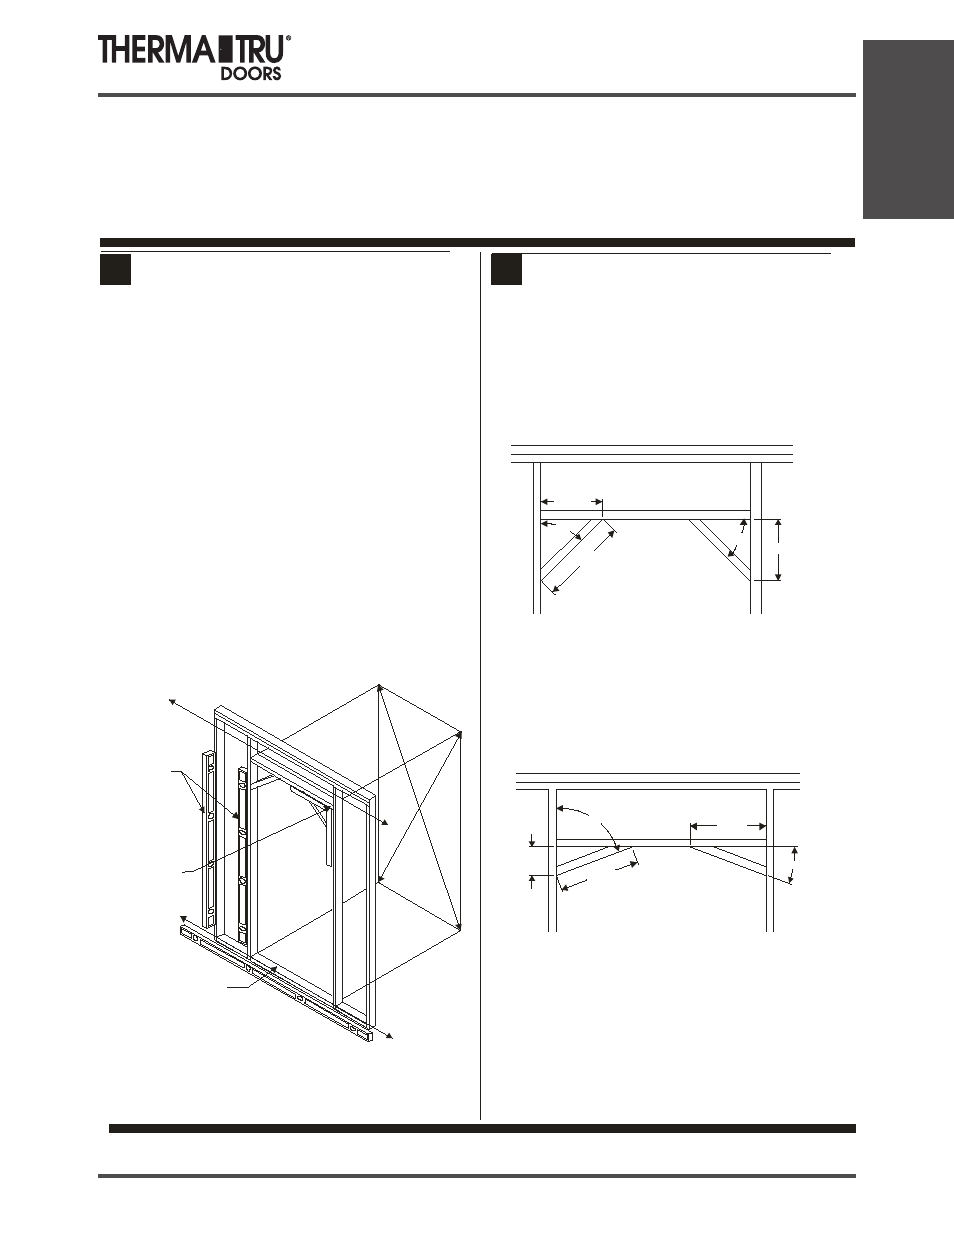
Pre-Hung Arch/Radius Unit Installation
1
Equ
al
Eq
ua
l
Check all
four corners
with square
Wall straight?
Check
each side
both ways
Wall straight?
Check floor
under sill
Compare Diagonals
•
•
•
•
•
Is subfloor level and solid? Provide a flat, level clean bearing
surface so the sill may be caulked and sealed to the opening.
Scrape, sand, or fill as required.
Shim subfloor for floor covering clearance if required. If
shimming, caulk under shims.
Is opening square? Check all corners with a framing square.
Double-check by comparing diagonal measurements. Fix any
problems now.
Are framing and walls plumb? Use a 6-foot level and check both
sides of opening, both ways. Fix any problems now.
Are the wall surfaces around the opening on the same plane?
There must be no “warps” or “jogs”. Fix any problems now.
size now
before installation. Opening should be frame height plus ½” and
frame width plus ½” to 1”.
• Is opening correct size? Check it against door frame
2
Build support framing at top for radius/arched top head
jamb as shown below
Pre-hung Rustic Arch/Radius
Installation Instructions
CHECK AND PREPARE OPENING
SUPPORT FRAME CONSTRUCTION
1
2
Refer to MSDRIST for all other Pre-Hanging Instructions
Radius Top Head Jambs
Arch Top Head Jambs
70°
5 1/32
20°
13 7/8
14 3/4
11 9/32
11 9/32
45°
45°
15 15/16