Multi-point lock quick tip sheet & instructions – Therma-Tru Doors Installation User Manual
Page 23
Installation
SITE 1
2014
1.23
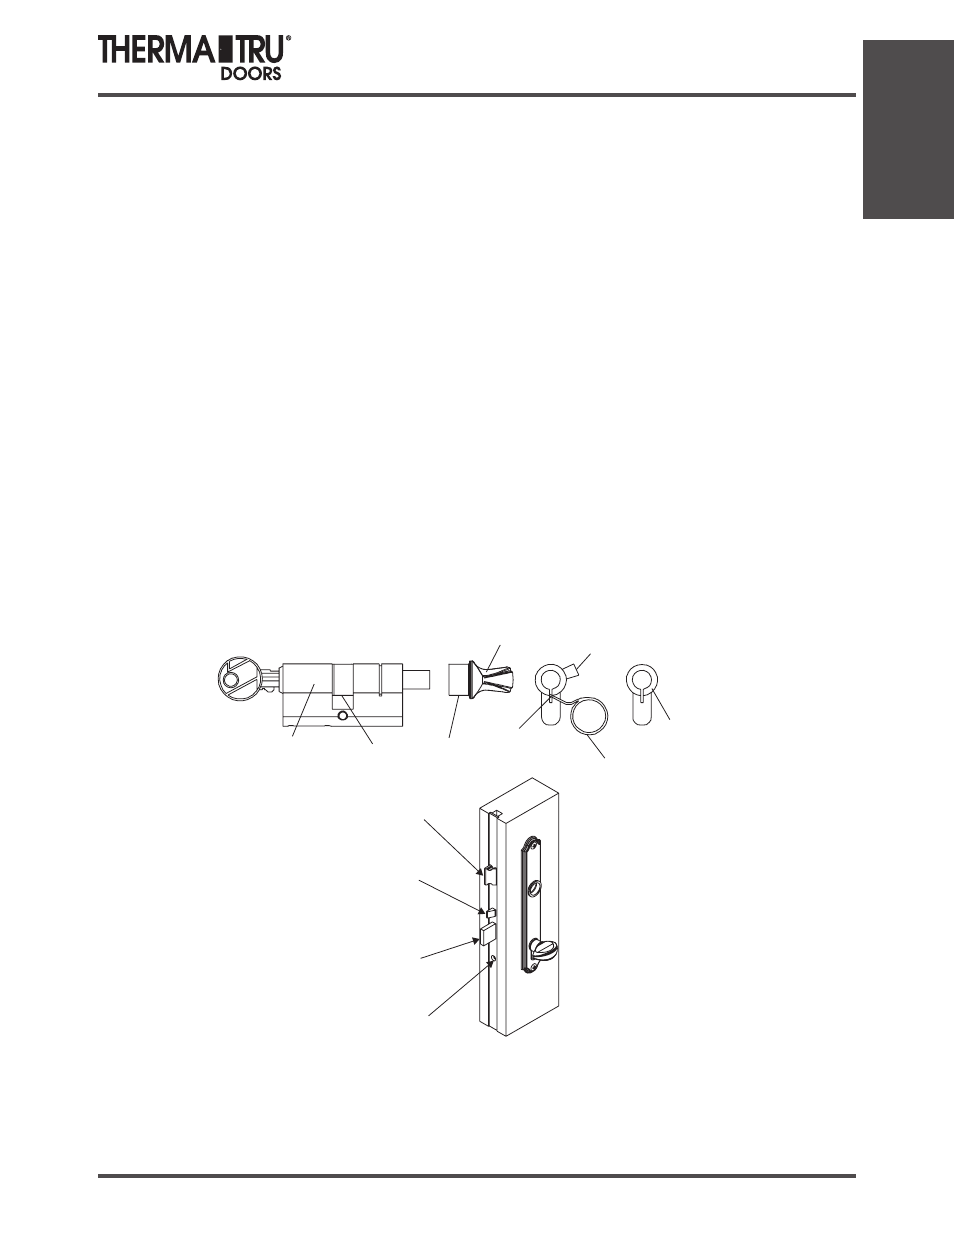
Multi-Point Lock
Quick Tip Sheet & Instructions
A
E
A
D
B
B
C
F
1994-2009 Therma-Tru Corp. All rights reserved. Therma-Tru is an operating company of Fortune Brands, Inc.
LATCH
DEADBOLT
MISHANDLING
DEVICE
CYLINDER
SCREW
INSTALLATION INSTRUCTIONS FOR
ACTIVE AND PASSIVE 90-DEGREE CYLINDERS
1. The drive tab (A) must be aligned with the cylinder (B) to install the cylinder into the lock mechanism.
If the tab cannot be rotated to this position, push the pin (C) down with the ring wrench (D) by inserting
into the top of the slot (C), pushing inward and then pulling downward to disengage the stops. Turn the
knob (E) until the drive tab (A) is aligned with the cylinder (B).
2. Holding in this position, insert the cylinder body into door so the tab (A) on the cylinder is inside of the
lock.
3. Rotate the knob (E) towards the edge of the door so that the tab (A) moves inward toward the door
center, the tab (A) will seat properly and allow the deadbolt to extend. On the passive door, if the knob
is rotated in the wrong direction, it will rotate approximately 120 degrees and lock up the system. If this
happens, push the pin (C) down with the ring wrench (D) to disengage the stops and turn the knob (E)
in the opposite direction until the deadbolt extends.
4. NOTE: The passive door cylinder is shorter, has no key on the outside and no deadbolt to extend. If it is
properly locked, the handles do not operate.
5. Install cylinder screw into hole in edge of door.
6. If the set screw (F) is at the top of the knob, remove the set screw, reverse the knob 180 degrees and
reinstall so the set screw is at the bottom of the knob.
7. To remove cylinder, loosen and remove cylinder screw and repeat step 1 and slide cylinder from door.