Transom installation instructions 1 – Therma-Tru Doors Installation User Manual
Page 44
Installation
1.44
2014
SITE 1
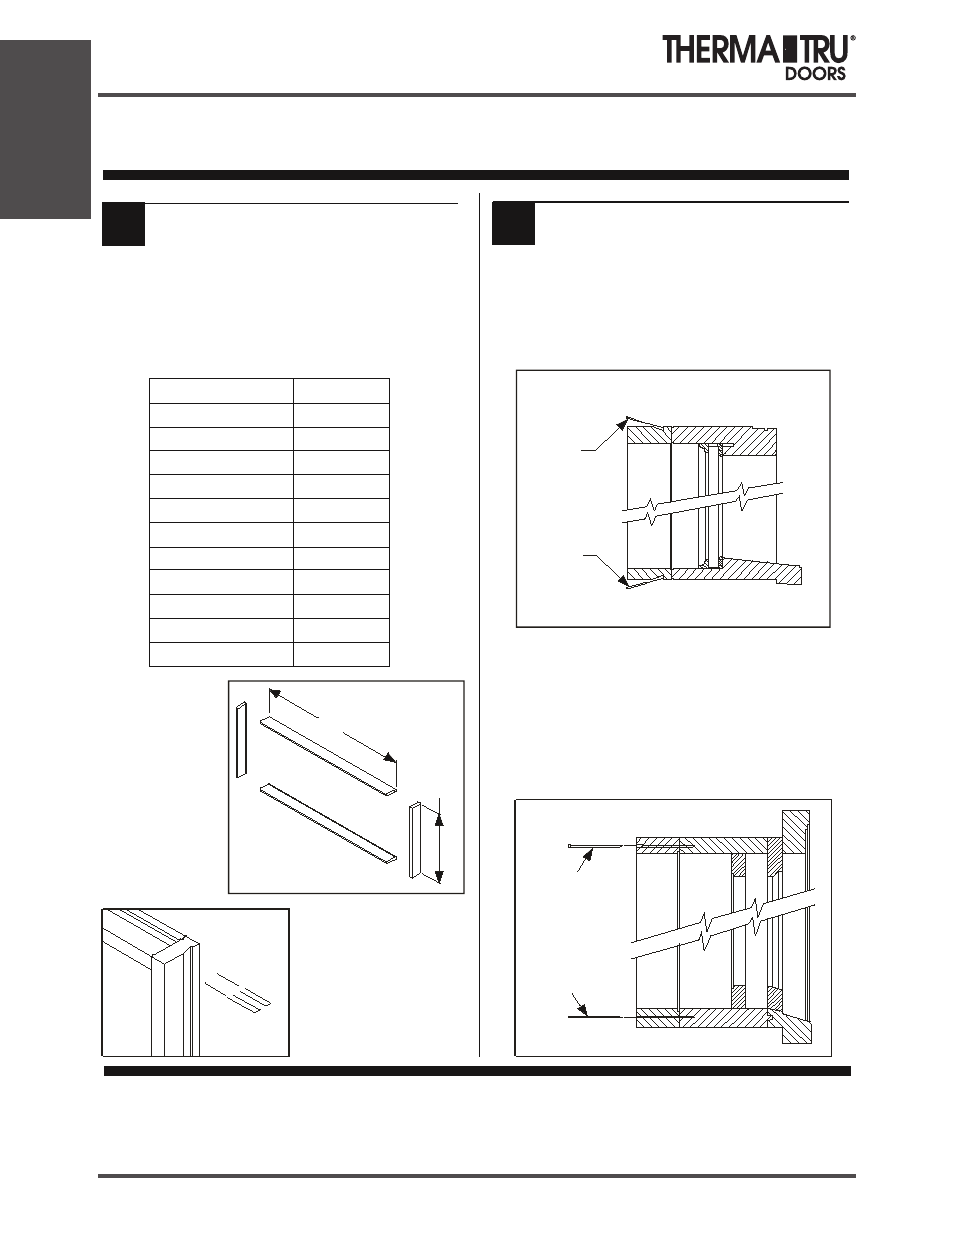
Transom Installation Instructions
1
ASSEMBLE JAMB EXTENDERS IF
USING 6-5/8” JAMBS.
2
APPLY JAMB EXTENDERS IF
APPLICABLE.
Align extension jamb with transom jamb so
inside surface of extension jamb is flush with
inside surface of transom jamb, and relief notch
is against transom jamb.
Nail and countersink extension jamb to transom
jamb with #8 finishing nails in pre-drilled holes.
#8 finishing nails
#8 finishing nails
Align extender with transom. Orient so V-groove
for fastening is closer to transom frame.
Fasten entire perimeter, as shown, through
V-groove. Use 1” brads on 6” centers.
1” brads
1” brads
Measure transom frame width and height.
The following are recommended height and width
dimensions. Use actual measurements to construct
jamb extender frame.
Cut extender
components to
match transom
dimensions.
Butt corners together
and fasten with 2 staples
or nails.
Height: 13-15/32"
Width
Height
(13-15/32”)
Door/Sidelite Slab
Width
14” Sidelite
14”
12” Sidelite
3/0
5/0 Patio
5/4 Patio
5/8 Patio
6/0 Patio
3/0 w/12” S/L, Mulled
12”
36-5/32”
64-5/16”
68-5/16”
72-5/16”
76-5/16”
62-5/32”
63-5/32”
66-5/32”
67-5/32”
3/0 w/12” S/L, Boxed.
3/0 w/14” S/L, Mulled
3/0 w/14” S/L, Boxed