Installation – Regency Liberty L965E Large Gas Fireplace User Manual
Page 30
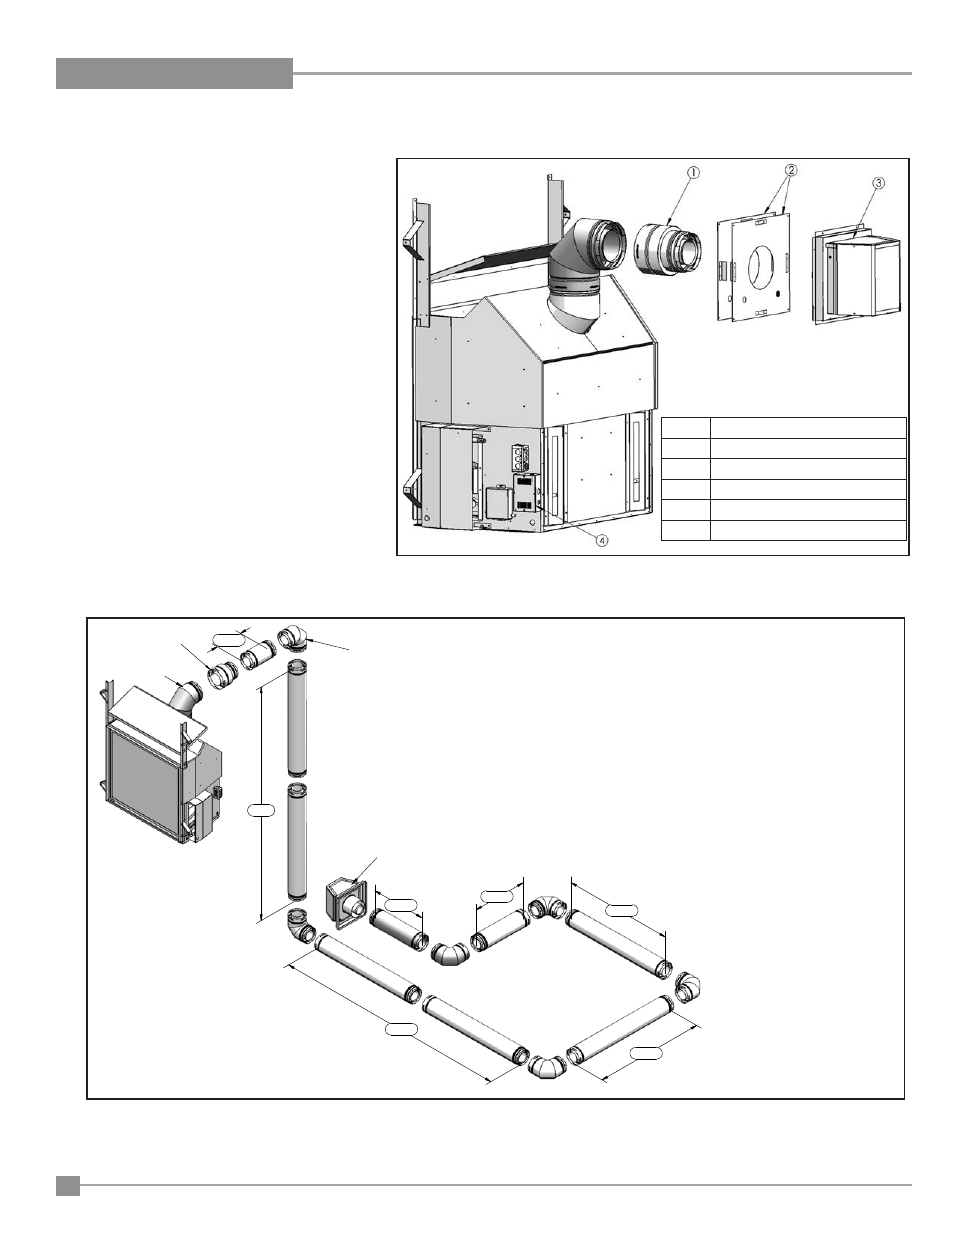
Figure 1: Power Vent Kit’s Parts Diagram.
Please ensure that your Power Vent Kit has not been
damaged.
1. Plan out the venting and wiring installation. Important
notes to consider when planning where the venting will be
installed:
•
Minimum horizontal vent run allowed with no rise
is 1 foot (305mm).
• Horizontal vent runs less than 8 feet (2.44m) require
a 60% restrictor. Refer to the Owner’s Manual on how to
install a restrictor.
• Maximum vent run is 100 feet (30.5m) (H
1
+ V + H
2
+
H
3
+ H
4
+ H
5
+ H
6
), refer to Figure 2.
• Maximum below-grade installation is 8 feet (2.4m) (V).
• Multi-elbow installations are possible up to a maximum
of six 90°.
• See Figure 4a for the typical overall dimensions with a
minimum horizontal vent installed.
• Refer to Figure 19 and Table 1 for vent termination
clearances and restrictions.
Item
Description
1
5”x8” to 4”x6⅝” Vent Reducer*
2
4”x6⅝” Wall Thimble
3
Power Vent Assembly
4
Power Vent Control Box
* Item not included
H1
V
H2
H3
H4
H5
H6
5"x8"
90
o
Elbow
5"x8" to 4"x6
5
/
8
"
Vent Reducer
4"x6
5
/
8
"
90
o
Elbow
Power Vent
Figure 2: Below-grade installation with maximum number of elbows.
POWER VENT KIT INSTALLATION
30
Regency L965E / HZ965E Gas Fireplace
INSTALLATION