Installation, Qualified installers only – Regency Liberty L965E Large Gas Fireplace User Manual
Page 20
QUALIFIED INSTALLERS ONLY
PLANNING YOUR INSTALLATION:
Prior to starting your venting installation, refer to the section on Allowable Vent Configurations to make sure your plans fall into the allowable limits of
horizontal and vertical installations.
When planning your installation, it will be necessary to select the proper length of vent pipe for your particular requirements. For horizontal installations,
refer to the section on Clearances to Combustibles to determine the minimum clearance from the rear of the appliance to the wall. It is also important
to note the wall thickness. Select the amount of vertical rise desired for “vertical-to- horizontal” type installations. To determine the length of vent pipe
required for vertical installations, measure the distance from the appliance flue outlet to the ceiling, the ceiling thickness, the vertical rise in an attic or
second story, and allow for sufficient vent height above the roofline. For two-story applications, firestops are required at each floor level. If an offset is
needed in the attic, additional pipe and elbows will be required.
ASSEMBLY OF THE UNIT:
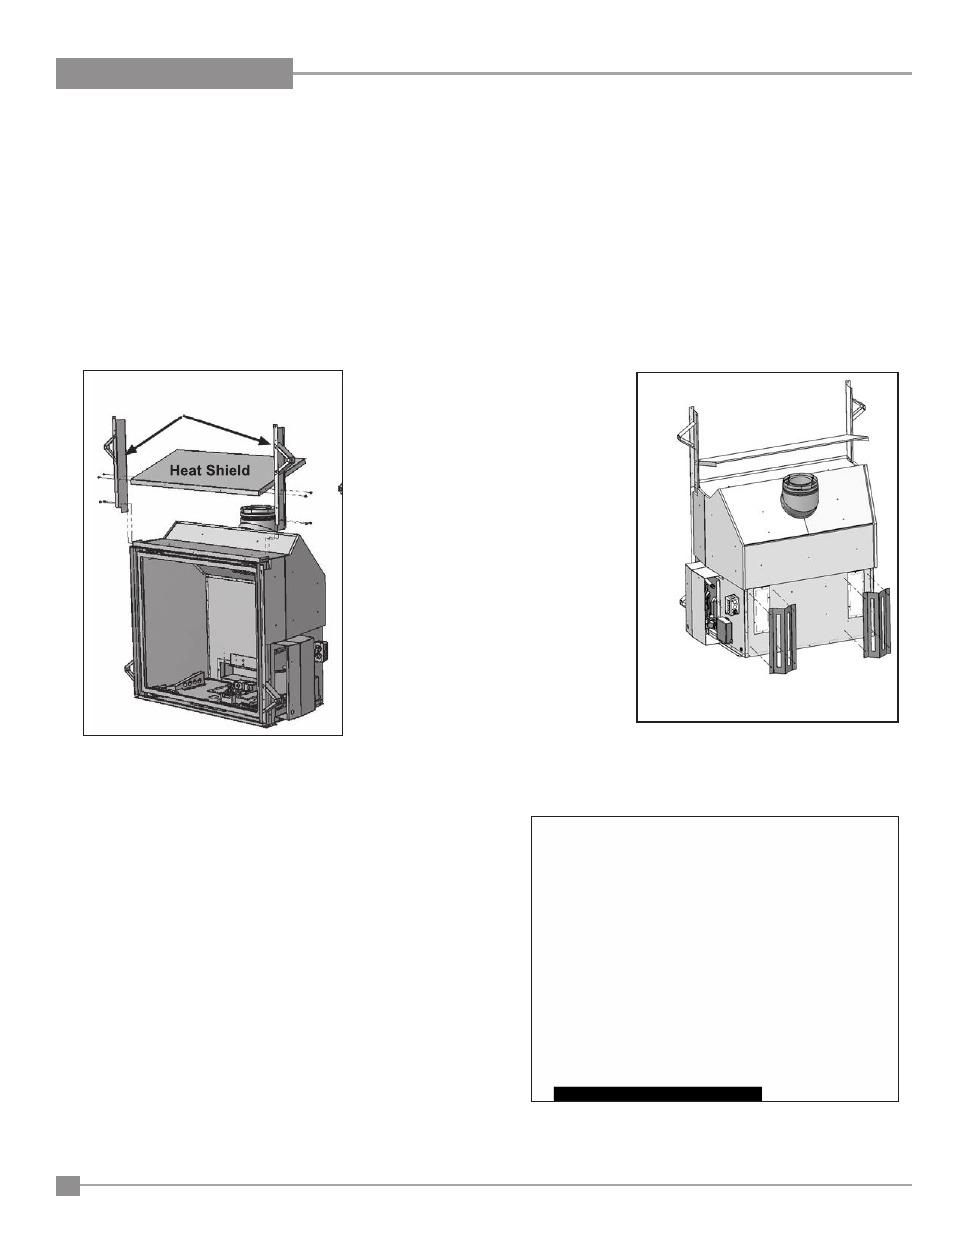
1.
Using eight (8) T-20 screws provided, install the
facing supports right and left as well as the heat
shield in the middle, as shown in Figure 28.
2
. Using eight (8) T20 screws provided, attach
both back stand-offs, as shown in Figure 29.
SECURING UNIT INTO POSITION:
Once the unit is in its final position, confirm that you have access to power, gas
supply, that your non-combustible zone requirements are met, that you meet all the
minimum vent requirements, and that your planned vent terminal location will meet
all of the vent termination clearances. Secure the unit to the floor, with at least four
(4) wood screws, two (2) on either side of the unit’s bottom nailing flange. Secure the
side stand-offs to the framing members using four (4) wood screws, one (1) for each
stand-off and to the header, one (1) wood screw for each facing support.
Left and Right
Facing Support
Figure 28: Installation of Supports & Heat
shield.
Figure 30: Securing the Unit.
Figure 29: Installation of Back Stand-Offs.
20
Regency L965E / HZ965E Gas Fireplace
INSTALLATION