Skyjacker TU761PRS User Manual
Page 9
6. Install the new Skyjacker u-bolts. (See Photo # 34)
7. Install the new Skyjacker rear shocks using the OEM hardware.
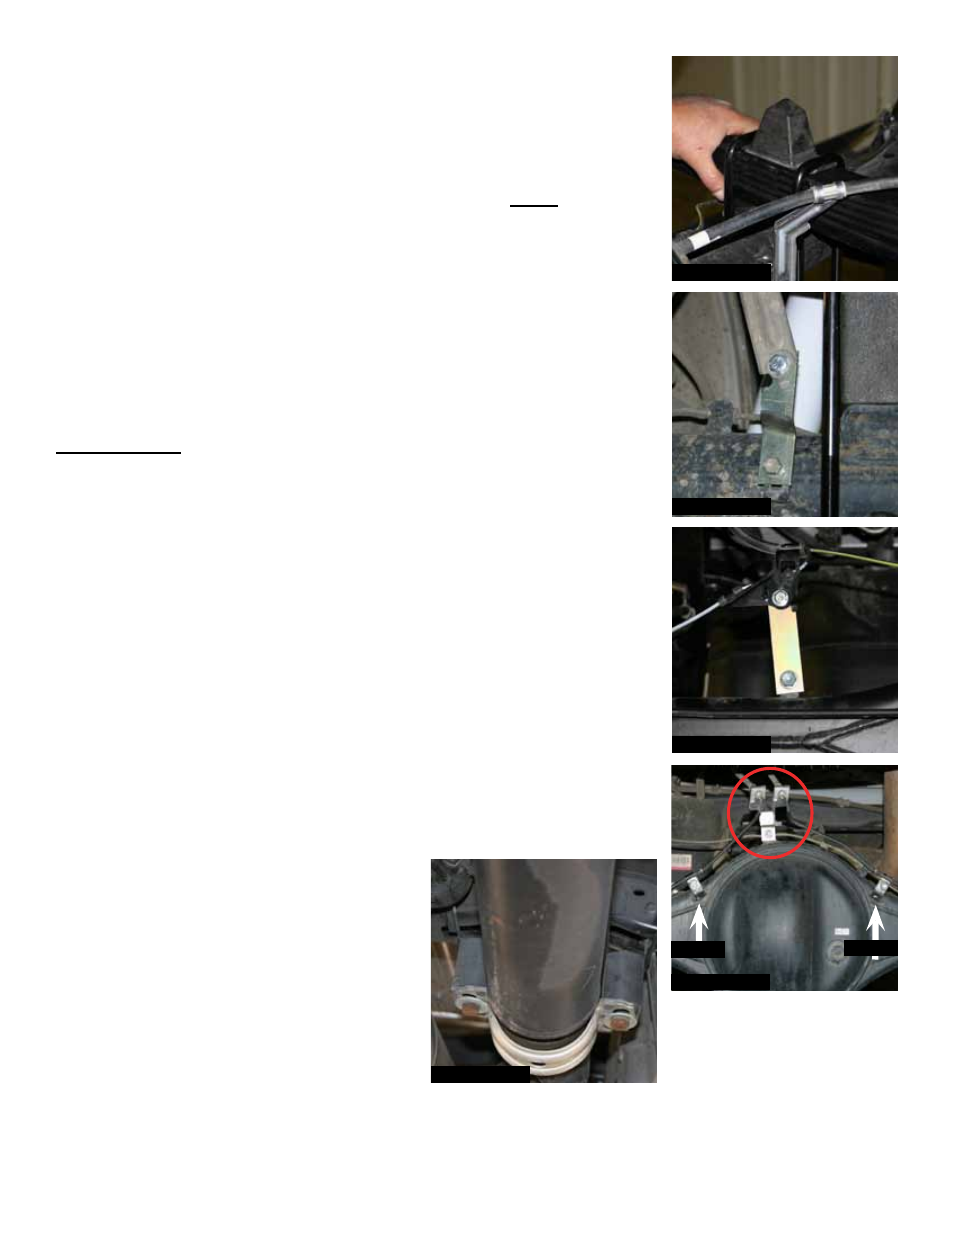
8. Install the new Skyjacker E-brake cable brackets, ABS line bracket, &
rear brake line bracket to the differential using the supplied 5/16" x
3/4" bolts & nuts. (See Photos # 35, # 36, & # 37)
Note: The OEM
rear brake line cable clamps must be inverted to raise the OEM
brake line up from the differential. (See Photo # 37)
9. Models equipped with an OEM carrier bearing will need to install the
new Skyjacker carrier bearing lowering spacers using the supplied
10mm x 80mm bolts & washers. (See Photo # 38)
10. Install the rear tires / wheels & lower the rear of the vehicle to the
ground.
FINAL NoTeS:
• After the installation is complete, double check that all nuts & bolts are
tight. Refer to the following chart for the proper torque specifications.
(Do not retighten the nuts & bolts where thread lock compound was
used.)
• With the vehicle on the ground, cycle the steering lock to lock &
inspect the steering, suspension, brake lines, front & rear drivelines,
fuel lines, & wiring harnesses for proper operation, tightness, &
adequate clearance.
• Have the headlights readjusted to the proper settings.
• Have a qualified alignment center realign the vehicle to the OEM
specifications.
• Retorque all the bolts after the first 100 miles.
Photo # 34
I-TU761
Pg 9
Photo # 35
Photo # 36
Photo # 38
Photo # 37
Invert
Invert