Skyjacker TU761PRS User Manual
Page 5
I-TU761
Pg 5
9.
4Wd Models: Support the front differential with a transmission jack.
(See Photo # 8)
10.
4Wd Models: Remove the differential mounting bolts & remove the
differential brackets. (See Photo # 9)
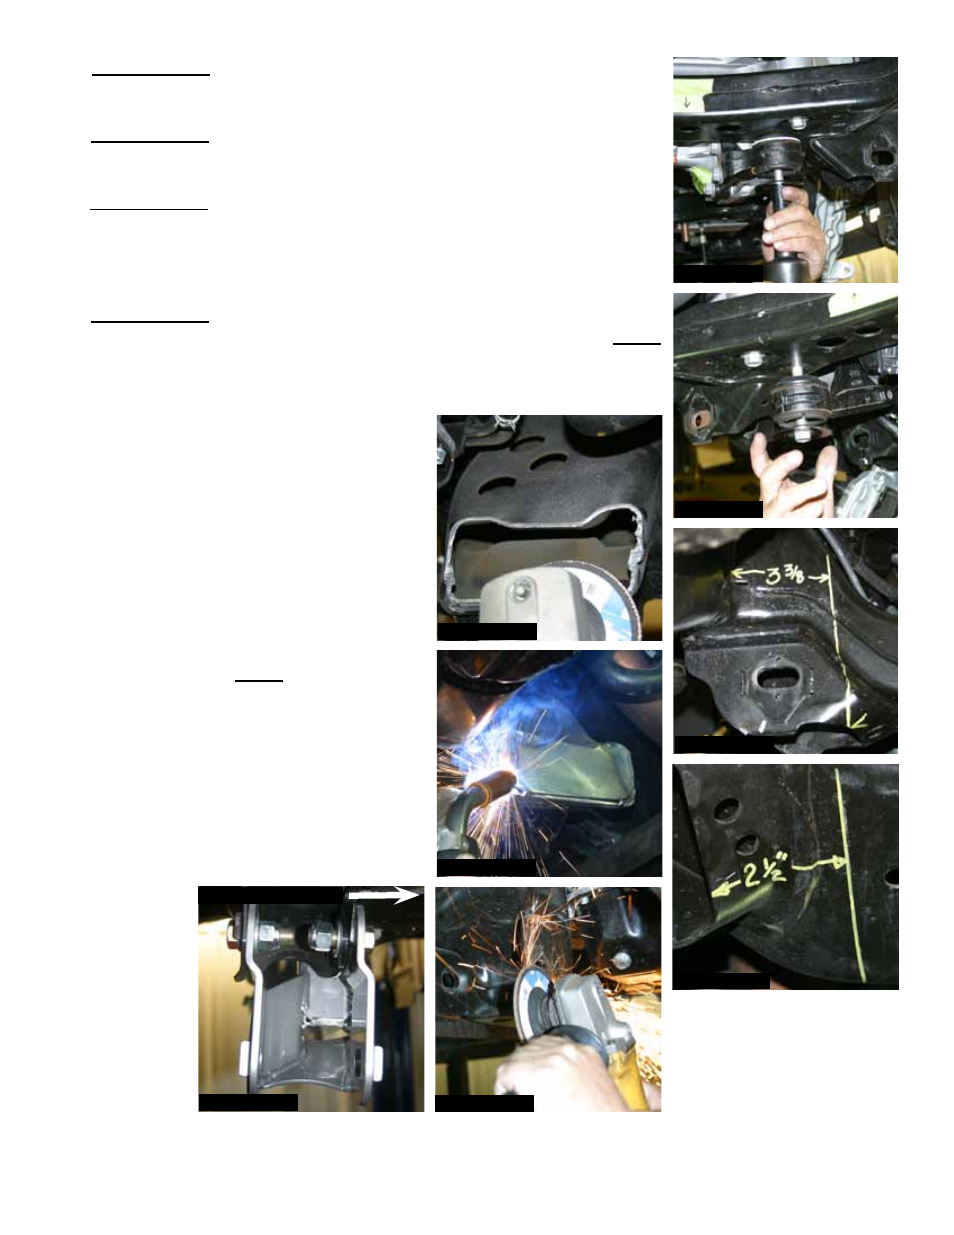
11.
4Wd Models: It will be necessary to cut the rear cross member with
a reciprocating saw. The driver side will need to be cut for front
driveshaft clearance. The measurement is 3 3/8” from the inside of
the frame rail. (See Photo # 10)
12.
4Wd Models: It will be necessary to cut the passenger side cross
member 2 1/2” from the lower A-arm mount. (See Photo # 11)
Note:
It will be necessary to grind down this area after cutting for the new
Skyjacker cross member caps to be welded in place. (See Photos
# 12 & # 13)
13. The OEM alignment cam brackets
(alignment ears) will need to be ground
down for the installation of the new
Skyjacker cross members. This will have
to be done on the front side of both front
& rear lower A-arm mounts. (See Photo
# 14)
14. Install the new Skyjacker front cross
member using the supplied 24MM bolts,
washers, & nuts.
Note: Do not tighten
the hardware completely at this time.
The cross member should be installed
with the bolt flanges on the front side of
the OEM cross member flanges. (See
Photo # 15)
Photo # 8
Photo # 9
Photo # 10
Photo # 11
Photo # 12
Photo # 14
Photo # 13
Photo # 15
Front of Vehicle