Skyjacker TJ403BPM User Manual
Page 7
4. Lower the rear axle down to remove the OEM rear coil springs.
Remove both the OEM coil springs & the OEM upper bump stops.
Note: Use channel lock pliers working the OEM bump stop back &
forth to remove.
5. Remove the OEM 10mm bolt from inside the OEM bump stop cup.
Install the new Skyjacker bump stop spacer & OEM bump stop cup
using the supplied 10mm
x 90mm bolts. Reinstall the OEM bump
stop in the OEM bump stop cup. (See Photo # 14)
6. Place the new Skyjacker rear track bar relocation bracket in position
& place the track bar in the new Skyjacker bracket.
Note: Do not
start its bolt. Start the supplied 12mm x 70mm bolt through the OEM
lower track bar location using the supplied spacer sleeve with a
self-locking nut & tighten the bolt to hold the bracket in place. (See
Photo # 15)
7. Drill a 1/2" hole through the hole in the end of the new Skyjacker
bracket. Remove the 12mm x 70mm bolt, installed before drilling, &
install the 1/2" x 1 1/2" bolt, with a washer on each side, through the
newly drilled hole & tighten the self-locking nut. Reinstall the new
12mm x 70mm bolt through the OEM track bar location using the
supplied spacer sleeve (See Arrow in Photo # 16) with a self-locking
nut.
Note: Do not tighten at this time.
8. Install new Skyjacker rear coil springs. Raise the jack up so that
enough load is applied to hold the coil springs in place.
9. Remove & replace the OEM lower links with the new Skyjacker
extended lower links (One side at a time).
Note: Only start these
bolts, do not tighten at this time. (See Photo # 17)
10. Attach the OEM track bar to the new Skyjacker relocation bracket on
the axle & to the OEM upper location on the passenger side frame
using the OEM hardware.
Note: Do not tighten at this time.
11. Assemble the new Skyjacker rear
extended sway bar links by applying
grease to the metal sleeves & inserting
them into each eye. Install using the OEM
hardware. (See Arrow in Photo # 17)
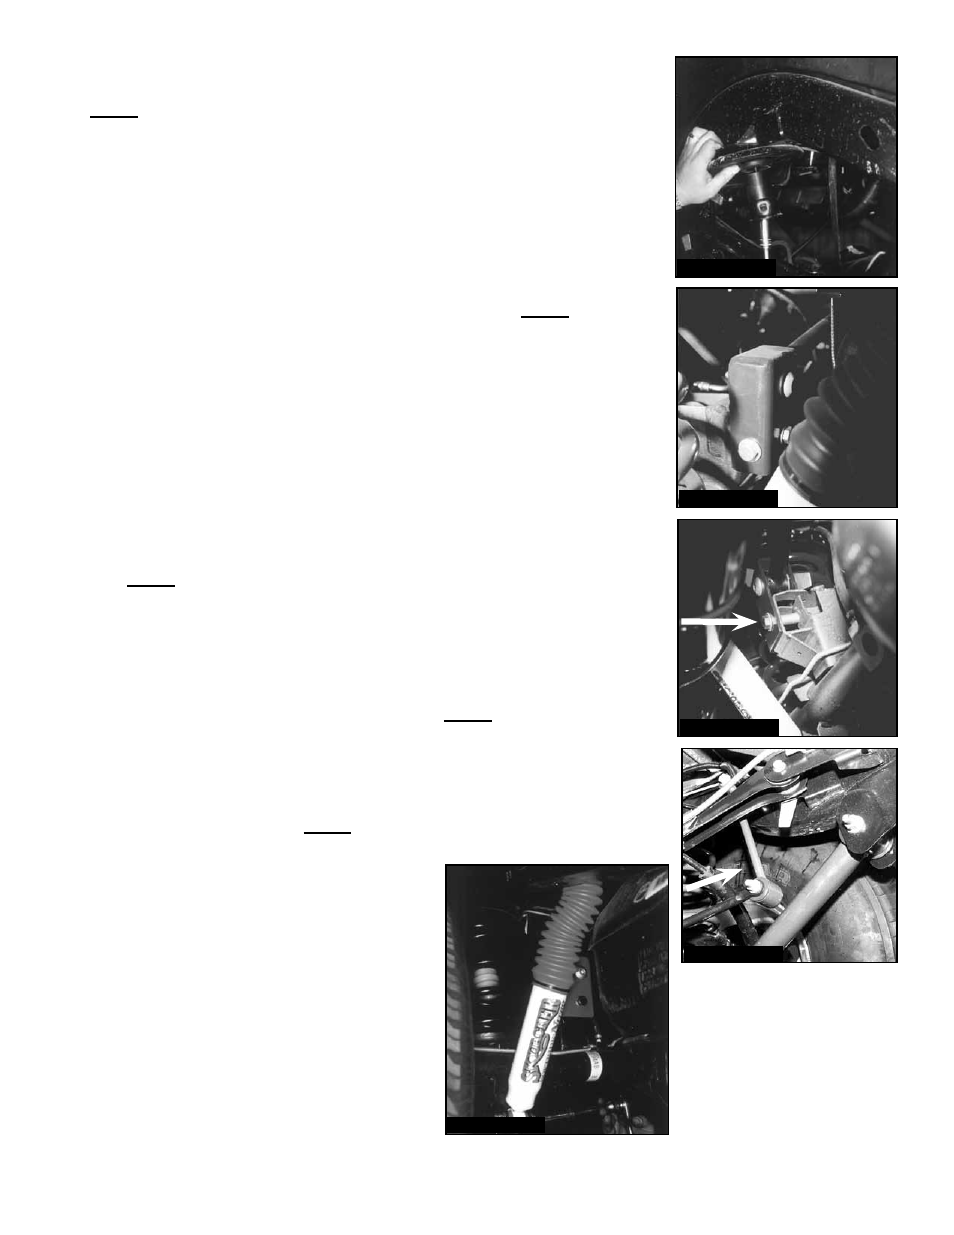
12. Install the new Skyjacker rear shocks.
(See Photo # 18)
13. Install the rear tires & lower the vehicle to
the ground.
I-TJ4013B
Pg 7
Photo # 14
Photo # 15
Photo # 16
Photo # 17
Photo # 18