Skyjacker TJ403BPM User Manual
Page 5
9. Remove the OEM 10mm bolt from inside the OEM bump stop cup.
Install the new Skyjacker bump stop spacer & OEM bump stop cup
using the supplied 10mm
x 90mm bolts. Reinstall the OEM bump
stop in the OEM bump stop cup. (See Photo # 4)
10. Install the new Skyjacker coil springs. Raise the jack up so that
enough load is applied to hold the new Skyjacker coil springs in
place. Reinstall the OEM spring bolt & clip at the bottom of the left
front coil spring.
11. Install the new Skyjacker front shocks. (See Photo # 5)
12. Reinstall the OEM drag link to the new Skyjacker pitman arm &
tighten.
Note: Be sure to install the OEM cotter pin.
13. Install the front tires & lower the vehicle to the ground.
14. Locate the OEM front track bar mounting bracket on the axle,
measure straight across (Inward) 3/4" & put a mark. Center punch &
drill a 7/16" hole through both front & back plates, keeping the drill
as straight & square to the bracket as possible. (See Photo # 6)
Reattach the OEM front track bar using the OEM hardware.
15. The new Skyjacker end link mounting bracket should be mounted to
the bottom of the OEM sway bar with the bolt pointing up through
the sway bar & the nut & washer applied on top. (See Photo # 7)
Note: Apply lithium grease to the metal sleeves & insert the metal
sleeves into the end link eyes. The top 1/2" x 2 1/2" bolt connecting
the bracket to the end link must be installed with the nut to the
outside of the vehicle to provide adequate clearance to the frame.
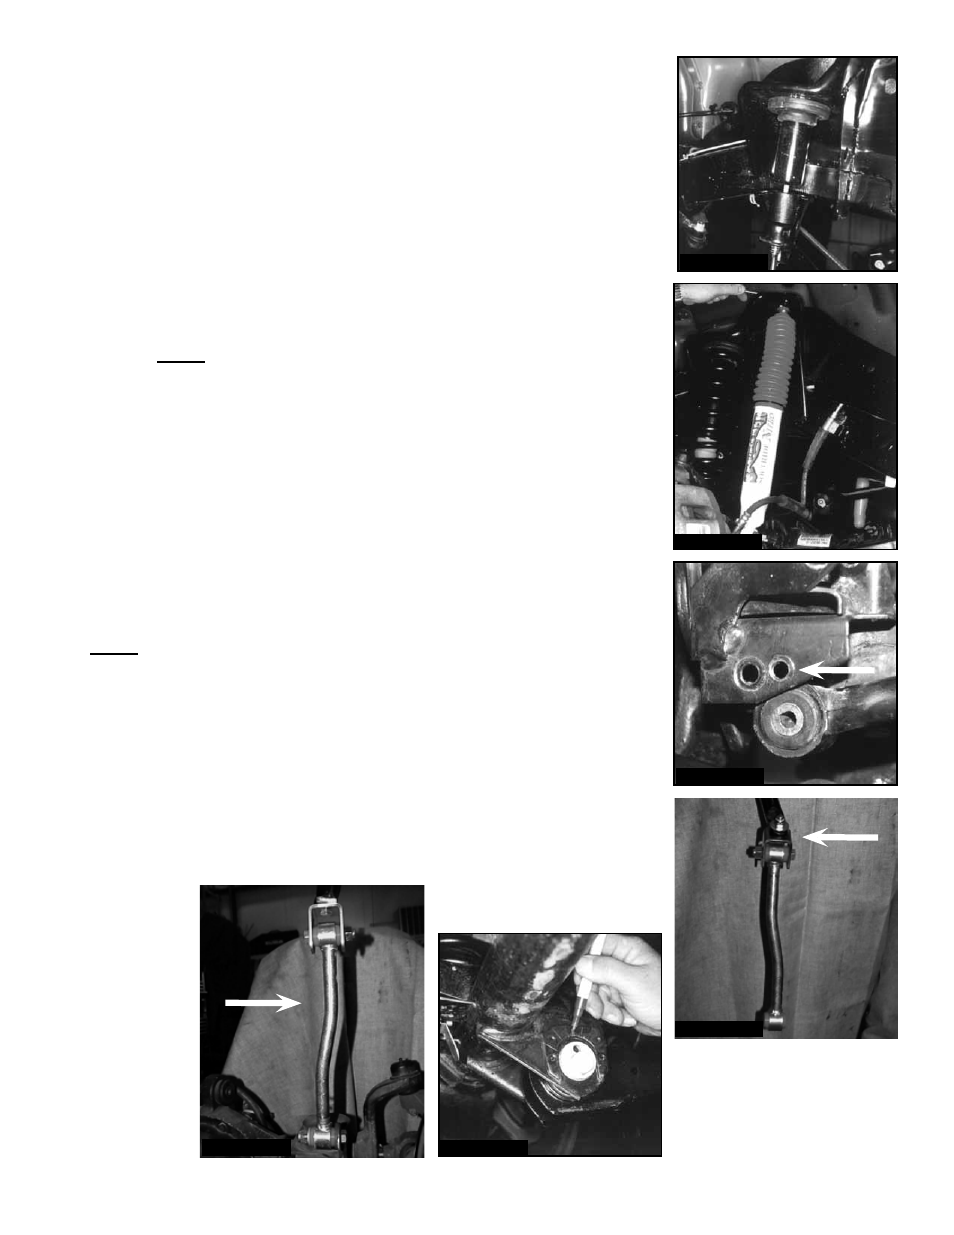
Install the new Skyjacker end links on the inboard side of the axle,
being sure that the offset is turned correctly. (See Photo # 8)
16. At the front lower link adjustment cams, mark (with an ink marker or
scribe a mark) the vertical line on the cam & the reinforcement bracket
for reference so you can realign the marks after installation. (See
Photo # 9)
I-TJ4013B
Pg 5
Photo # 4
Photo # 5
Photo # 6
Photo # 7
Photo # 9
Outboard
Photo # 8