Skyjacker FAA301 User Manual
Page 7
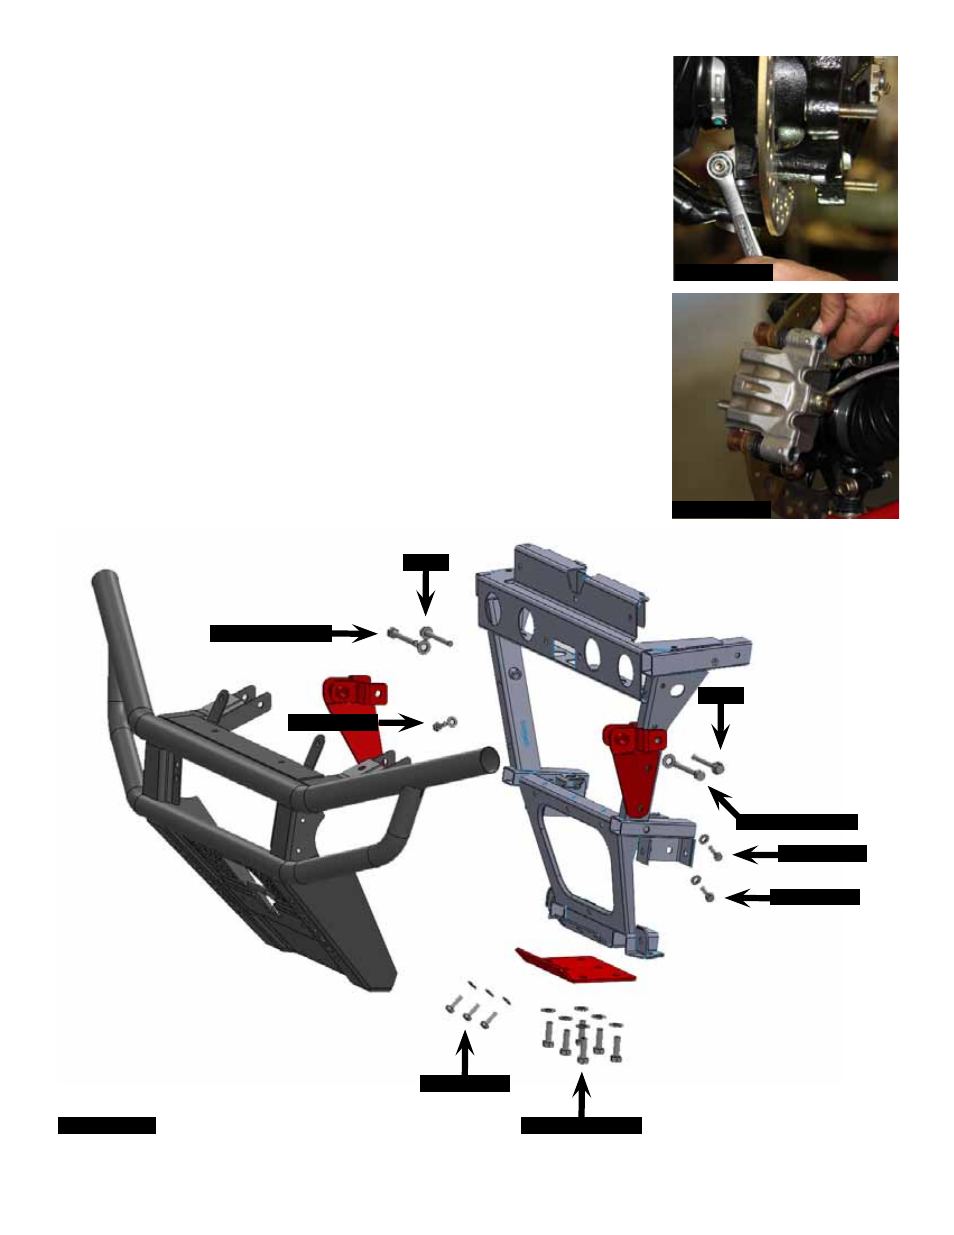
37. Attach the new Skyjacker lower A-arms to the steering knuckles using
the OEM hardware & a 13mm socket. (See Photo # 30)
38. Attach the brake caliper assemblies using the OEM hardware & a
15mm socket. (See Photo # 31)
39. Install the new Skyjacker upper bumper brackets to the frame using
the supplied 5/16” x 1” bolts, washers, nuts, OEM hardware, 1/2”
socket, & a 15mm socket. (See Photo # 32)
40. Attach the front bumper assembly to the new Skyjacker upper
bumper brackets using the supplied 7/16” x 3 1/2” bolts, washers,
nuts, & a 5/8” socket. (See Photo # 32)
41. Install the new Skyjacker lower bumper bracket using the supplied
5/16” x 1” bolts, 7/16” x 1 1/4” bolts, washers, nuts, 1/2” socket, & a
5/8” socket. (See Photo # 32)
42. Install the front tires / wheels using a 17mm socket & lower the front
of the vehicle to the ground.
I-FAA301
Pg 7
Photo # 30
Photo # 31
oeM
oeM
7/16" x 3 1/2"
7/16" x 3 1/2"
5/16" x 1"
5/16" x 1"
5/16" x 1"
5/16" x 1"
7/16" x 1 1/4"
Photo # 32