Skyjacker FAA301 User Manual
Page 4
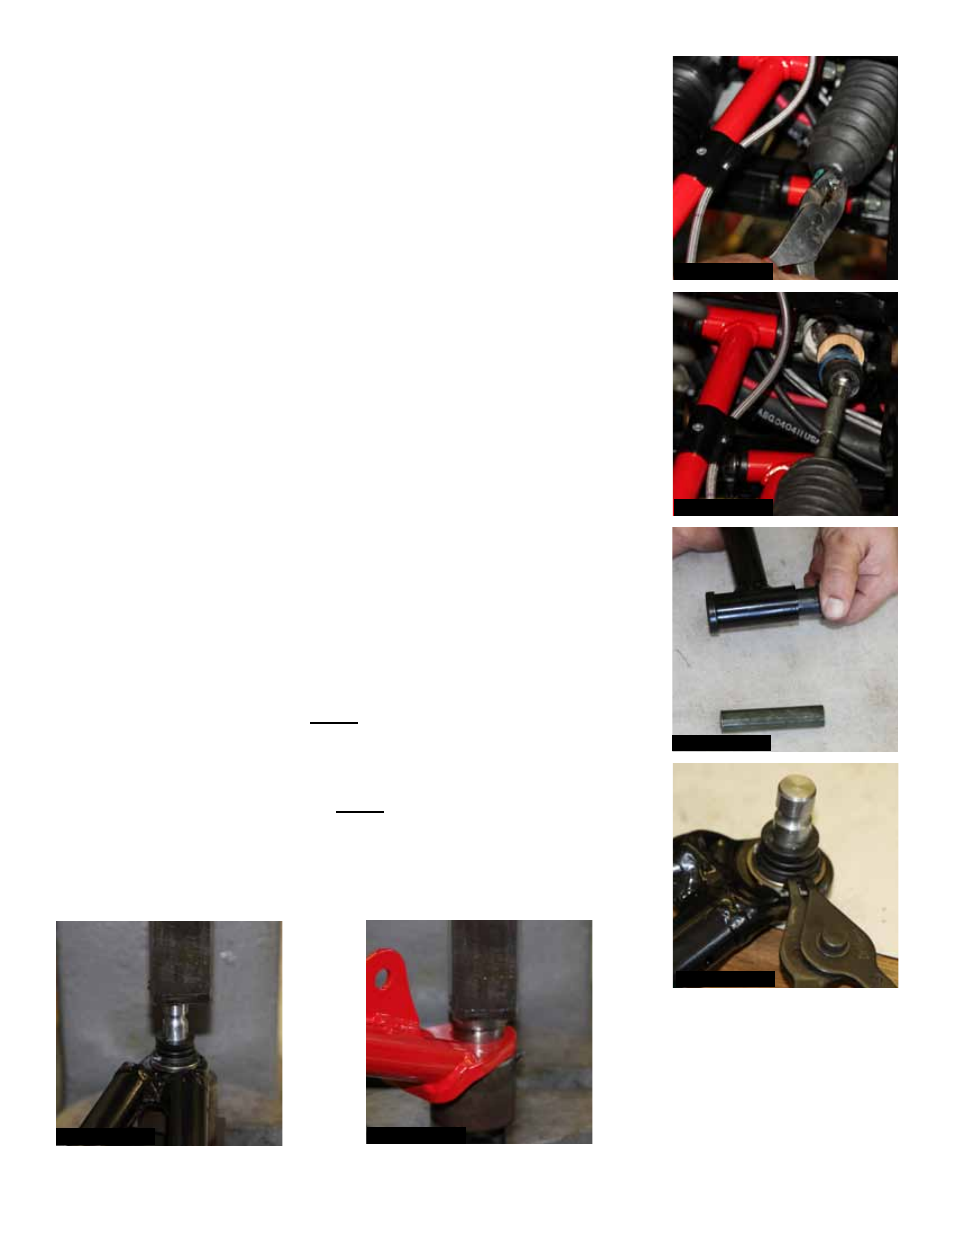
13. Remove the outer clamp & inner plastic tie from the rack & pinion
boots. Slide the rack & pinion boots toward the outer tie rods. (See
Photo # 11)
14. Rotate the steering wheel to full lock to the passenger side & install
the new Skyjacker driver side steering stop spacer onto the rack &
pinion shaft behind the inner tie rod. (See Photo # 12)
15. Rotate the steering wheel to full lock to the driver side & install the
new Skyjacker passenger side steering stop spacer onto the rack &
pinion shaft behind the inner tie rod. (See Photo # 12)
16. Slide the rack & pinion boots toward the inner tie rods & install the
rack & pinion boots using the OEM outer clamps & supplied plastic
ties. (See Photo # 11)
17. Install the previously trimmed plastic inner fender liners using the
OEM hardware.
18. Remove the bushings & sleeves from the OEM upper & lower
A-arms. (See Photo # 13)
19. Install the new Skyjacker bushings & OEM sleeves into the new
Skyjacker upper & lower A-arms. (See Photo # 13)
20. Remove the retaining ring from the ball joint of each OEM upper &
lower A-arm. (See Photo # 14)
21. Remove the ball joint from each OEM upper & lower A-arm using an
arbor press or similar tool.
Note: Be careful not to damage the ball
joints. (See Photo # 15)
22. Install a ball joint into each new Skyjacker upper & lower A-arm using
an arbor press or similar tool.
Note: Be careful not to damage the ball
joints. (See Photo # 16)
23. Install a retaining ring to each ball joint of the new Skyjacker upper &
lower A-arms. (See Photo # 14)
I-FAA301
Pg 4
Photo # 11
Photo # 12
Photo # 13
Photo # 14
Photo # 15
Photo # 16