Skyjacker FAA301 User Manual
Page 6
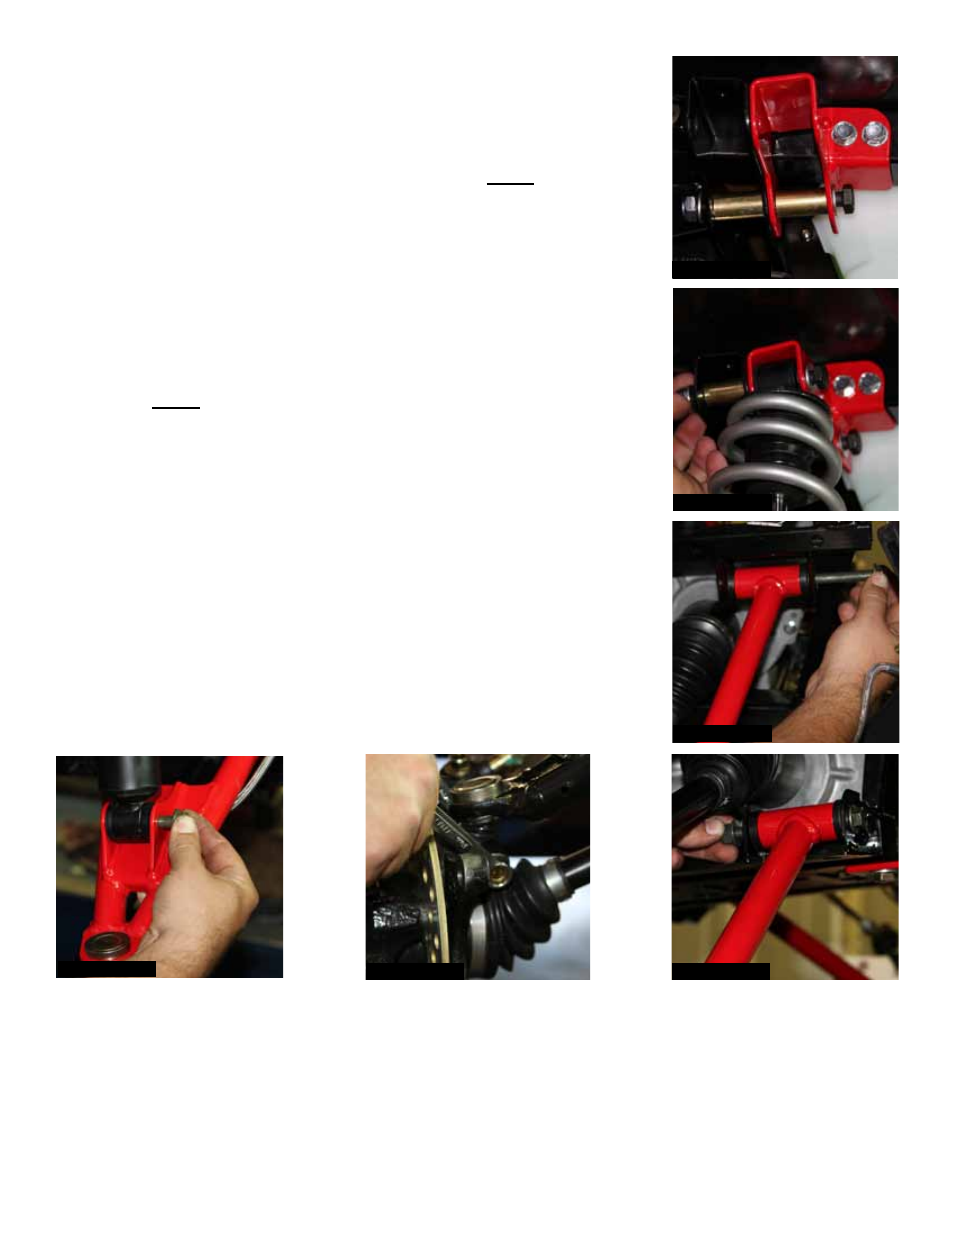
31. Remove the 10mm x 100mm bolt, washers, & nut that are to the
inside of the frame on each new Skyjacker upper shock bracket &
install two of the new Skyjacker sleeves (Part # CS1281) into the two
inside upper shock mounting locations. Reinstall the 10mm x 100mm
bolt, washers, & nut through each new Skyjacker upper shock bracket
& new Skyjacker sleeves using a 17mm socket.
Note: Do not tighten
at this time. (See Photo # 24)
32. Remove the 10mm x 100mm bolt, washers, & nut that are to the
outside of the frame on each new Skyjacker upper shock bracket.
Install the new Skyjacker sleeve (Part # CS1281) into the rear outside
upper shock mounting location & the shock assembly into the forward
outside upper shock mounting location. Reinstall the 10mm x 100mm
bolt, washers, & nut through each new Skyjacker upper shock
bracket, upper shock eyelet, & new Skyjacker sleeve using a 17mm
socket.
Note: Tighten all upper shock bracket mounting hardware at
this time. (See Photo # 25)
33. Install the new Skyjacker upper A-arms using the OEM hardware & a
15mm socket. (See Photo # 26)
34. Attach the lower shock eyelet to each new Skyjacker upper A-arm
using the OEM hardware & a 15mm socket. (See Photo # 27)
35. Attach the new Skyjacker upper A-arms to the steering knuckles using
the OEM hardware & a 13mm socket. (See Photo # 28)
36. Install the new Skyjacker lower A-arms using the OEM hardware & a
15mm socket. (See Photo # 29)
I-FAA301
Pg 6
Photo # 24
Photo # 25
Photo # 26
Photo # 27
Photo # 28
Photo # 29