Vertical seam – Metal Sales Vertical Seam Installation User Manual
Page 47
800.406.7387 • www.metalsales.us.com
© Metal Sales Manufacturing Corporation Subject to change without notice Effective Date 5/13
47
VERTICAL SEAM
Z-c
loSure
I
nStallatIon
3:12 Slope
Minimum
#10-16 x 1" PHD or
#10-12 x 1" PHW
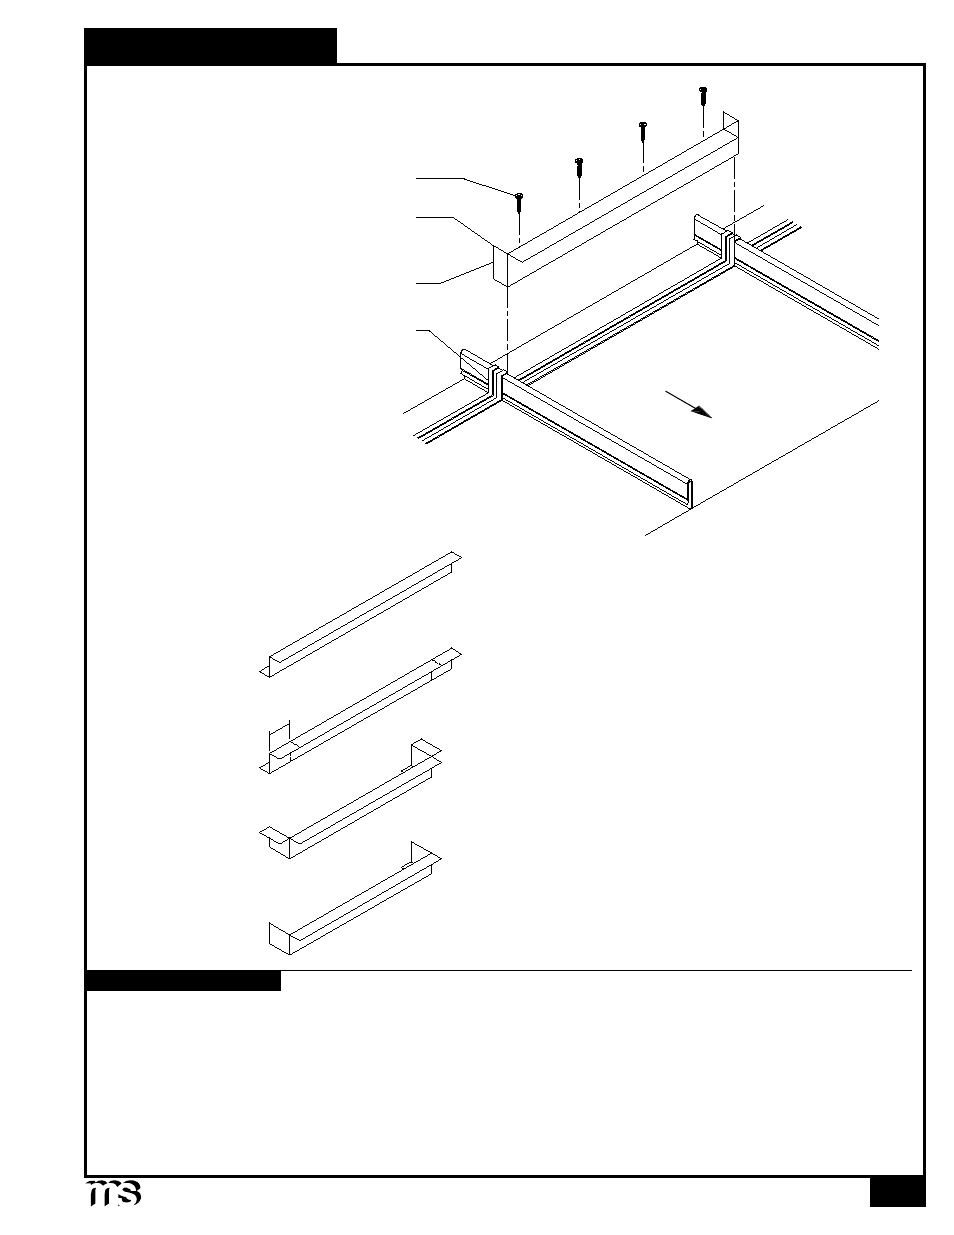
Vertical Seam Z-Closure
Field cut and bend back 1"
Double Bead Tape Sealant
1. Place a row of Double Bead Tape Sealant across panel and over each rib approximately 4" from panel end. Before proceeding,
make sure Z-Closure placement will accommodate flashing.
2. Field cut the Z-Closure 2" longer than the panel width. Snip the top and bottom leg of the Z-Closure and bend both sides back
(as shown above).
3. Fasten through the Z-Closure, Tape Sealant, Vertical Seam panel, and substrate with (4) (#10-12 x 1" PHW for solid decking,
or #10-16 x 1" PHD for open framing).
Note: For open framing, the substrate will be the Back-up Channel shown in the details.
4. Apply a row of Double Bead Tape Sealant across the top of the Z-Closure filling any gaps or openings around the panel ribs.
This will be fastened through when the flashing is installed.
Field cut and bend back 1"
INSTALLATION NOTES