Step 1 step 2, Vertical seam – Metal Sales Vertical Seam Installation User Manual
Page 34
800.406.7387 • www.metalsales.us.com
© Metal Sales Manufacturing Corporation Subject to change without notice Effective Date 5/13
VERTICAL SEAM
34
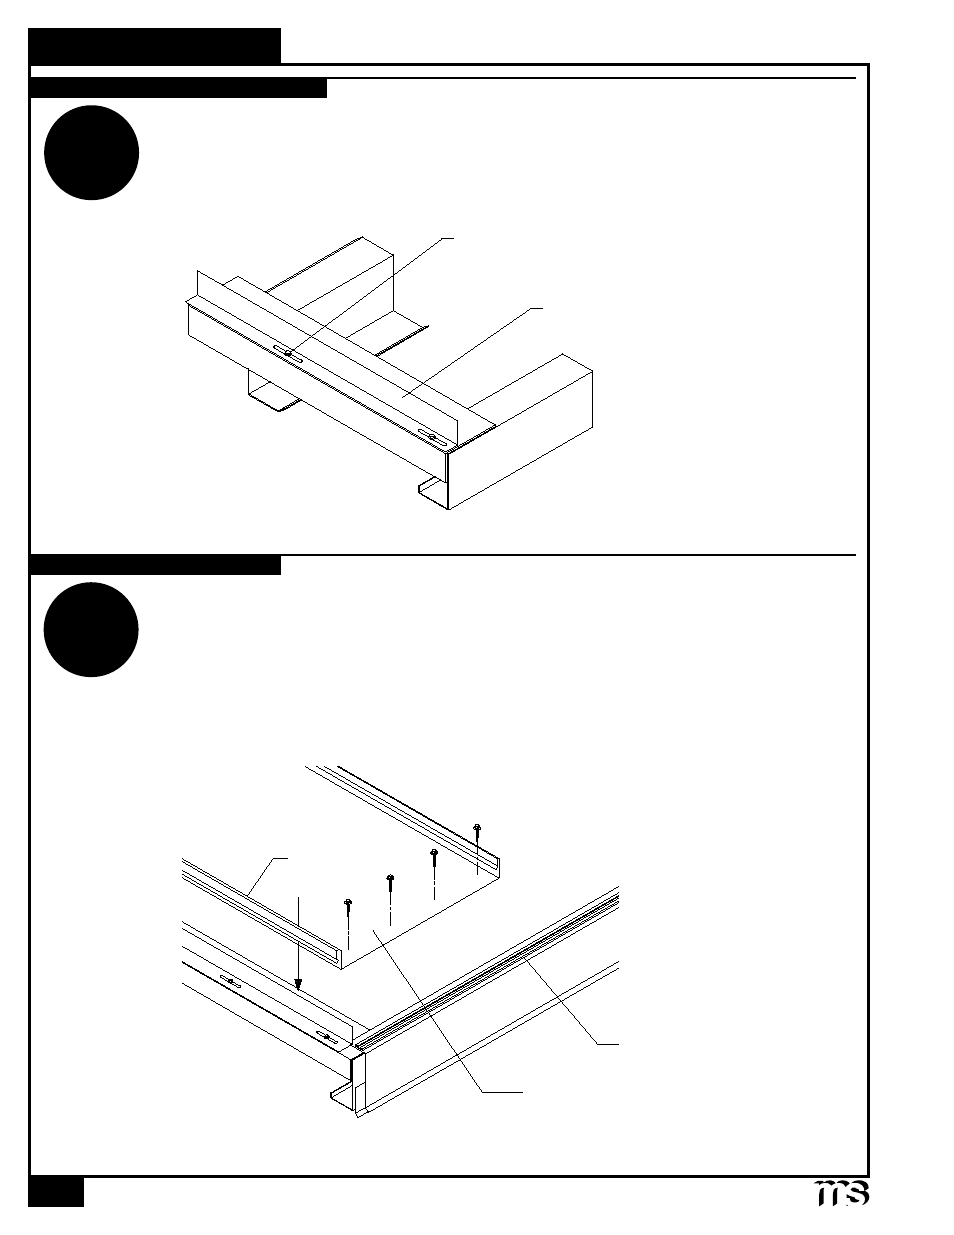
1. Install Floating Rake Angle at all rake and rake parapet conditions. Square Floating Rake Angle to rake
condition. It is critical that Floating Rake Angle be square to building as this will control alignment
of panels (see page 15 to check building square).
2. Fasten to framing with #12-14 x 1
1
/
4
" Shoulder Self Driller screws at 1'-0" o.c. Do not over tighten
screws for it is imperative that the Vertical Seam roof system be allowed to float.
3. If two or more Floating Rake Angles are required, butt ends. Do not overlap Floating Rake Angles.
I
nStallatIon
of
p
anel
o
ver
o
pen
f
ramIng
Note: Insulation, Eave, Gutter, and Valley flashings must first be installed before panel installation
can begin (see pages 36-39). Vertical Seam panels must be installed going from left to right when
looking from eave to peak.
1. Apply a row of Double Bead Tape Sealant across the top leg of the Eave (Extended Eave, Gutter) flashing.
2. Install the first panel so that the female leg is on top of the Floating Rake Angle, and has the proper
overhang. Make sure that the panel is square to the eave and rake.
3. Fasten Vertical Seam panel with (4) #12-14 x 1
1
/
4
" Self Driller XL screws through the Double Bead
Tape Sealant, flashing, and into the framing (as shown below).
INSTALLING FIRST PANEL
INSTALLING FLOATING RAKE ANGLE
STEP
1
STEP
2
Square Floating Rake Angle to Rake
Fasten Floating Rake Angle with
Shoulder Self Driller (1'-0" o.c.)
Vertical Seam Panel
Female Leg
Double Bead Tape Sealant