Step 3 step 4, Vertical seam – Metal Sales Vertical Seam Installation User Manual
Page 21
800.406.7387 • www.metalsales.us.com
© Metal Sales Manufacturing Corporation Subject to change without notice Effective Date 5/13
21
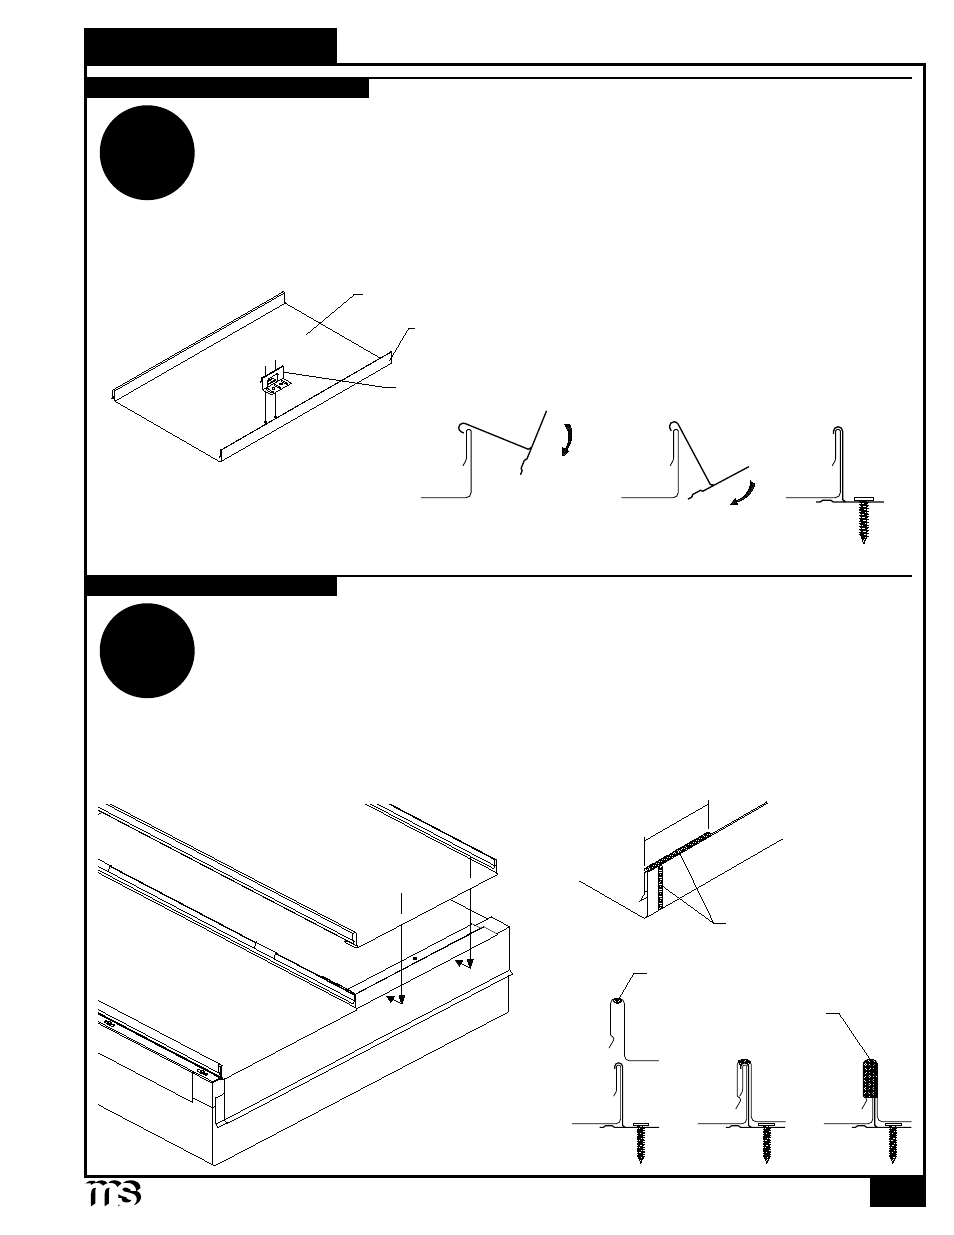
VERTICAL SEAM
I
nStallatIon
of
p
anel
o
ver
d
eckIng
(
cont
.)
1. Once the first panel has been installed, roll the first clip into lock position over the male leg of the
panel (see below).
2. Fasten the Vertical Seam clip to the deck with the proper type and number of fasteners (see chart on page 17).
If a fastener strips out, remove the clip and reposition it so the fastener can drill a new hole at least
3
/
8
" from
the stripped hole or install an oversized fastener into the stripped hole. Failure to do so will impact the system
to resist the applied loads.
3. Repeat steps 1 and 2 to install clips along the male leg of the panel from eave to peak. For certain building
codes and state or county specifications, special clip spacing may be required. Please contact Metal Sales for
specific clip and fastener spacing.
INSTALLING SECOND PANEL
1. Prior to installing the second Vertical Seam panel, Tube Sealant must be placed on the male leg of the
first panel (see below).
2. Place the second panel on top of previously installed panel so that the second hemmed panel can be
engaged with the Offset Cleat.
3. Begin snapping the panels together working from eave to peak. It is critical that panels only be snapped
in one direction.
4. Repeat steps 2 and 3 for remaining panels.
5. Make sure all panels are properly snapped into place. Also clean any debris and excess sealant before
continuing to the next section of the roof.
6. Once installation is complete, fill the end of each panel rib with Tube Sealant (as shown below).
STEP
3
STEP
4
INSTALLING VERTICAL SEAM CLIP
Vertical Seam Panel
Vertical Seam Clip
Engage Clip to Panel in circular motion for proper seating.
Male Leg
2" to 4"
Minimum
Factory applied Sealant
Field applied Tube Sealant
Field applied Tube Sealant