Vertical seam – Metal Sales Vertical Seam Installation User Manual
Page 39
800.406.7387 • www.metalsales.us.com
© Metal Sales Manufacturing Corporation Subject to change without notice Effective Date 5/13
39
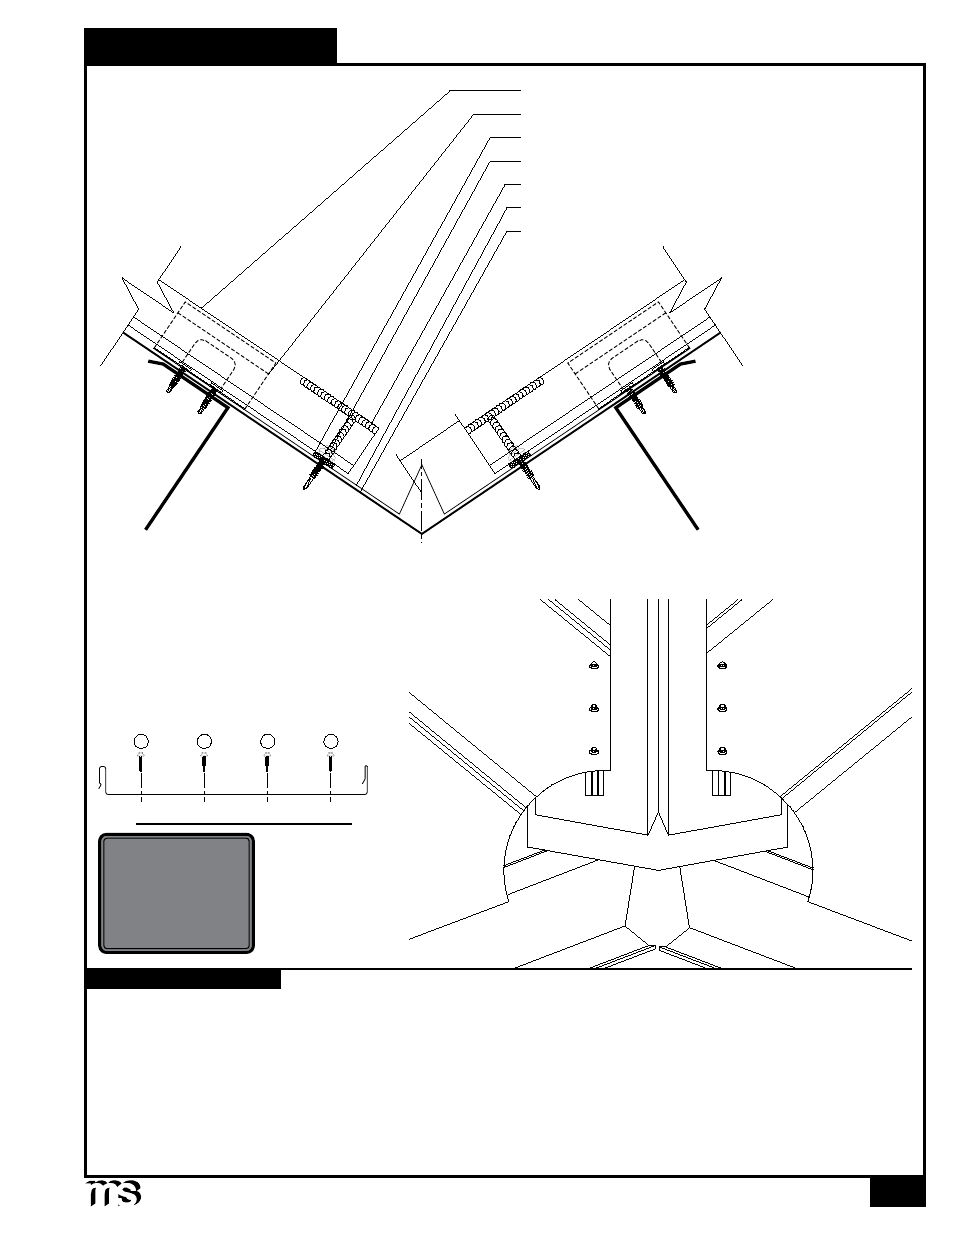
VERTICAL SEAM
v
alley
o
ver
o
pen
f
ramIng
All Valley Flashings must be installed prior to panel installation. If two or more Valley Flashings are required, Valley must
be installed working from Eave to Peak.
1. Install Valley flashing back against substrate and fasten with #10-16 x 1" Pancake Head Driller (4'-0" o.c.) to hold flashing
place during installation.
2. Apply a row of Double Bead Tape Sealant across both sides of Valley flashing about 3" from the center of the valley.
3. Field cut the Vertical Seam panel to the appropriate angle and install over the Valley flashing, with (5) #12-14 x 1
1
/
4
" Self
Driller XL screws, as shown above (see pages 34-35 for panel installation).
4. If two or more flashings are required, lap the flashing over the previously installed flashing by a minimum of 2" placing a bead
of Tube Sealant between the flashings and securing with (2) pop rivets in the 1" water diverter.
Vertical Seam Clip
Valley
Vertical Seam Panel
Tube Sealant
Valley Plate
#12-14 x 1
1
/
4
" SD XL (see below)
Double Bead Tape Sealant
CAUTION
Additional screws
may be required for
high snow loading
and steep slopes.
3"
Min.
INSTALLATION NOTES
3
1
2
4
Vertical Seam Fastening Pattern
3:12 Slope
Minimum