Vertical seam – Metal Sales Vertical Seam Installation User Manual
Page 33
800.406.7387 • www.metalsales.us.com
© Metal Sales Manufacturing Corporation Subject to change without notice Effective Date 5/13
33
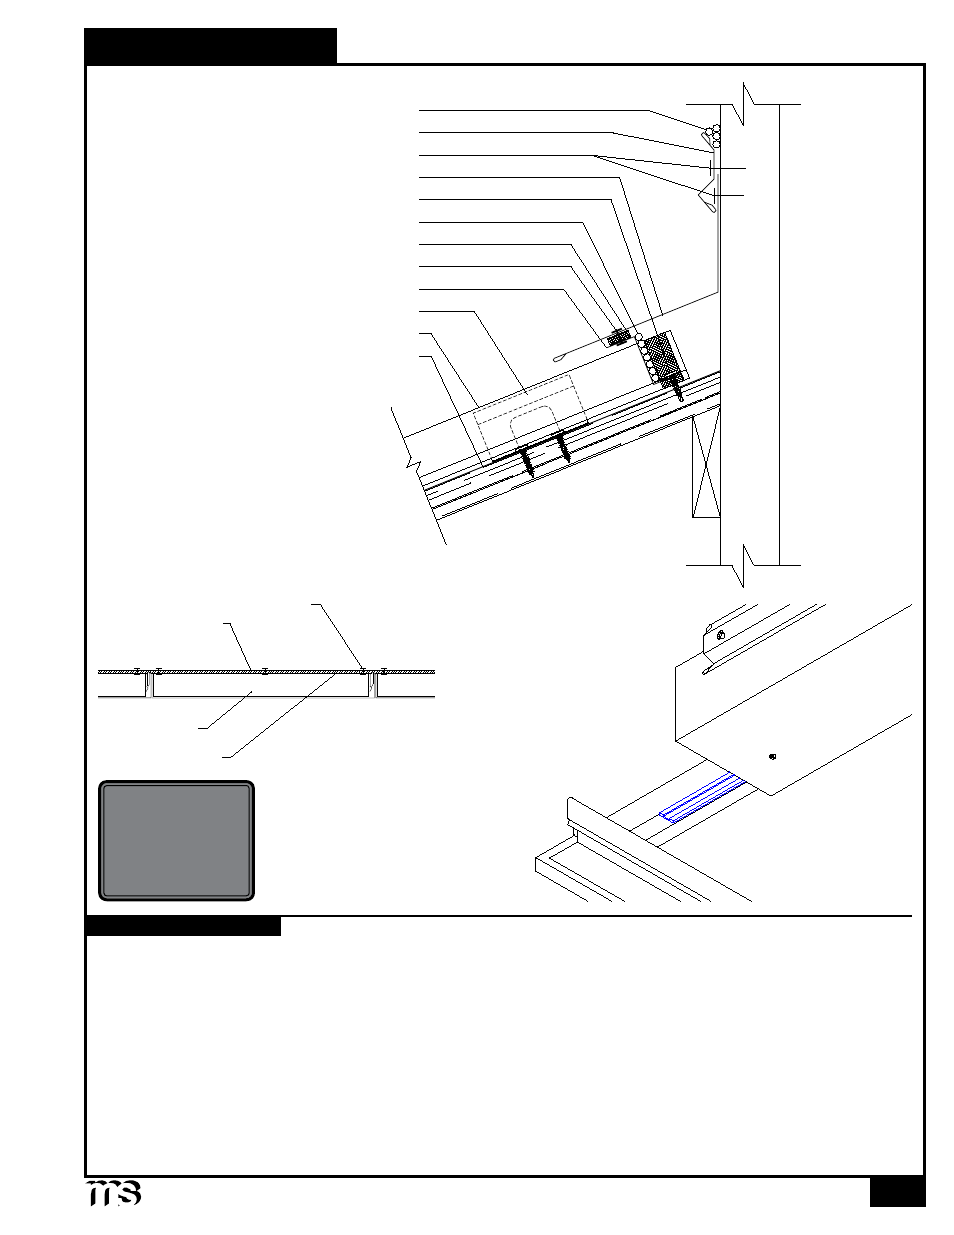
VERTICAL SEAM
h
IghSIde
p
arapet
o
ver
d
eckIng
1. Once panels have been installed, field cut the Vertical Seam Z-Closure (see page 47) to fit between the panel ribs.
2. Place a row of Double Bead Tape Sealant across panel and over each panel rib approximately 2" from panel end. Before
proceeding make sure Z-Closure placement will accommodate Pitch Break flashing.
3. Install field cut Z-Closure (as shown on page 47).
4. Fasten Z-Closure through panel with #10-12 x 1" Pancake Head Woodscrews (4 per panel).
5. Apply a continuous bead of Tube Sealant across top leg of Z-Closure filling any gaps or openings around panel ribs. Position
and install Pitch Break flashing to Z-Closure with
1
/
8
" x
3
/
16
" Pop Rivets (as shown).
6. Fasten vertical leg of Pitch Break to the parapet wall with the appropriate fastener. (1'-0" o.c.)
7. Install Counter Flashing, Reglet, or wall panel and fasten to parapet wall with appropriate fastener 1'-0" o.c. If Counter
Flashing or Reglet is used, seal to parapet wall with tube sealant. Do NOT fasten Rakewall to wall.
8. If two or more flashings are required, lap the flashing over the previously installed flashing by a minimum of 2" placing a bead
of Tube Sealant between the flashings and securing with pop rivets 2
1
/
2
" o.c.
Counter Flashing
Tube Sealant
Tube Sealant
#10-12 x 1" PHW (4 per panel)
Pitch Break
1
/
8
x
3
/
16
" Pop Rivet (see below)
Double Bead Tape Sealant
Fasteners (by others)
Vertical Seam Panel
Vertical Seam Clip
Vertical Seam Z-Closure
Moisture Barrier (by others)
CAUTION
Additional screws
may be required for
high snow loading
and steep slopes.
INSTALLATION NOTES
Pop Rivet
Flashing
Z-Closure
Tape Sealant
1:12 Slope
Minimum
over Solid
Substrate