Vertical seam – Metal Sales Vertical Seam Installation User Manual
Page 36
800.406.7387 • www.metalsales.us.com
© Metal Sales Manufacturing Corporation Subject to change without notice Effective Date 5/13
VERTICAL SEAM
36
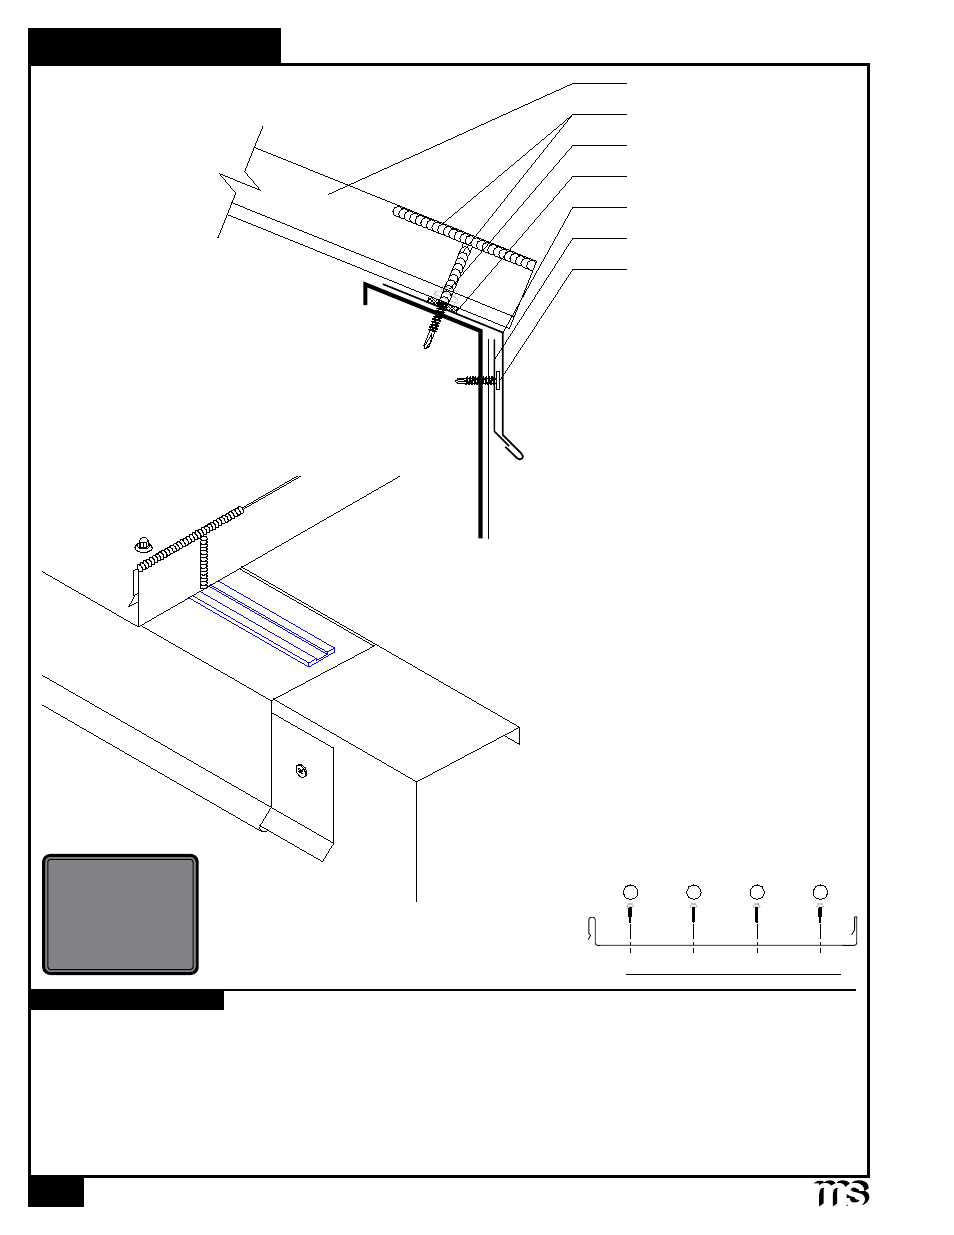
Cleat
#10-16 x 1" PHD (1'-0" o.c.)
Double Bead Tape Sealant
Vertical Seam Panel
e
ave
o
ver
o
pen
f
ramIng
Eave
All Eave flashings must be installed prior to panel installation.
1. Position and install Cleat to wall with appropriate fastener, 1'-0" o.c. Make sure Cleat allows for proper Eave attachment.
2. Install Eave flashing by sliding open hem onto Cleat and resting the Eave flashing against the substrate and fasten with
#10-16 x 1" Pancake Head Driller (4'-0" o.c.) to hold the Eave Flashing in place during installation.
3. Apply a row of Double Bead Tape Sealant along the top leg of the Eave flashing about 2" from the end.
4. Install panel by fastening through with #12-14 x 1
1
/
4
" Self Driller XL screws (see pages 34-35 for panel installation).
5. If two or more flashings are required, lap the flashing over the previously installed flashing by a minimum of 2" placing a bead
of Tube Sealant between the flashings and securing with pop rivets 2
1
/
2
" o.c.
Tube Sealant
#12-14 x 1
1
/
4
" SD XL (see below)
CAUTION
Additional screws
may be required for
high snow loading
and steep slopes.
INSTALLATION NOTES
3
1
2
4
Vertical Seam Fastening Pattern
3:12 Slope
Minimum