Eave detail – Metal Sales Image II Installation User Manual
Page 23
© Metal Sales Manufacturing Corporation / Subject to change without notice, effective 6/2011
23
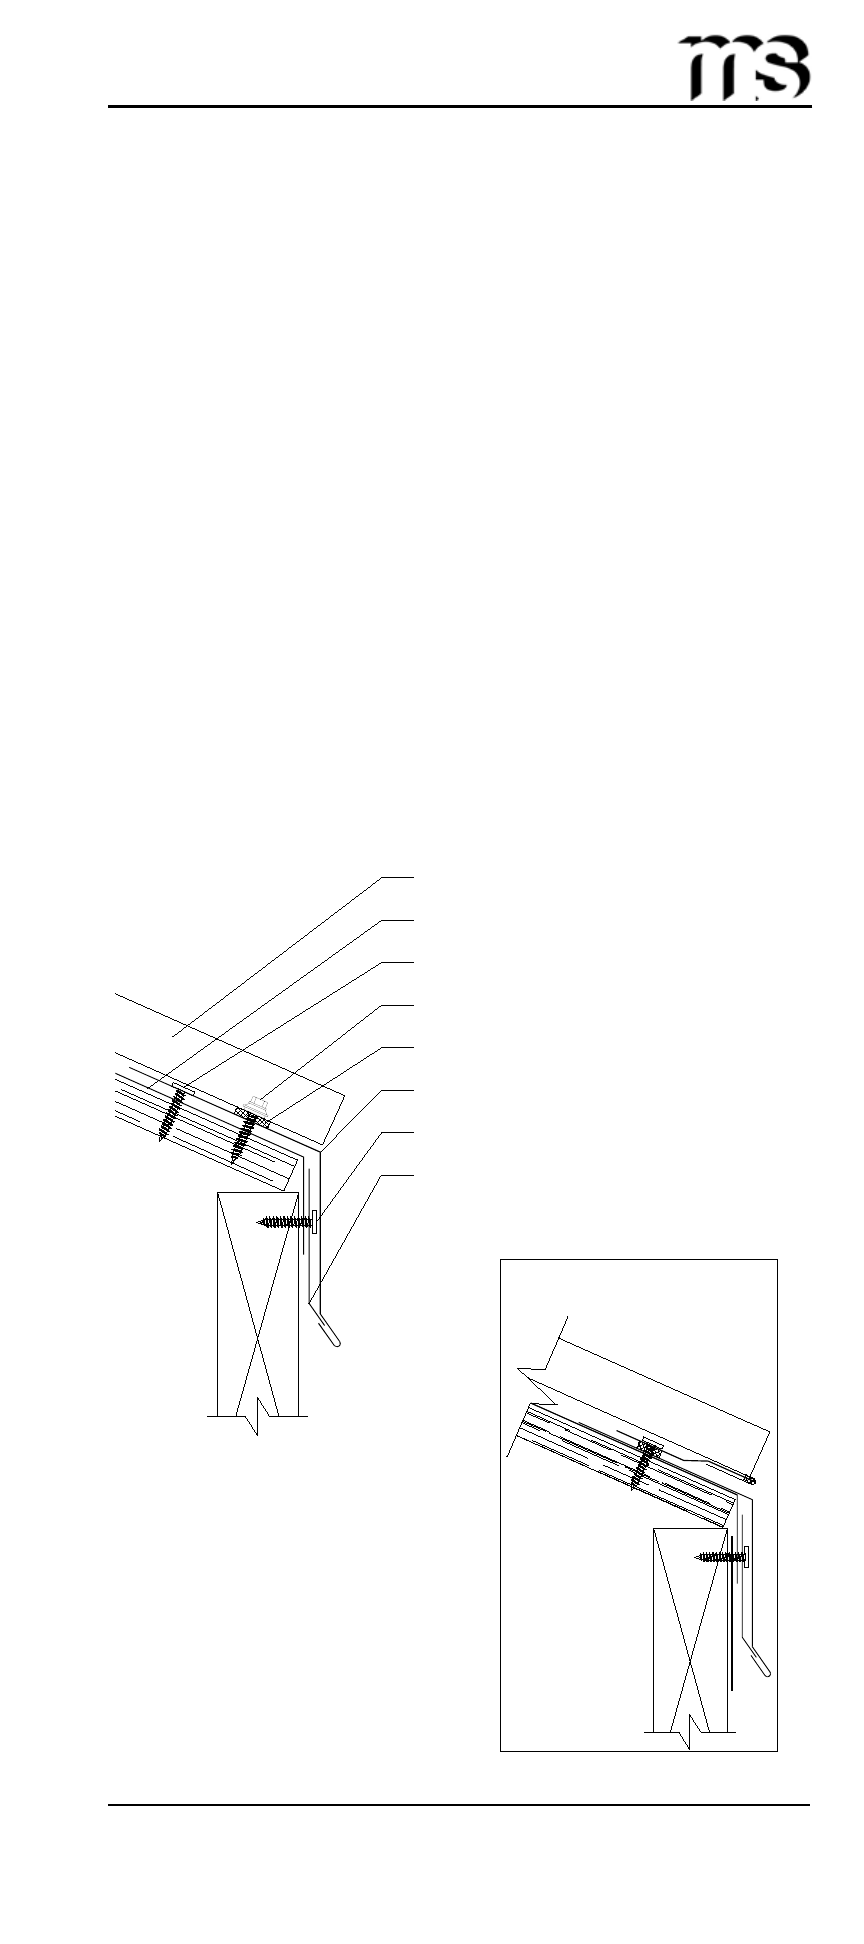
Eave Detail
All Eave flashings must be installed prior to panel installation.
1. Position and install Cleat to wall with #8-18 x
3
/
4
" Truss Head
Woodscrew, 1' o.c. Make sure Cleat allows for proper Eave
attachment considering wall panels.
2. Install Eave flashing by resting the flashing against the
substrate and fasten with #8-18 x
3
/
4
" Truss Head Woodscrews,
4' o.c. to hold the Eave flashing in place during installation.
3. Apply a row of Double Bead Tape Sealant on the top leg of the
Eave flashing.
4. Install first panel so that the panel end has proper overhang
making sure that panel is square to eave and rake.
5. Fasten substrate with a #8-18 x
3
/
4
" Truss Head Woodscrew in
the center of the fastening groove located along the male leg
of the panel. Fastener spacing must be designed to meet local
building codes.
6. Fasten Image II panel with (4) #9-16 x 1" Woodscrews
through Double Bead Tape Sealant, flashing, and into the solid
substrate as shown below.
Note: If two or more flashings are required, lap the flashing over
the previously installed flashing by a minimum of 2" placing a bead
of Tube Sealant between the flashings and securing with Pop Rivets,
2" o.c.
Optional Eave
with Offset Cleat
Image II Panel (6)
Moisture Barrier
Truss Head Woodscrew, 4' o.c. (4)
Double Bead Tape Sealant (5)
Eave (3)
Truss Head Woodscrew 1' o.c. (2)
Cleat (1)
#9-16 x 1" Woodscrew (7)
(X) Numbers indicate sequence of installation.