Panel installation – Metal Sales Image II Installation User Manual
Page 19
© Metal Sales Manufacturing Corporation / Subject to change without notice, effective 6/2011
19
Panel Installation
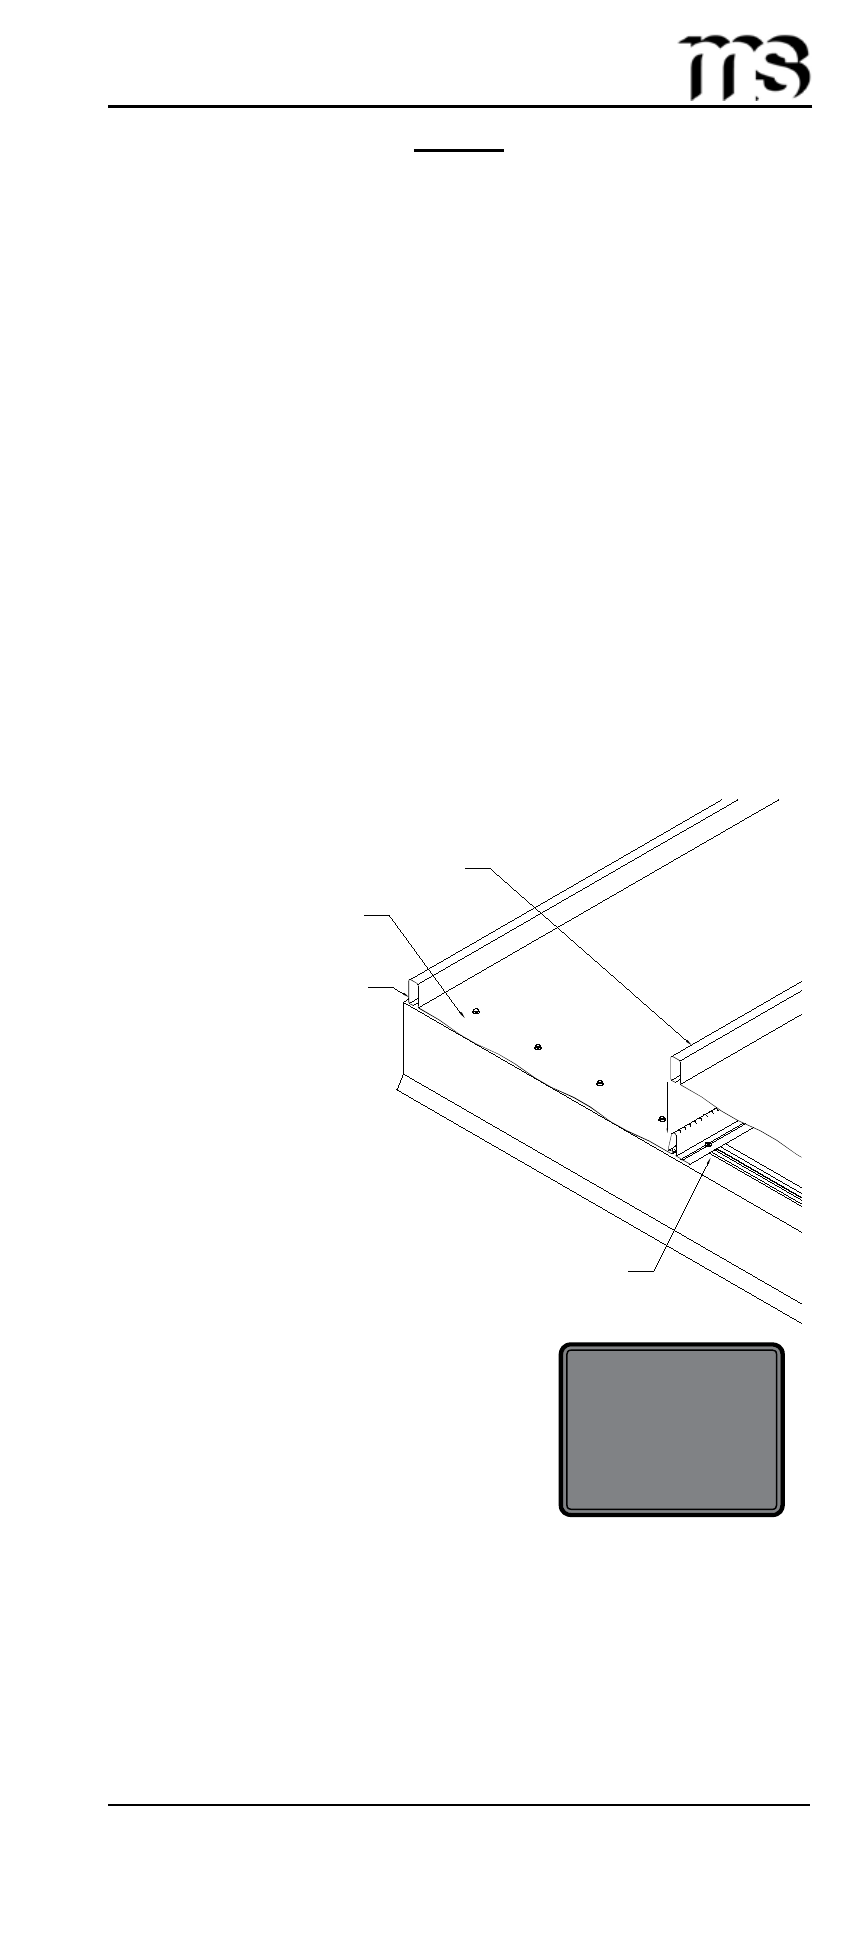
1. Snap second panel in place making sure panel ends are aligned.
Snap panel in place working from one end to the other.
2. Fasten substrate with a #8-18 x
3
/
4
" Truss Head Woodscrew in
the center of the fastening groove located along the male leg
of the panel. Fastener spacing must be designed to meet local
building codes.
3. Fasten Image II panel with (4) #9-16 x 1" Woodscrews through
Double Bead Tape Sealant, flashing, and into the solid sub-
strate below.
4. Continue with previous step until installation is complete. It
is important that the fastener is in the center of the fastening
groove, and make sure not to over-tighten the screws.
5. Once installation is complete, fill each lower end of panel rib
with Tube Sealant, and clean any debris and excess sealant
before continuing to next area.
CAUTION
Additional screws
may be required for
high snow loading
and steep slopes.
Position panel to keep ends
flush (2)
#9-16 x 1
"
Woodscrew
(3)
Double Bead Tape Sealant (1)
Apply sealant at all
rib ends along eave
(4)
Step 2
Exposed Fastened Panel Installation
Installing Second Panel
(X) Numbers indicate sequence of installation.