Installation procedures, Step 1 installing cleat & eave flashings – Metal Sales Image II Installation User Manual
Page 16
© Metal Sales Manufacturing Corporation / Subject to change without notice, effective 6/2011
16
Installation Procedures
If your building requires a Gutter instead of Eave Flashing, please
see page 22 for installation.
Moisture Barrier must be installed prior to beginning installation.
Metal Sales recommends a minimum 30# felt moisture barrier.
To avoid panel distortion, use a properly aligned and uniform
substructure.
All Cleat and Eave flashings must be installed prior to panel
installation.
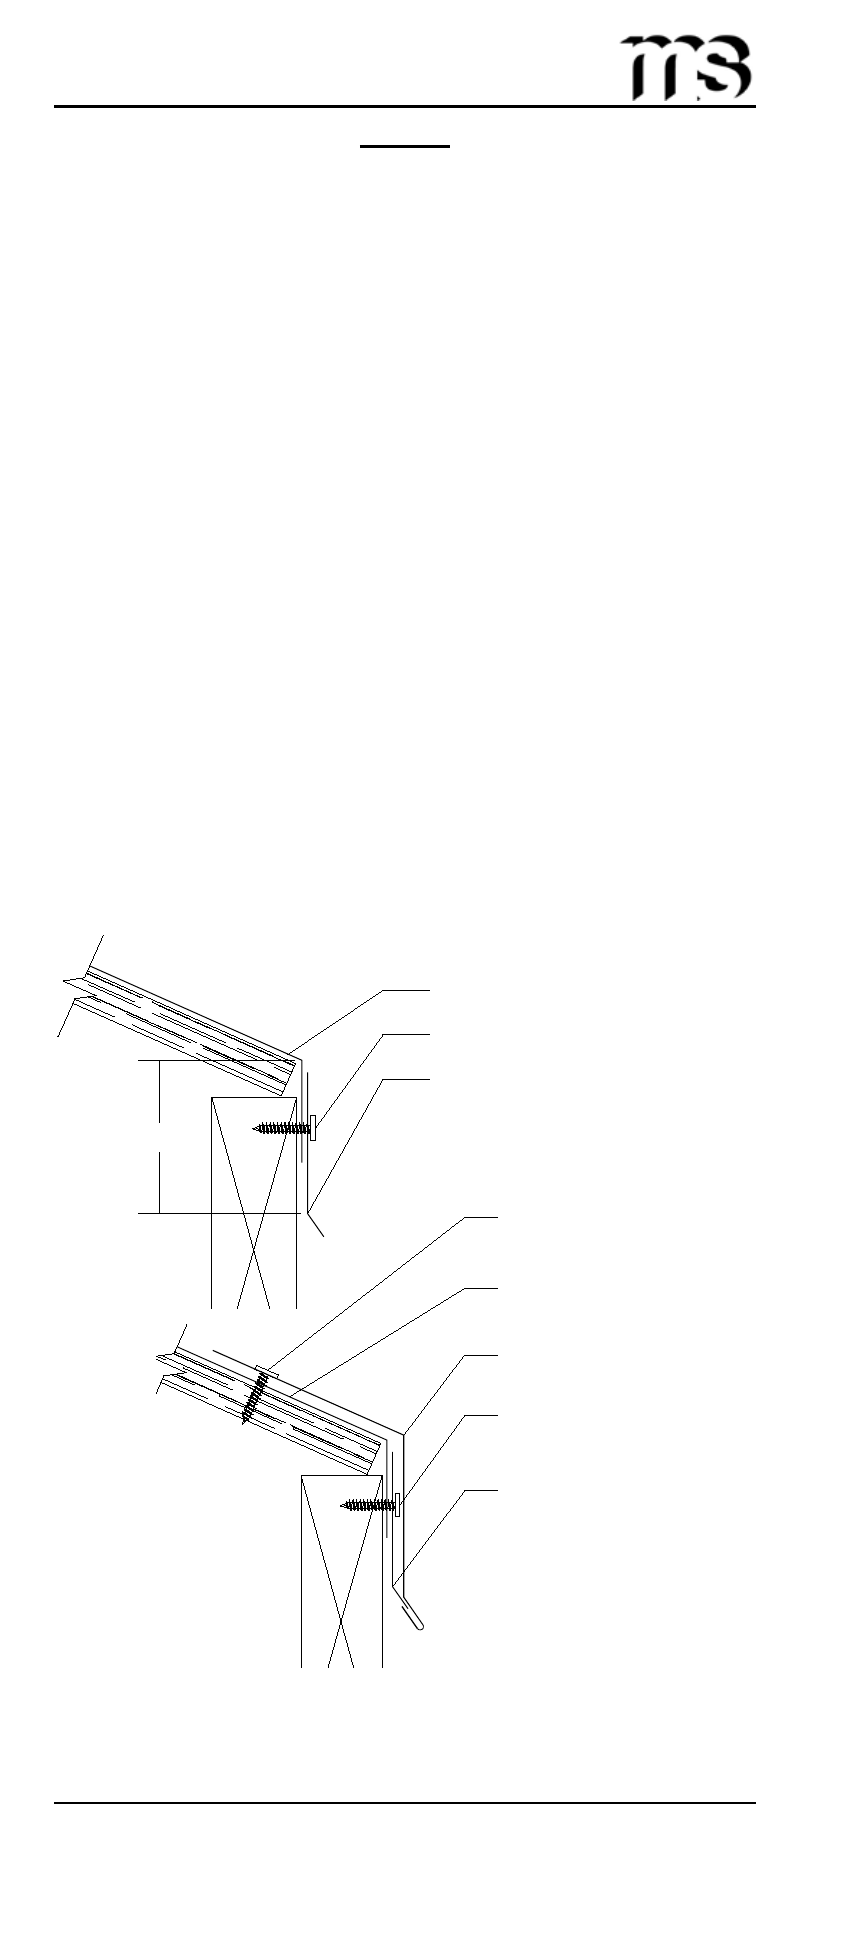
1. Position Cleat on wall at the appropriate distance from roof-
line. Make sure Cleat allows for proper Eave attachment.
2. Attach Cleat to wall with #8-18 x
3
/
4
" Truss Head Woodscrews,
1' o.c.
3. Install Eave flashing by inserting the open hem of the Eave
flashing onto the bottom leg of the Cleat and rest the Eave
flashing against the substrate.
4. Fasten Eave flashing to substrate with #8-18 x
3
/
4
" Truss Head
Woodscrews, 4' o.c. to hold the Eave flashing in place during
installation.
Note: If two or more flashings are required, lap the flashing over the
previously installed flashing by a minimum of 2" placing 2 beads of
Tube Sealant between the flashings and securing with Pop Rivets,
2" o.c.
Step 1
Installing Cleat & Eave Flashings
Moisture Barrier
Truss Head Woodscrew,
1' o.c. (2)
Cleat (1)
3"*
Moisture Barrier
Eave (3)
Cleat (1)
Truss Head Woodscrew,
1' o.c. (2)
Truss Head Woodscrew,
4' o.c. (4)
* 3" Dimension is based on the standard Eave Flashing (See
page 9) Dimension may vary with different flashings.
(X) Numbers indicate sequence of installation.