COATS 7xxx Series Tire Changer User Manual
Page 25
Important: Always read and follow operating instructions.
• 21
9.
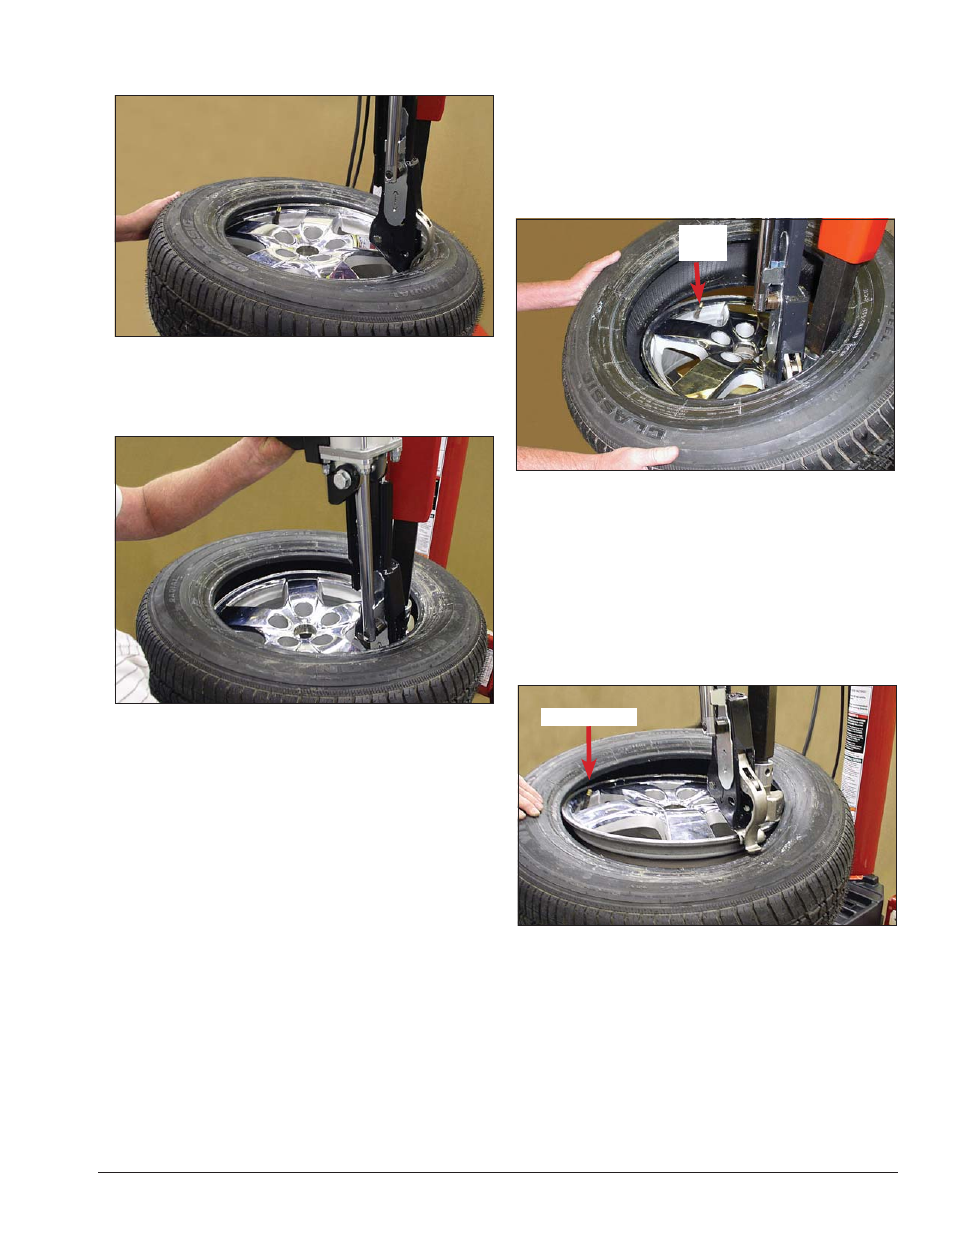
Now repeat step 5, to position tool for lower bead
removal (figure 47).
Figure 47 - Bead Lifter Tool Hooked Under Tire Bead
10.
While holding tire up in the drop center, lift tire to
hook the bead on leverless tool, push control handle up
to lift bead over rim (figure 48).
Figure 48 - Push Control Handle Up To Lift Bead Over Rim
11.
Depress the table top pedal to rotate wheel. The
bead lifter tool will guide the bead up and over the edge
of the wheel. Continue rotation until the lower bead is
demounted.
Tire Mounting
12.
Lubricate tire beads liberally with tire manufac-
turer’s approved rubber lubricate.
13.
Place tire over wheel and move swing arm into
position making sure the valve stem is at the 9 o’clock
position in front of bead lock. Position tire so that lower
bead is above the rear extension of the bead lifter tool
and below the front knob (figure 49).
Figure 49 - Position Tire Against Bead Lifter Tool
14.
Depress table top pedal and rotate wheel to
mount lower bead. Use drop center of wheel by forc-
ing down on tire just ahead of the mounting tool, and
follow as tire rotates Rotate table top until lower bead
is mounted.
15.
For top bead installation, rotate table top until the
valve stem on wheel is just in front of where the bead
crosses the rim (figure 50). Be sure the tire is on top of
the mount/demount tool tail.
Figure 50 - Position Valve Stem In Front Of Bead Lock
16.
Slightly lower leverless tool to push bead down;
hold opposite side of tire down into drop-center.
17.
Depress table top pedal and rotate tire until bead
is mounted. Be careful to ensure bead stays in the rim
drop center in the area ahead of the bead lifter tool.
18.
Inflate, unclamp per standard instructions.
Valve
Stem
Valve Stem