Leverless bead lifter operation – COATS 7xxx Series Tire Changer User Manual
Page 24
20 •
Important: Always read and follow operating instructions.
Leverless Bead Lifter Operation
This section of the Operating Instructions manual
review basic operations and use of the Leverless Bead
Lifter on units so equipped. Keep these instructions
near the machine for easy reference.
Tire Demounting
Follow tire changer operating instructions provided for
demounting a standard wheel assembly, except:
1.
After deflating and bead loosening, clamp the
wheel to the table top. Position leverless arm until
mount/demount tool plastic contacts wheel.
2.
Tighten swing arm adjustment screw until it con-
tacts arm.
3.
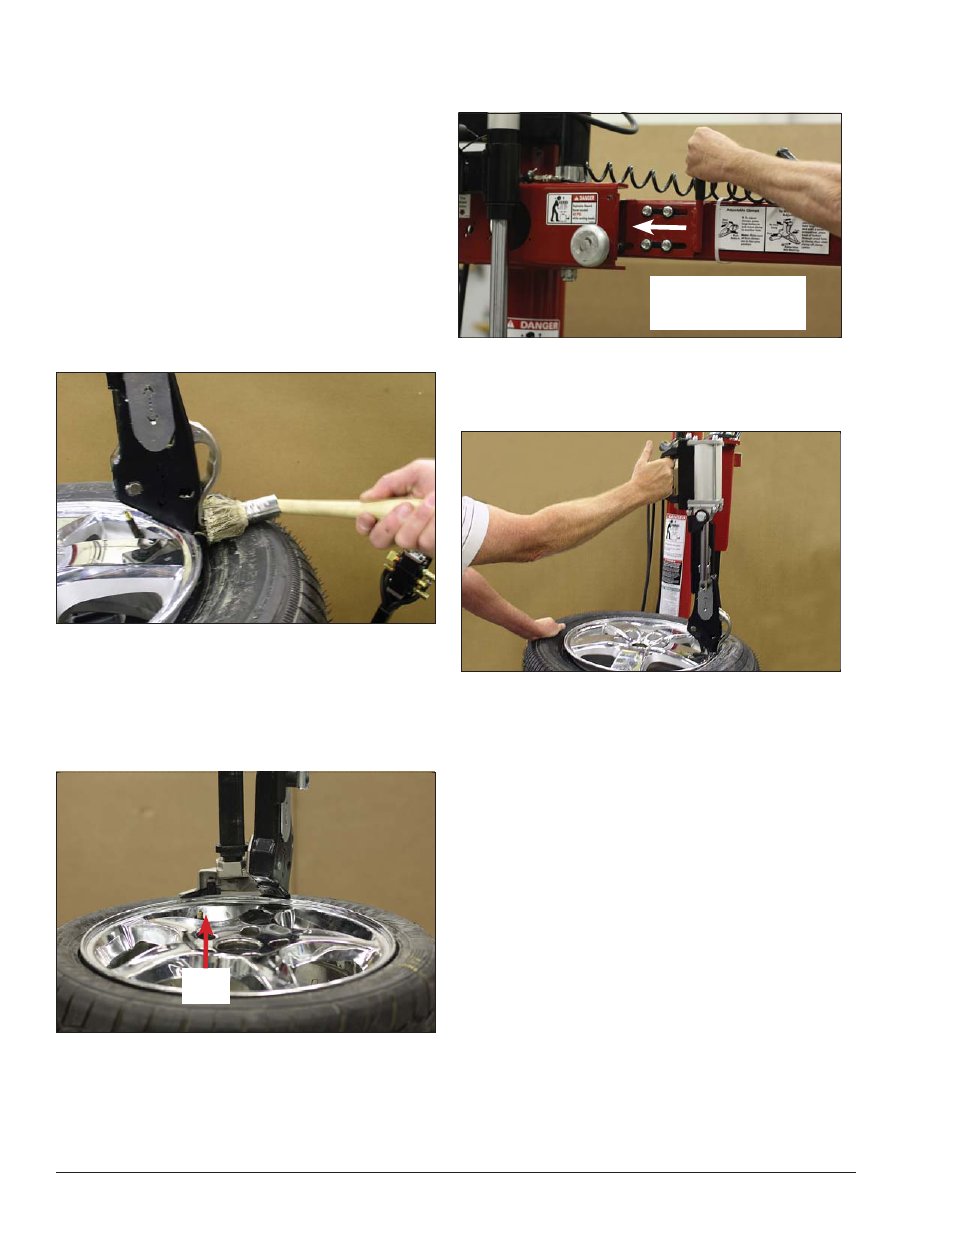
Lubricate leverless bead lifter tool (figure 43).
Figure 43 - Apply lubricant to Bead Lifter Tool
Note: To aid bead lubrication, lower leverless tool
slightly to move bead away from wheel.
4.
Position valve stem approximately as shown (figure
44) to prevent damage to TPMS (Tire Pressure Monitor-
ing System) sensor.
Figure 44 - Position Valve Stem By the Bead Lifter Tool
5.
Push control handle down to lower leverless tool
under tire bead (figure 46) with swing arm locked (figure
45) to hold leverless bead lifter against the wheel.
Figure 45 - Lock Swing Arm In Position
Note: If leverless tool does not hook under tire bead,
reverse rotation. Re-position valve stem while pushing
bead opposite leverless bead lifter into drop center.
Figure 46 - Leverless Tool Hooked Under Tire Bead
6.
Push lifter control up, retracting leverless tool.
Note: Use helper arms if equipped.
7.
Depress the table top pedal to rotate wheel. The
bead lifter tool will guide the bead up and over the edge
of the wheel. Continue rotation until the upper bead is
demounted.
8.
Next, position valve stem by the bead lifter tool, as
shown in step 4 (figure 44).
Engage Swing Arm
Lock To Hold Bead
Lifter Against Wheel
Valve
Stem