Configure the windows service (step 3 of 3) – Google Message Continuity Setup and Administration Guide User Manual
Page 27
Install and Configure the Continuity Sync Server
31
Click Next to open the third configuration window. See “5. Configure the
Windows Service (Step 3 of 3)” on page 31.
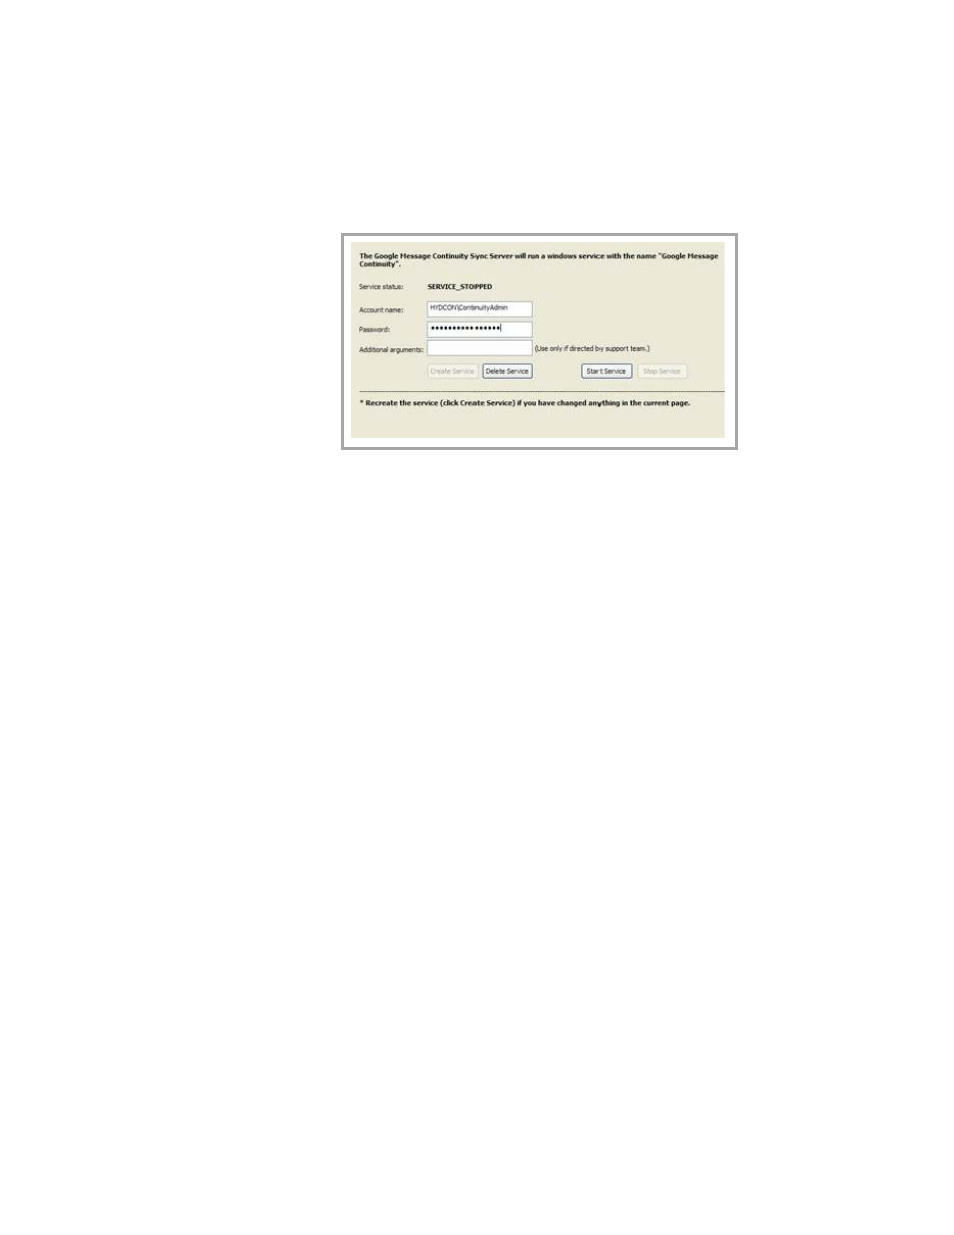
5. Configure the Windows Service (Step 3 of 3)
When you first come to this page, you will need to create a Windows Service.
To create the service:
1.
Enter the account name and password and then click Create Service.
2.
When you are done with your configuration, click Finish.
For an existing service, if you changed any of the settings in Step 1 of 2
(Configure the Continuity Sync Server), you must first click Stop Service, and
then click Start Service (to restart the service).
Additionally, if you ever return to your configuration steps in Step 2 of 2 to change
your account name or password, you must click Create Service to create a new
service.
Fields in Step 3 of 3
Service Status: This automatically displays the current status of the Continuity
Sync Server: Service Stopped or Service Running.
Account Name: Windows user name under which the service is run. This
includes the domain name and the administrator’s user name -- for example,
solarmora\jadmin
Password: Password for the Windows service.
Additional arugments: Enables you to add new features as they become
available.