End cap -32, Shaft seal -32, Plugs and fittings installation -32 – JLG 450A_AJ Series II Service Manual User Manual
Page 72
SECTION 3 - CHASSIS & TURNTABLE
3-32
– JLG Lift –
3121290
15.
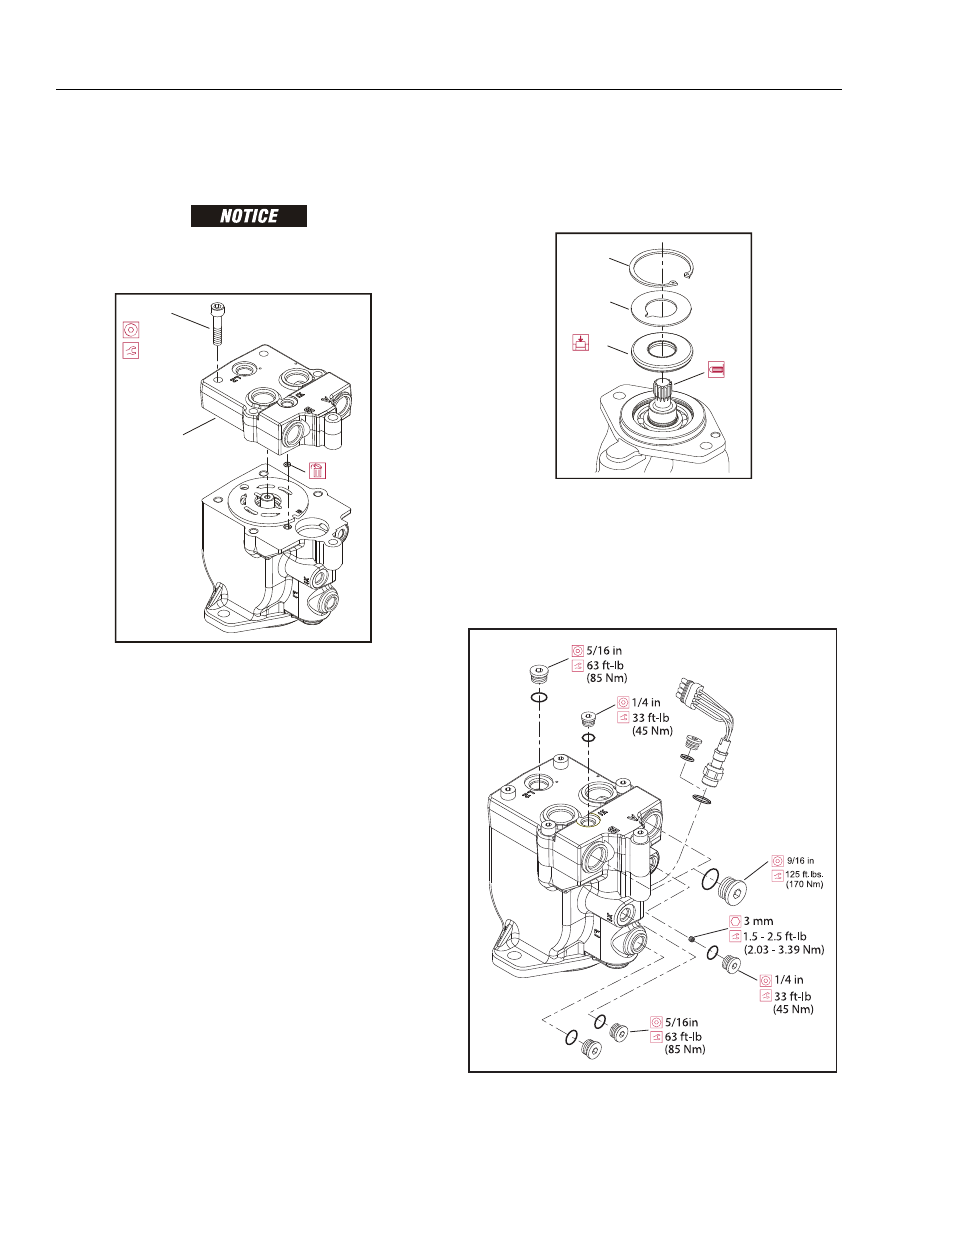
Install endcap (25) on housing with endcap screws (26).
Check endcap properly seats on housing without interfer-
ence.
IMPROPER ASSEMBLY OF INTERNAL COMPONENTS MAY PREVENT ENDCAP
FROM SEATING PROPERLY. ENSURE O-RINGS SEAT PROPERLY WHEN INSTALL-
ING ENDCAP.
16.
Using an 8 mm internal hex wrench, tighten endcap
screws. Tighten screws in opposite corners slowly and
evenly to compress servo spring and properly seat end-
cap. Torque endcap screws 35 to 45 ft-lb (47-61 Nm).
17.
Before installing shaft seal, ensure shaft turns smoothly
with less than 120 in-lb (13.5 Nm) of force. If shaft does
not turn smoothly within specified force, disassemble
and check unit.
18.
Cover shaft splines with an installation sleeve. Install a
new shaft seal (27) with cup side facing motor. Press seal
into housing until it bottoms out. Press evenly to avoid
binding and damaging seal. Install seal support washer
(28) and snap ring (29).
19.
Install remaining plugs and fittings to housing. Refer to
drawing below for wrench sizes and torque settings.
Figure 3-27. Plugs and Fittings Installation
26
25
8 mm
(47-61 Nm)
35-45 ft.lbs.
25. End Cap
26. Screw
Figure 3-25. End Cap
29
28
27
27. Shaft Seal
28. Seal Support Washer
29. Snap Ring
Figure 3-26. Shaft Seal