15 swing motor, Disassembly and inspection, Swing motor -77 – JLG 1100SB Service Manual User Manual
Page 119: Disassembly and inspection -77, 15 swing motor disassembly and inspection
SECTION 3 - CHASSIS & TURNTABLE
3121265
– JLG Lift –
3-77
3.15 SWING MOTOR
Disassembly and inspection
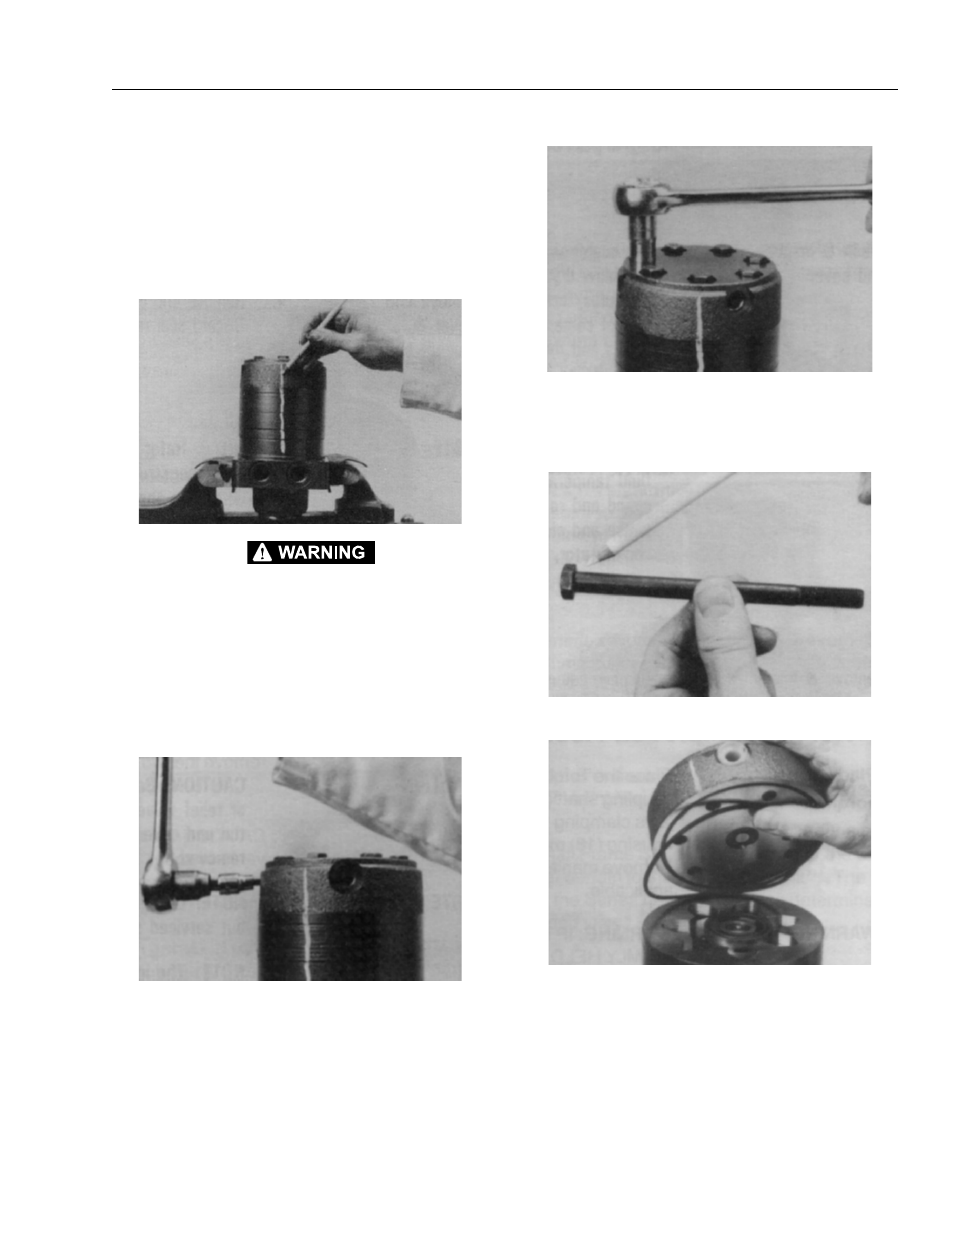
1.
Place the Torqlink™ in a soft jawed vice, with cou-
pling shaft (12) pointed down and the vise jaws
clamping firmly on the sides of the housing (18)
mounting flange or port bosses. Remove manifold
port O-Rings (18A) if applicable.
IFTHETORQLINK™ IS NOT FIRMLY HELD IN THE VISE, IT COULD
BE DISLODGED DURINGTHE SERVICE PROCEDURES, CAUSING
INJURY.
2.
Scribe an alignment mark down and across the
Torqlink™ components from end cover (2) to hous-
ing (18) to facilitate reassembly orientation where
required. Loosen two shuttle or relief valve plugs
(21) for disassembly later if included in end cover. 3/
16 or 3/8 inch Allen wrench or 1 inch hex socket
required.
3.
Remove the five, six, or seven special ring head
bolts (1) using an appropriate 1/2 or 9/16 inch size
socket. Inspect bolts for damaged threads, or seal-
ing rings, under the bolt head. Replace damaged
bolts.
4.
Remove end cover assembly (2) and seal ring (4).
Discard seal ring.
NOTE: Refer to the appropriate “alternate cover construc-
tion” on the exploded view to determine the end
cover construction being serviced.