1 setting co2 channel zero, Setting co, Channel zero – Eppendorf Galaxy Gas Analyzer User Manual
Page 35: Ons (see setting co, On p. 35), Galaxy® gas analyzer — operating manual, Ca libr ati on
35
Galaxy® Gas Analyzer — Operating manual
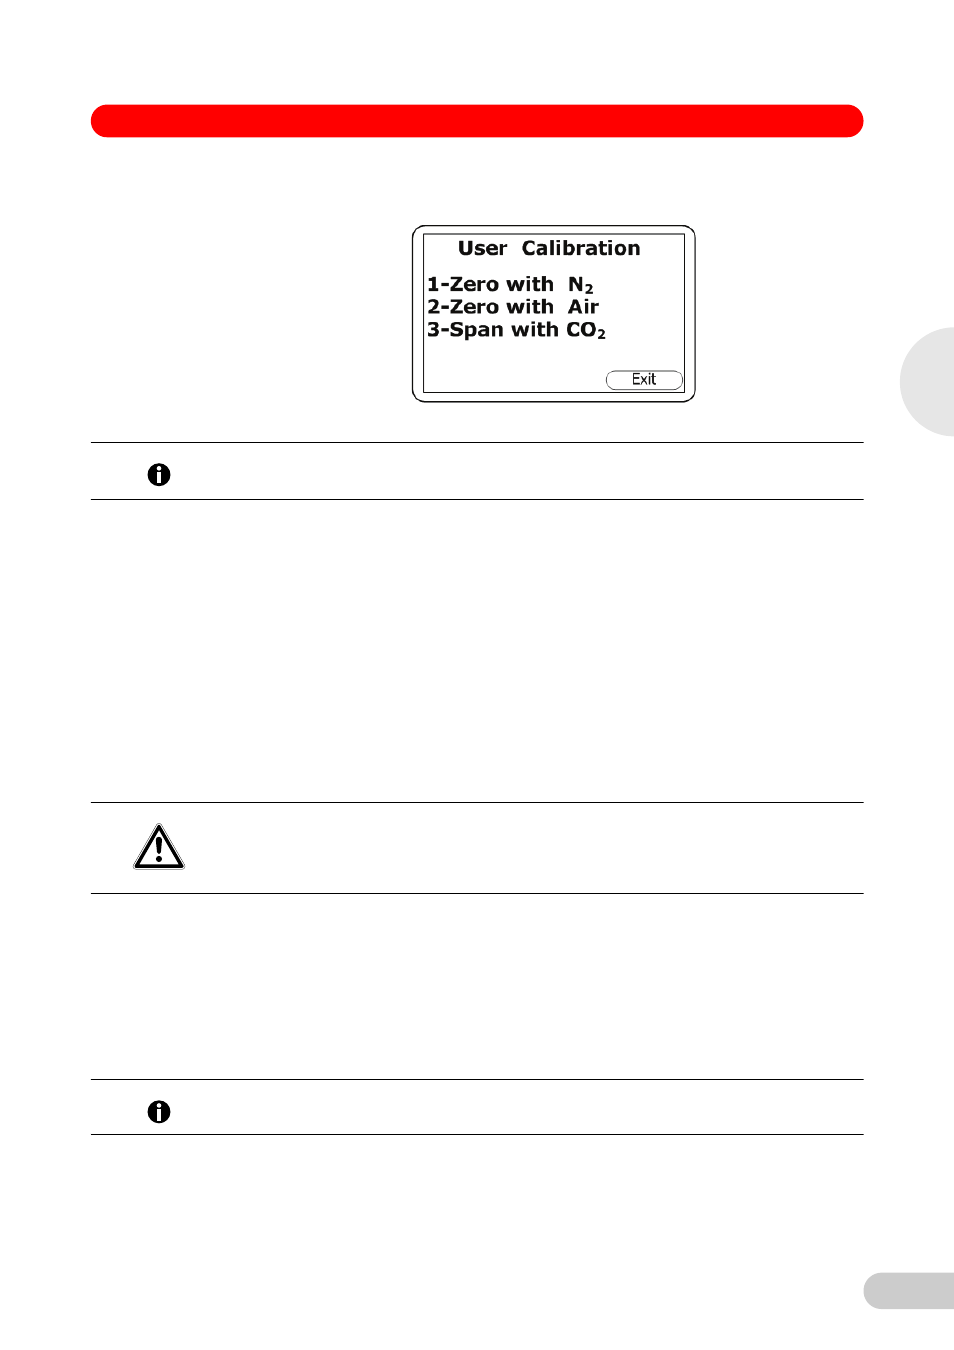
3. Press the numeric 2 key to calibrate the CO
2
gas. This will bring you to the User Calibration
screen for the CO
2
channel (see Fig. 26 on p. 35).
Abb. 26:
User Calibration (CO
2
) Screen
Fig. 26:
User Calibration (CO
2
) Screen
4. Proceed with the instructions (see Setting CO
channel zero on p. 35) and (see Setting CO
channel span on p. 36) to set the Zero and Span for the CO
2
channel.
7.4.1
Setting CO
2
channel zero
For maximum accuracy, we recommend the use of certified 100 % N
2
bottled gas. However, if
nitrogen gas is not available, the optional soda lime filter kit can be fitted to the gas inlet, allowing
you to use normal air; the soda lime filter will absorb virtually all CO
2
from the sample air.
If neither of the recommended methods is available, you can perform an air calibration. This
option assumes that you have access to fresh air at around 390 ppm. Generally, this can be
found outside or in a well-ventilated corridor (an office or lab typically has a higher CO
2
concentration, which is not desirable for this operation).
1. If you need to perform the Zero with air, skip to Step 2. To perform the Zero as recommended
with N
2
or the soda lime filter kit, press the numeric 1 key (1-Zero with N
2
and attach the 100 % N
2
to the instrument’s gas inlet (see Fig. 3 on p. 13) and (Fig. 24 on
2. To perform the Zero with air, press the numeric 2 key (2-Zero with Air (Fig. 26 on p. 35)), and
attach the sample pipe to the instrument’s gas inlet (see Fig. 3 on p. 13) to allow access to
fresh air.
3. Press the Start key. The instrument will wait approximately 60 seconds for the gas reading to
stabilize at the correct level. If you are zeroing with air, you will need to press the Pump key to
draw in fresh air.
4. The instrument will indicate when a successful Zero has been completed. Press the Accept
soft key to confirm the calibration and press the Store key to save the new user offset.
Alternatively, you can press the Reject soft key to exit without change.
Hint!
To calibrate the O
2
channel, (see Setting O
channel zero on p. 36) and (see Setting O
CAUTION!
Do not exceed the maximum input pressure of 250 mbar (3.6 PSI).
Do not exceed the maximum input flow rate of 250 ml per minute.
Hint!
If the calibration fails, purge the instrument then try again. If you are zeroing with air, select a
different air source.
7
Ca
libr
ati
on