Automatic sensor set-up – MBW CG200 User Manual
Page 29
27
AUTOMATIC SENSOR SET-UP:
1. Install sensors. (See INSTALLING SENSORS", page 22.)
2. Drive Paver to string line. Left side of curb mold should be about 18" to 24" from
the string line. (6" to 12" for curb only). Bottom edge of mold (or mold edge
bars) should be about 0" to 1/4" above grade level. Front wheel should point
straight forward.
3. Manually level machine right-left. Adjust rear height to be slightly above front
height for grading. Adjust front height to be slightly above rear height for pourĆ
ing. This will ensure proper mold angle to provide pressure on concrete exiting
the form.
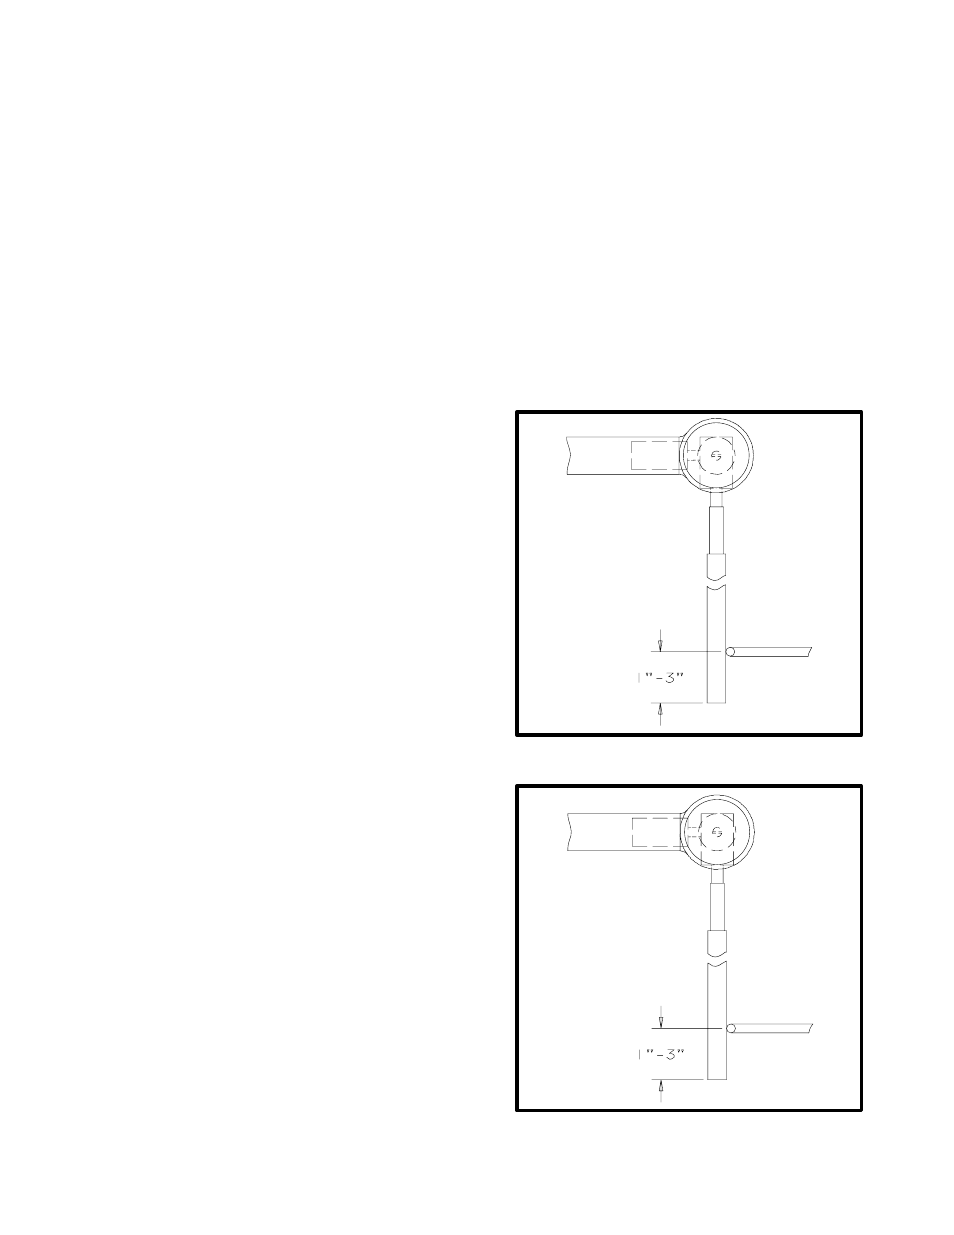
4. Front steering sensor: Install senĆ
sor with potentiometer shaft facing
backward. Adjust sensor head horĆ
izontally so that it is directly above
the string line. Install wand hangĆ
ing straight down with wand weight
to the inside. Adjust sensor vertiĆ
cally until string line is approxiĆ
mately 1" to 3" above the end of
wand. Adjust sensor potentiomeĆ
ter shaft so that screw driver slot is
horizontal. Tighten wand counter
balance weight to secure wand to
sensor.
5. Rear steering sensor: Follow steps
as listed for the front sensor.
Note: 12" molds incorporate a slidĆ
ing rear steering sensor bracket.
This allows the paver to turn a very
tight radius, while in automatic
mode. Slide the bracket towards
the rear of the mold to turn a tight
radius and to the front for a larger
radius.
Note: Only one height sensor can be used at a time. Front (grade) or rear (pour).
Only one steering sensor can be used at a time. Front or rear.