Connecting a rgb analog source with composite sync, Menu 3-1), Menu 3-2) – Barco CINE7 R9010050 User Manual
Page 19: Menu 3-3), Menu 3-4), Menu 3-5), Menu 3-6), Source connections, Which signals can be connected to the input, Rgbs or rgsb selection via the rcu
3. Source Connections
MAIN MENU
Image control
Iris control
Sound control
Function keys
Service menus
Select with
↑
or
↓
then
Menu 3-1
Warning
Risk of incorrect adjustment
of the projector
The following
SERVICE menus
are reserved to,
and to be performed only
by qualified personnel !
If qualified, press
if not,
Menu 3-2
ADJUSTMENT MODE
Select a path from below :
AUTO IMAGE
RANDOM ACCESS
INSTALLATION
SERVICE
Source 01
Select with
↑
or
↓
then
Menu 3-3
Choose a setup path
from below :
SELECTED SOURCE
GENLOCKED PATTERN
INTERNAL # PATTERN
Source 01
Select with
↑
or
↓
then
Menu 3-4
RANDOM ACCESS
ADJUSTMENT MODE
PICTURE TUNING
GEOMETRY
CONVERGENCE
COLOR SELECT
Select with
↑
or
↓
then
Menu 3-5
PICTURE TUNING
COLOR BALANCE
SYNC : FAST
DECODING : EBU
PORT2 :
VIDEO
LINE MULTIPLIER : ON
Select with
↑
or
↓
then
Menu 3-6
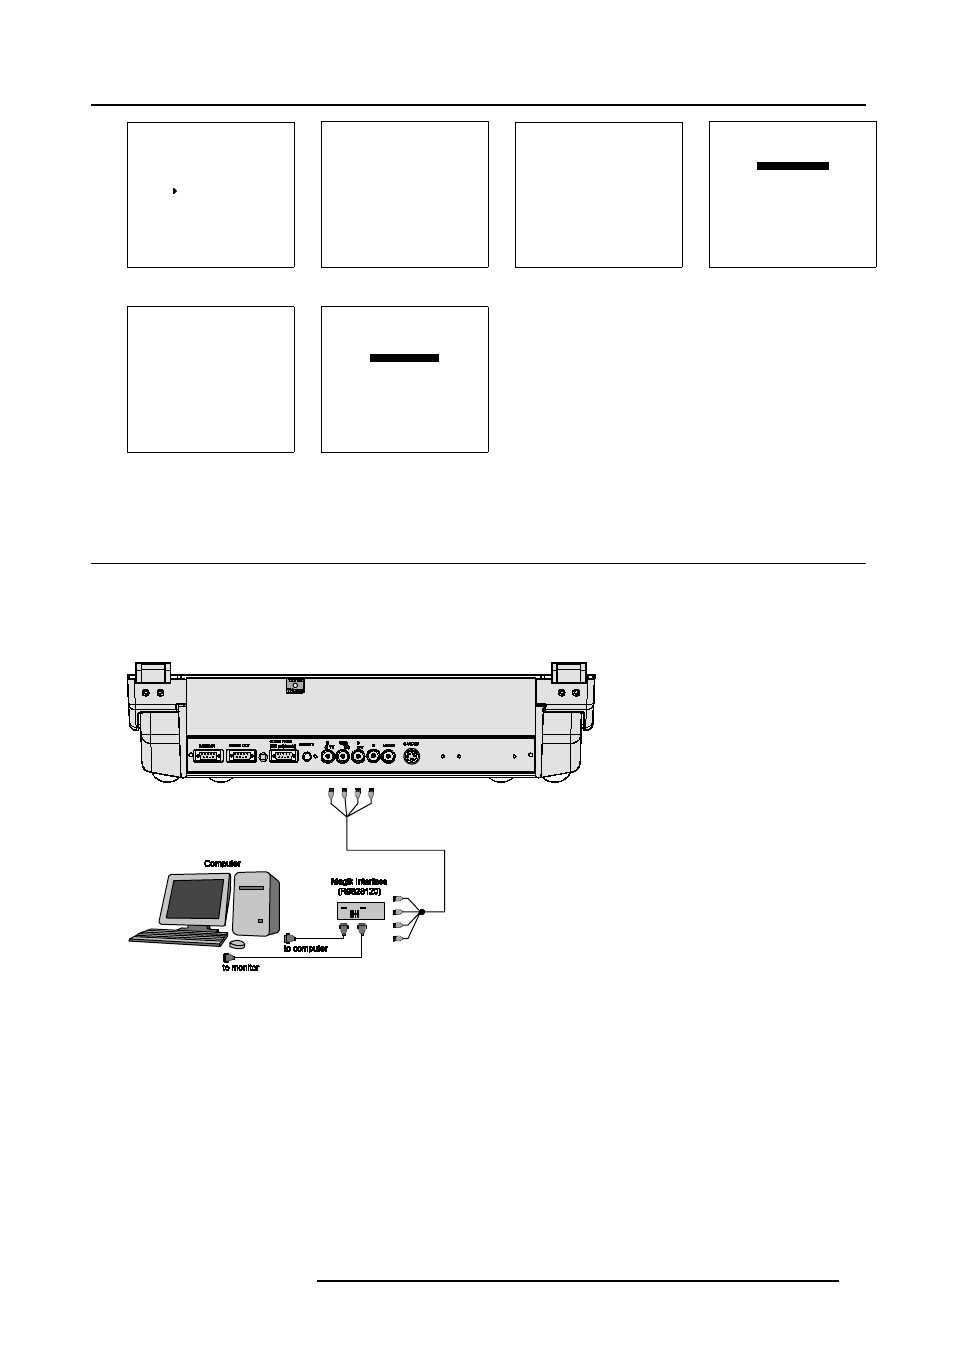
3.4 Connecting a RGB Analog source with composite sync
Which signals can be connected to the input
Connect your RGB source with sync on green, composite or separate sync via an interface to RGBS input. Always use an interface
(e.g. Barco Magik Interface R9828120) when a computer and local monitor have to be connected to the projector as the signal cable
coming from the computer is limited to 60 cm due to interferences.
Image 3-6
RGBS or RGsB selection via the RCU
1. Press digit button 3.
RGBS or RGsB selection via the local keypad
1. Press ADJUST key to start up the adjustment mode.
The General access menu will be displayed. (image 3-7)
2. Use the cursor keys to highlight 3
3. Press ENTER to select the highlighted source.
R5976584 BARCO CINE7 26022003
15