Displaying the screen for av system, Settings, Setting video input 1 (av1) 158 – Pioneer AVIC-F840BT User Manual
Page 158: Setting video input 1, Displaying the screen for, Displaying the screen for av system settings, 27 customising preferences, Setting video input 1 (av1)
! Audio source
— AM/FM/CD/ROM/iPod (Music)/SD
(audio)/
USB (audio)/Bluetooth
audio/source off screen/menu
screens/others
! Video source
— AV1 and iPod (Video)
— DVD-V and DivX
— SD (Video) and USB (Video)
— AV2 (Video)
— Rear view camera image
p With the AVIC-F840BT, AV2 is not
available. And AVIC-F840BT shows
“AV Input” as “AV1 Input”.
! Map screen
p The picture adjustment may not be avail-
able with some rear view cameras.
p Because of the LCD screen characteristics,
you may not be able to adjust the screen at
low temperatures.
3
Touch [+] or [
–] to adjust the desired
item.
Each touch of [
+] or [
–] increases or decreases
the level of the desired item.
4
Touch
.
The previous screen returns.
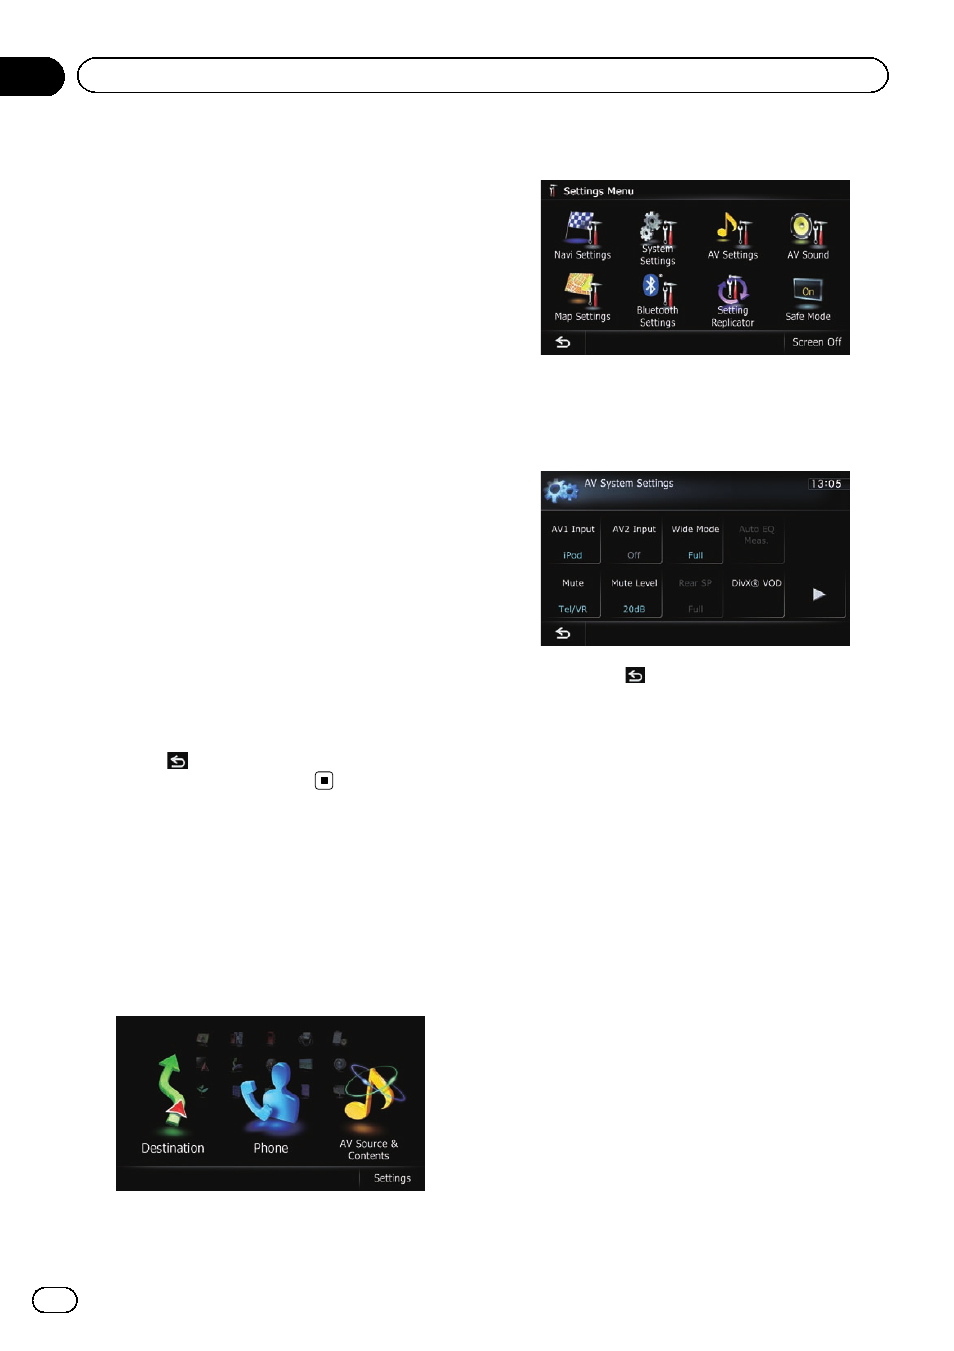
Displaying the screen for
AV system settings
1
Press the HOME button to display the
“Top Menu” screen.
2
Touch [Settings].
The
“Settings Menu” screen appears.
3
Touch [AV Settings].
The
“AV System Settings” menu appears.
4
Touch the item that you want to
change the setting.
# If you touch
, the previous screen returns.
Setting video input 1 (AV1)
You can switch this setting according to the
connected component.
p This setting applies to mini-jack input.
1
Display the
“AV System Settings”
screen.
= For details, refer to Displaying the screen for
AV system settings on this page.
2
Touch [AV1 Input].
Each touch of [
AV1 Input] changes the set-
ting as follows:
! iPod: iPod connected with the USB Inter-
face cable for iPod (CD-IU51V) (sold sepa-
rately)
! Video: External video component
! Off: No video component is connected.
p AVIC-F840BT shows “AV Input” as “AV1
Input
”.
Engb
158
Chapter
27
Customising preferences