Using the guide plus+™ electronic program guide 05 – Pioneer RCS-656HX User Manual
Page 68
Using the GUIDE Plus+™ electronic program guide
05
68
En
4
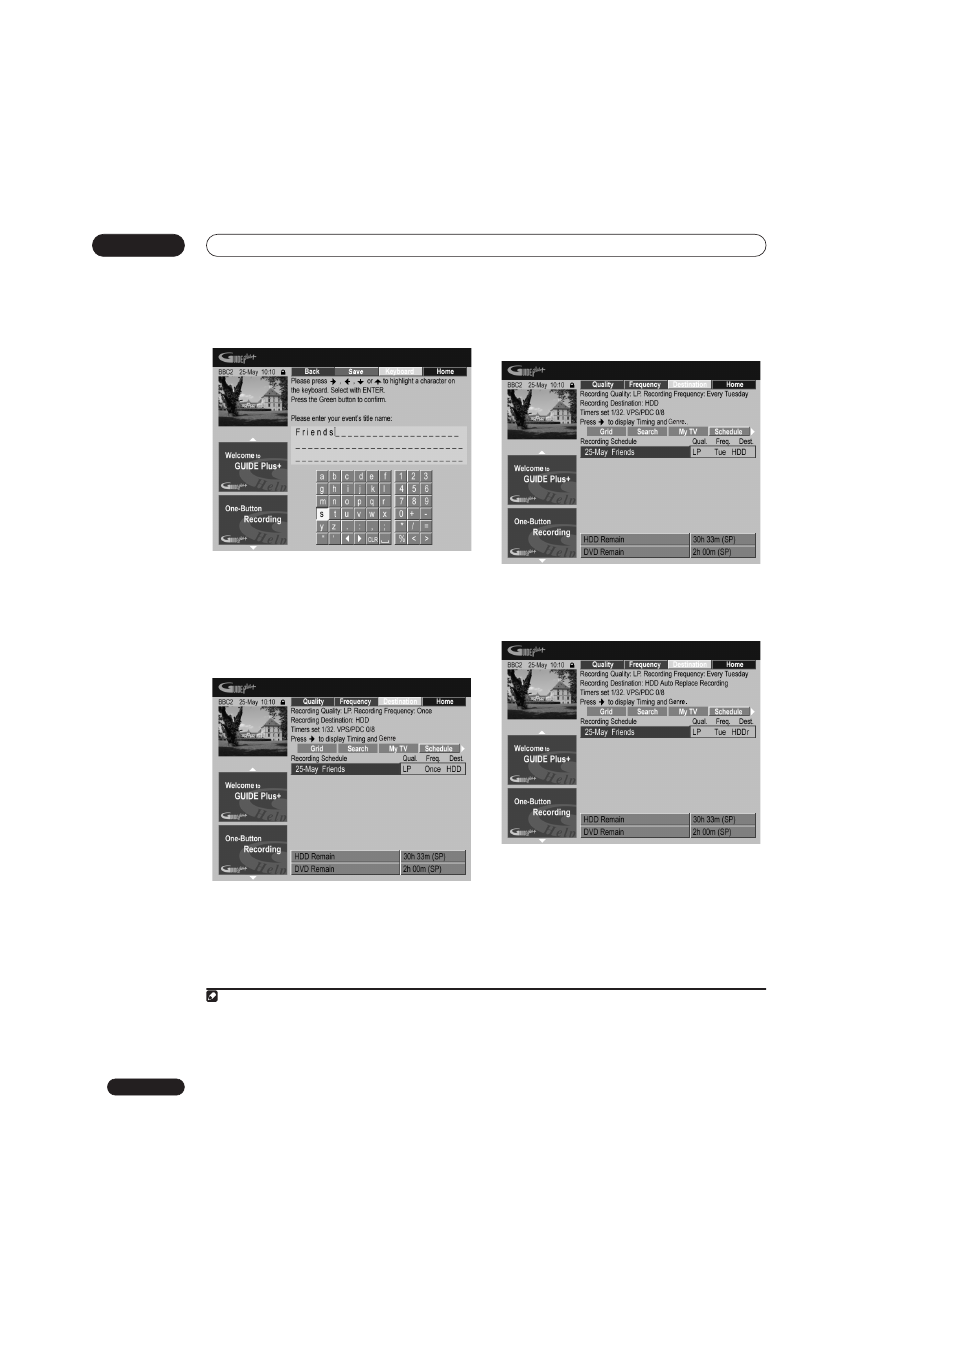
Enter a name for the scheduled recording.
Use the
/ / / buttons followed by ENTER to select
characters from the on-screen keyboard.
After entering the whole name, press the
GREEN Action
button to continue.
5
Highlight the right recording tile.
6
Press the RED Action button (Quality) to change
the recording quality.
Select from
AUTO
1
,
XP, SP, LP, EP, SLP, SEP or MN (if
manual recording is set to
On).
7
Press the GREEN Action button (Frequency) to
change the recording frequency.
Select from the various options for one-time, daily and
weekly recordings.
8
Press YELLOW Action button (Destination) to
select the recording destination.
Select from
DVD, HDD or HDDr (Auto Replace
Recording)
2
.
• Auto Replace Recording is only available as an
option with regular daily or weekly recordings.
Note
1 This mode maximizes the recording quality to fit on to a single DVD disc. Can also be used when recording to HDD.
2 • For a DVD timer recording, if
Optimized Rec (see Optimized Rec on page 135) is set to On (and VPS/PDC is off), the recorder will adjust the
recording quality to try and fit the recording on the disc. If the recording will not fit onto the disc even on MN1 recording quality then the Re-
covery Recording feature will automatically make the recording to the HDD instead.
• If there is very little free space left on the HDD, an Auto Replace Recording may not complete successfully.
• If the HDD is being used for playback or high-speed copying when an Auto Replace Recording is due to start, the new timer recording will
not replace the old one. However, the next time the timer recording starts, both of the older two programs will be erased.