Copying and backup 11 – Pioneer RCS-656HX User Manual
Page 113
Copying and backup
11
113
En
•
Preview – Check the content of a title in the Copy
List.
•
Divide – Divide a title in the Copy List into two (see
Divide on page 105).
•
Combine – Combine two titles in the Copy List into
one (see Combine on page 108).
•
Chapter Edit – Edit chapters within a Copy List title
(see Chapter Edit on page 105):
•
Divide – Divide a chapter into two.
•
Erase/Move – Erase a chapter/Change the chapter
order.
•
Combine – Combine two chapters into one.
•
Set Thumbnail – Set the thumbnail frame for a title
(see Set Thumbnail on page 103).
•
Recording Mode – Set the picture quality of the copy
(see Recording Mode on page 114).
•
Bilingual – Set how bilingual audio should be copied
when copying from HDD to Video mode DVD (see
Bilingual on page 114).
•
Cancel – Exit the menu.
Repeat this step for as many titles you have that need
editing.
9
Display the command menu panel.
10
Select ‘Next’ to proceed.
There are several options available from the next screen:
• Select
Recording Mode if you want to change the
recording quality (see Recording Mode on page 114).
1
• Select
Input Disc Name if you want to change the
disc name. Input a name of up to 64 characters for a
VR mode disc or 40 characters for a Video mode disc
or DVD+R/+RW. (The input method is similar to that
of naming titles; see Title Name on page 103.)
• Select
Finalize if you want to automatically finalize a
Video mode DVD or DVD+R after copying.
2
Select a
title menu style from the following screen.
11
Select ‘Start Copy’ to start copying.
• If you’re using a DVD-R DL or DVD+R DL disc and
the copy will span both layers, the
Copy List Total
bar will be purple.
• The
Current DVD Remain bar will be half-length if
the first layer of a DVD-R DL or DVD+R DL disc is
already full.
Copying from DVD to HDD
Important
• The DVD to HDD Copy screen isn’t accessible when
a finalized Video mode disc or a DVD-Video is loaded.
As long as the disc is not Copy Guard protected, you
can still use the One Touch Copy function, however
(See One Touch Copy on page 110).
• The recorder can only store one Copy List at a time.
• The Copy List will be erased if:
– any of the titles on the DVD disc are erased or edited.
– the disc tray is opened.
–
playback is switched between Play List and Original.
– the DVD disc is re-initialized or finalized.
– the recorder is reset to its factory settings (see
Resetting the recorder on page 153).
• It may not be possible to copy from a DVD disc that
was recorded on a different DVD recorder or a PC.
1
Select ‘Copy’ from the Home Menu.
2
Select ‘DVD/CD
HDD’.
3
Select a Copy List type.
• Selecting
Create New Copy List will erase any Copy
List already stored in the recorder.
4
Add titles to the Copy List (highlight a
title and press ENTER to add).
Titles you’ve added to the Copy List are highlighted in pink.
Note
1 Titles recorded in
MN1 to MN6, SEP, SLP or EP mode cannot be copied to DVD+R/+RW using high-speed copy.
2 If a timer recording is scheduled to start during copying, the disc will not be finalized.
ENTER
ENTER
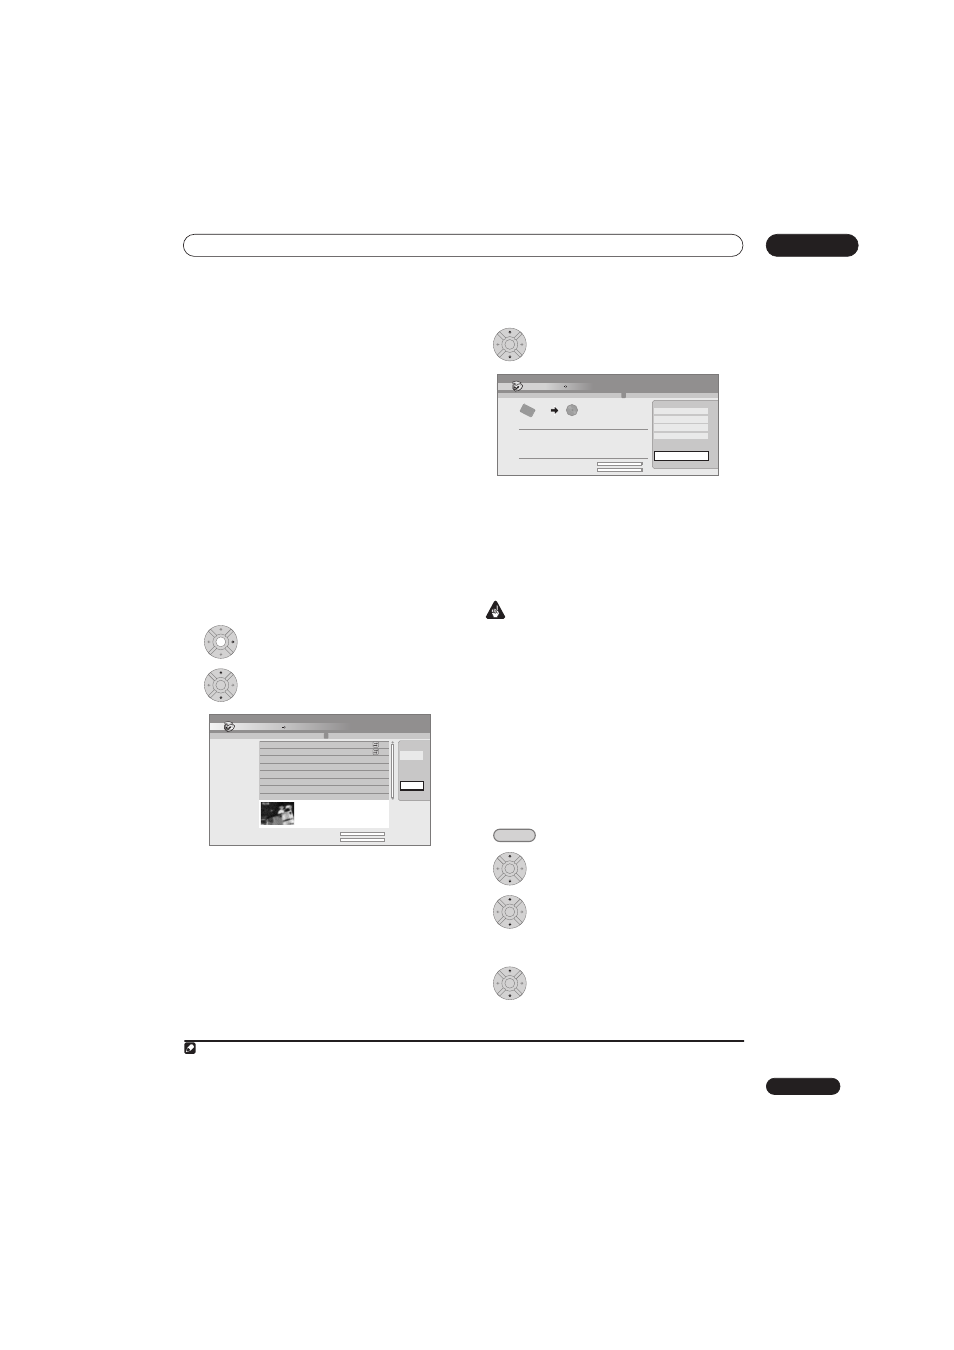
Copy
Title Edit
2 Title
Copy List Total
Current DVD Remain
1
2
20:00 Wed
29/03 Pr 2 SP
20:00 Wed
22/03 Pr 2 SP
4.3G
4.3G
1 > 2 > 3
Back
Next
20:00 Wed29/03 Pr 2 SP
1h00m(2.0G)
HDD DVD (Video mode)
ENTER
Copy
HDD DVD (Video Mode)
Start Copy
Copy Time 0h 16m
Recording Mode
Disc Name
Finalize
Return
Recording Mode
Input Disc Name
Finalize
Start Copy
Copy List Total
Current DVD Remain
4.3G
4.3G
DVD-RW
Video Mode
HDD
High-Speed
Off
1 > 2 > 3
HOME MENU
ENTER
ENTER
ENTER